Introduction
AWS offers services such as AWS Route53 and AWS Certificate Manager to set up domain names with SSL. Which are very easy to use and set up in a matter of minutes to have your website up and running in a couple of steps.
But sometimes you just don't want to incur any costs with this. Well, are there any cheaper ways to do this? Yes. And in today's article, I'll be doing a guide on how to install Let's Encrypt SSL on your web server and configure it to be used on your website for FREE! I'm using an Ubuntu 20.04 server and I'll be hosting my personal portfolio website on it. I'll also be using a domain name I acquired from .Tech Domains as part of my GitHub Student Developer Pack. Let's get started.
Requirements
The following are the requirements for this task:
An Ubuntu 20.04 server - Doesn't necessarily have to be Ubuntu 20.04, any modern Linux distribution will do.
A registered domain name - Feel free to use a domain registrar of your choice i.e. Route53, Namecheap, .Tech, name.com etc
Apache web server - Nginx is also simple to use but configuration may differ
Certbot
And finally, a portfolio website.
Steps
Create an EC2 Instance
Add an A record that points your domain to the created EC2 instance
Create a bash script that installs a bunch of dependencies on your server
Clone your repository
Create a config file for your site
Obtain an SSL certificate
Create An EC2 Instance
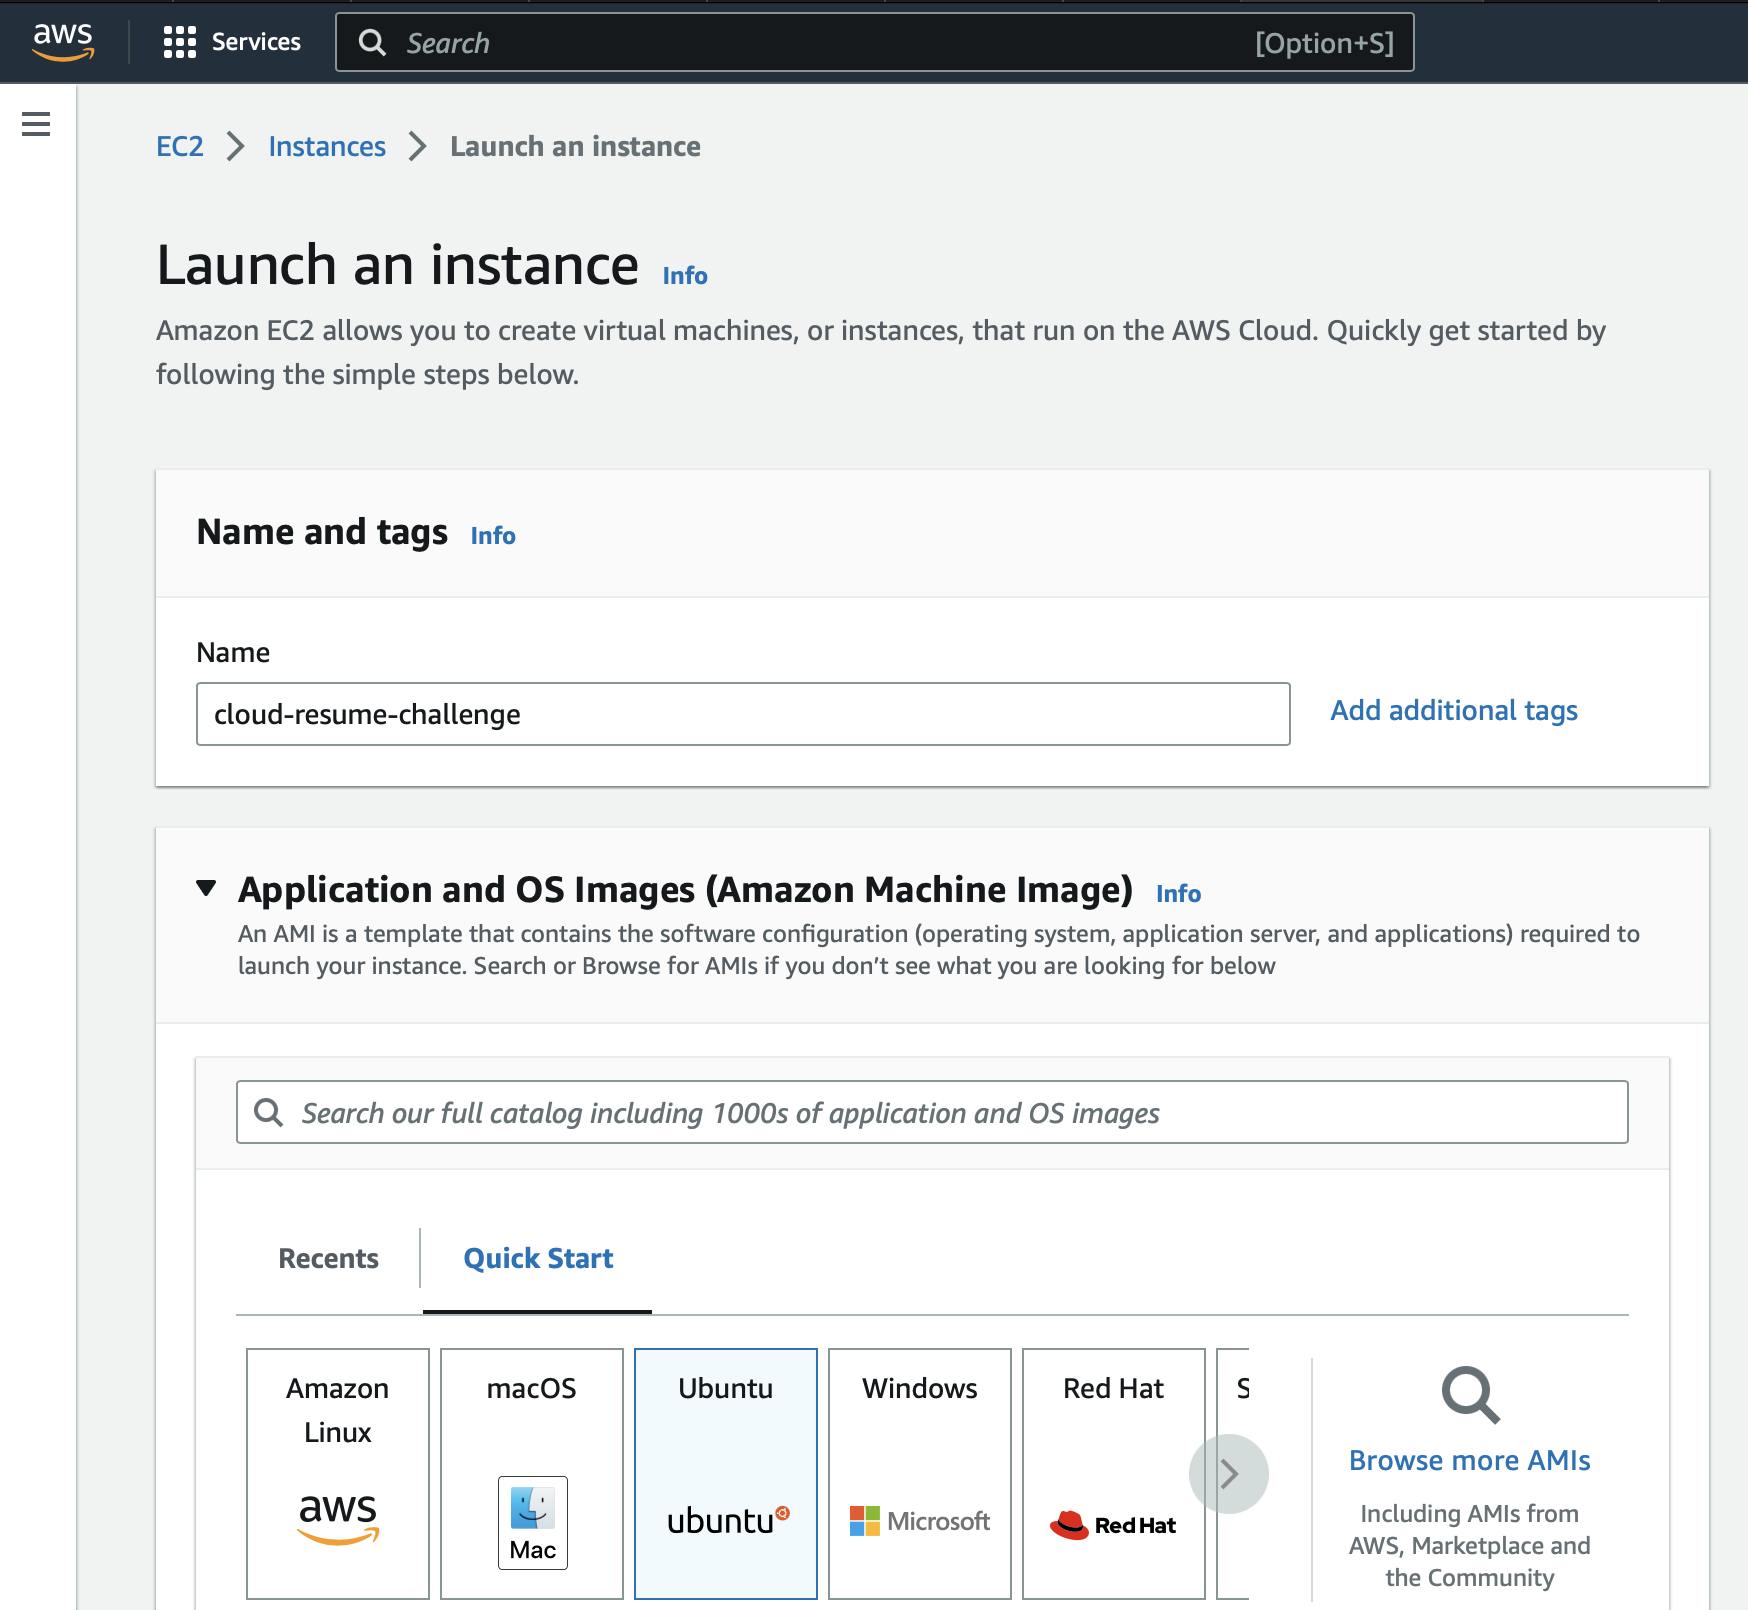
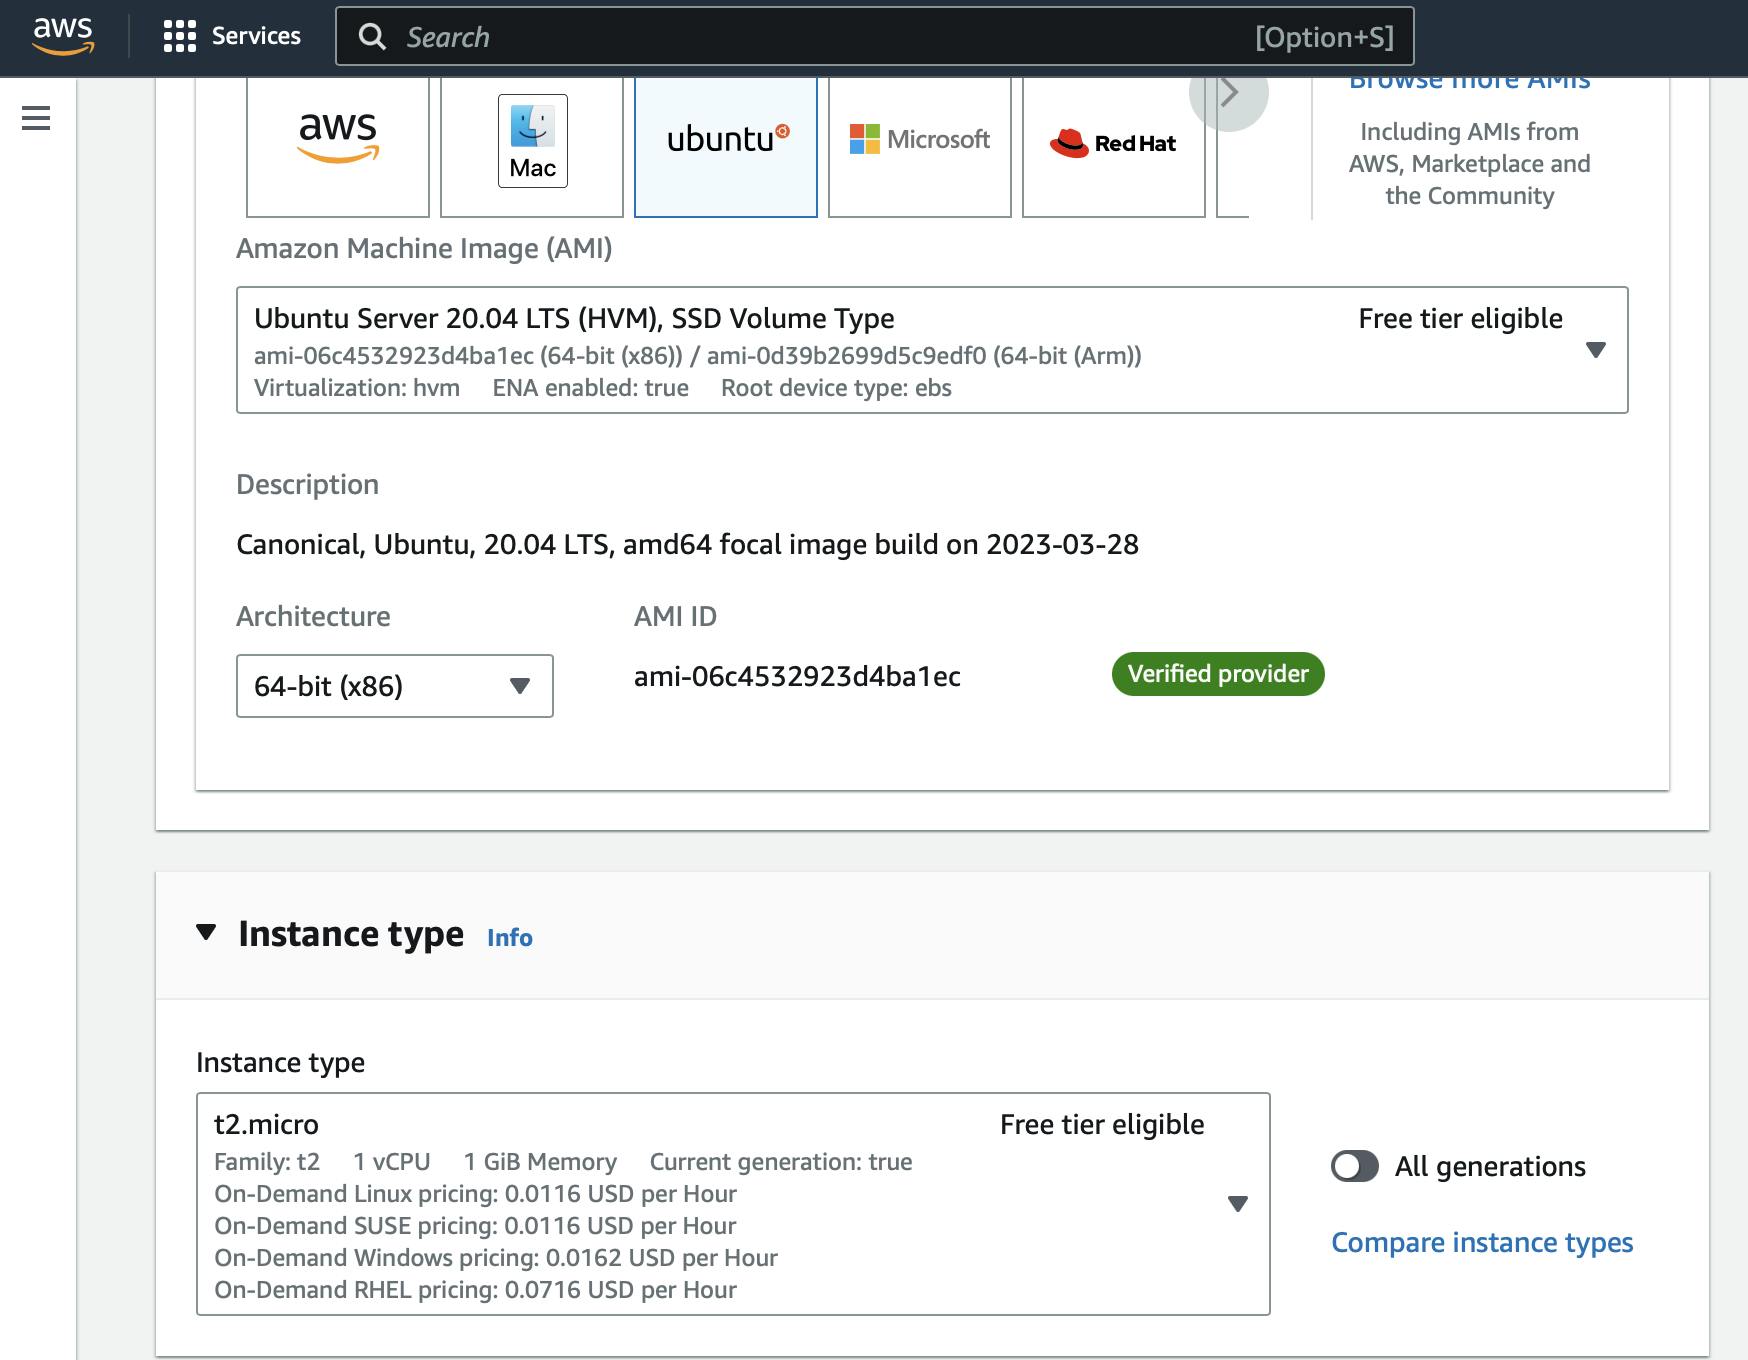
So first and foremost, we need an actual server to work on. Head over to AWS EC2 and create a server that will host your site.

Create an A record
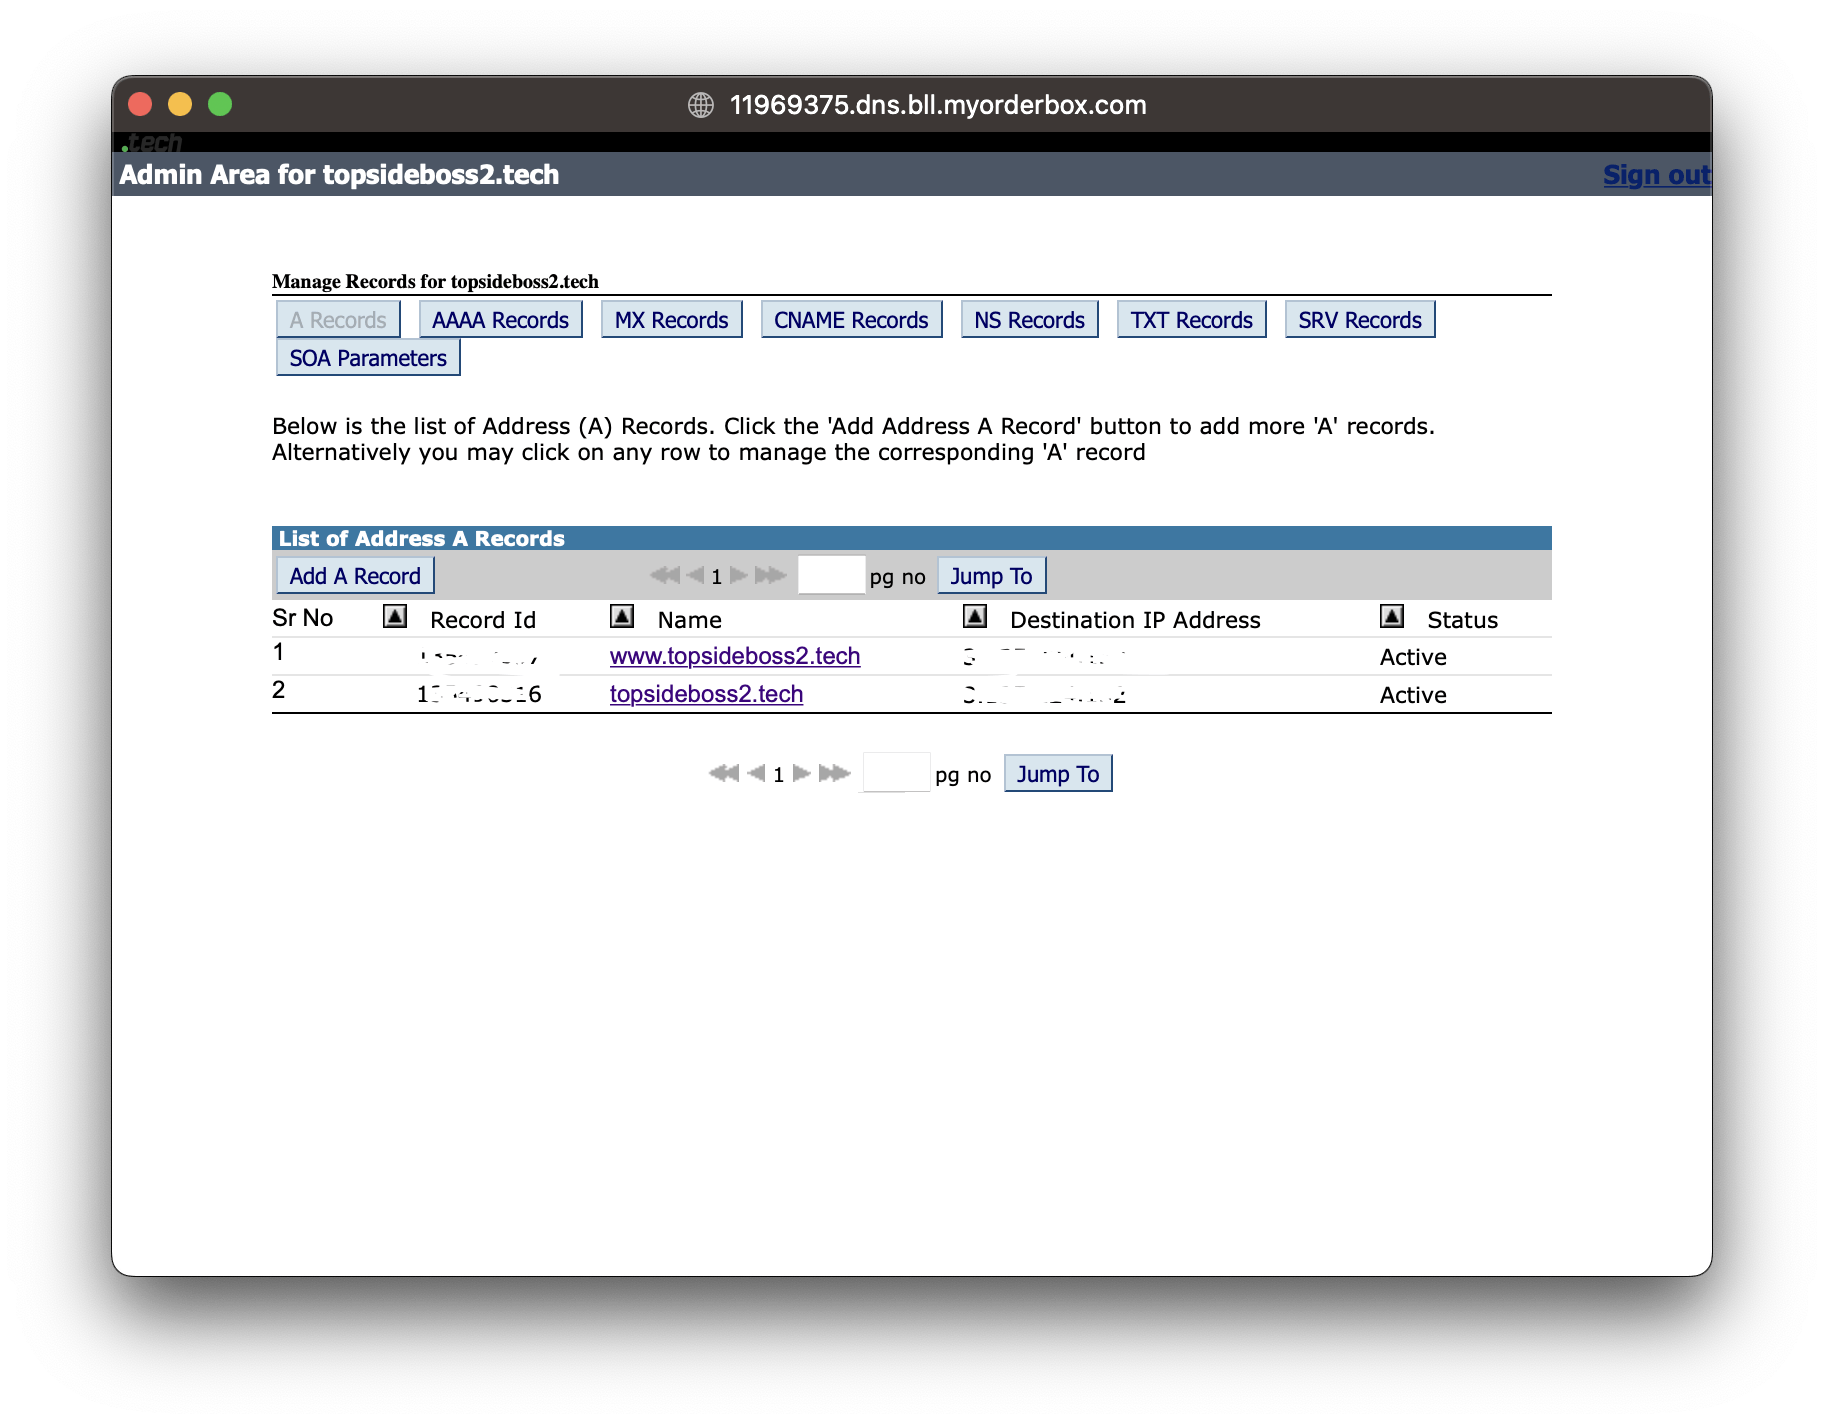
Next, we need to create an A record for your domain name that points to your EC2 instance. This can be done from your domain registrar's website. I used .Tech domains and I headed over to their website and did what was necessary.
I added two addresses to point to my AWS EC2 instance.
www.topsideboss2.techtopsideboss2.tech
Install Dependencies
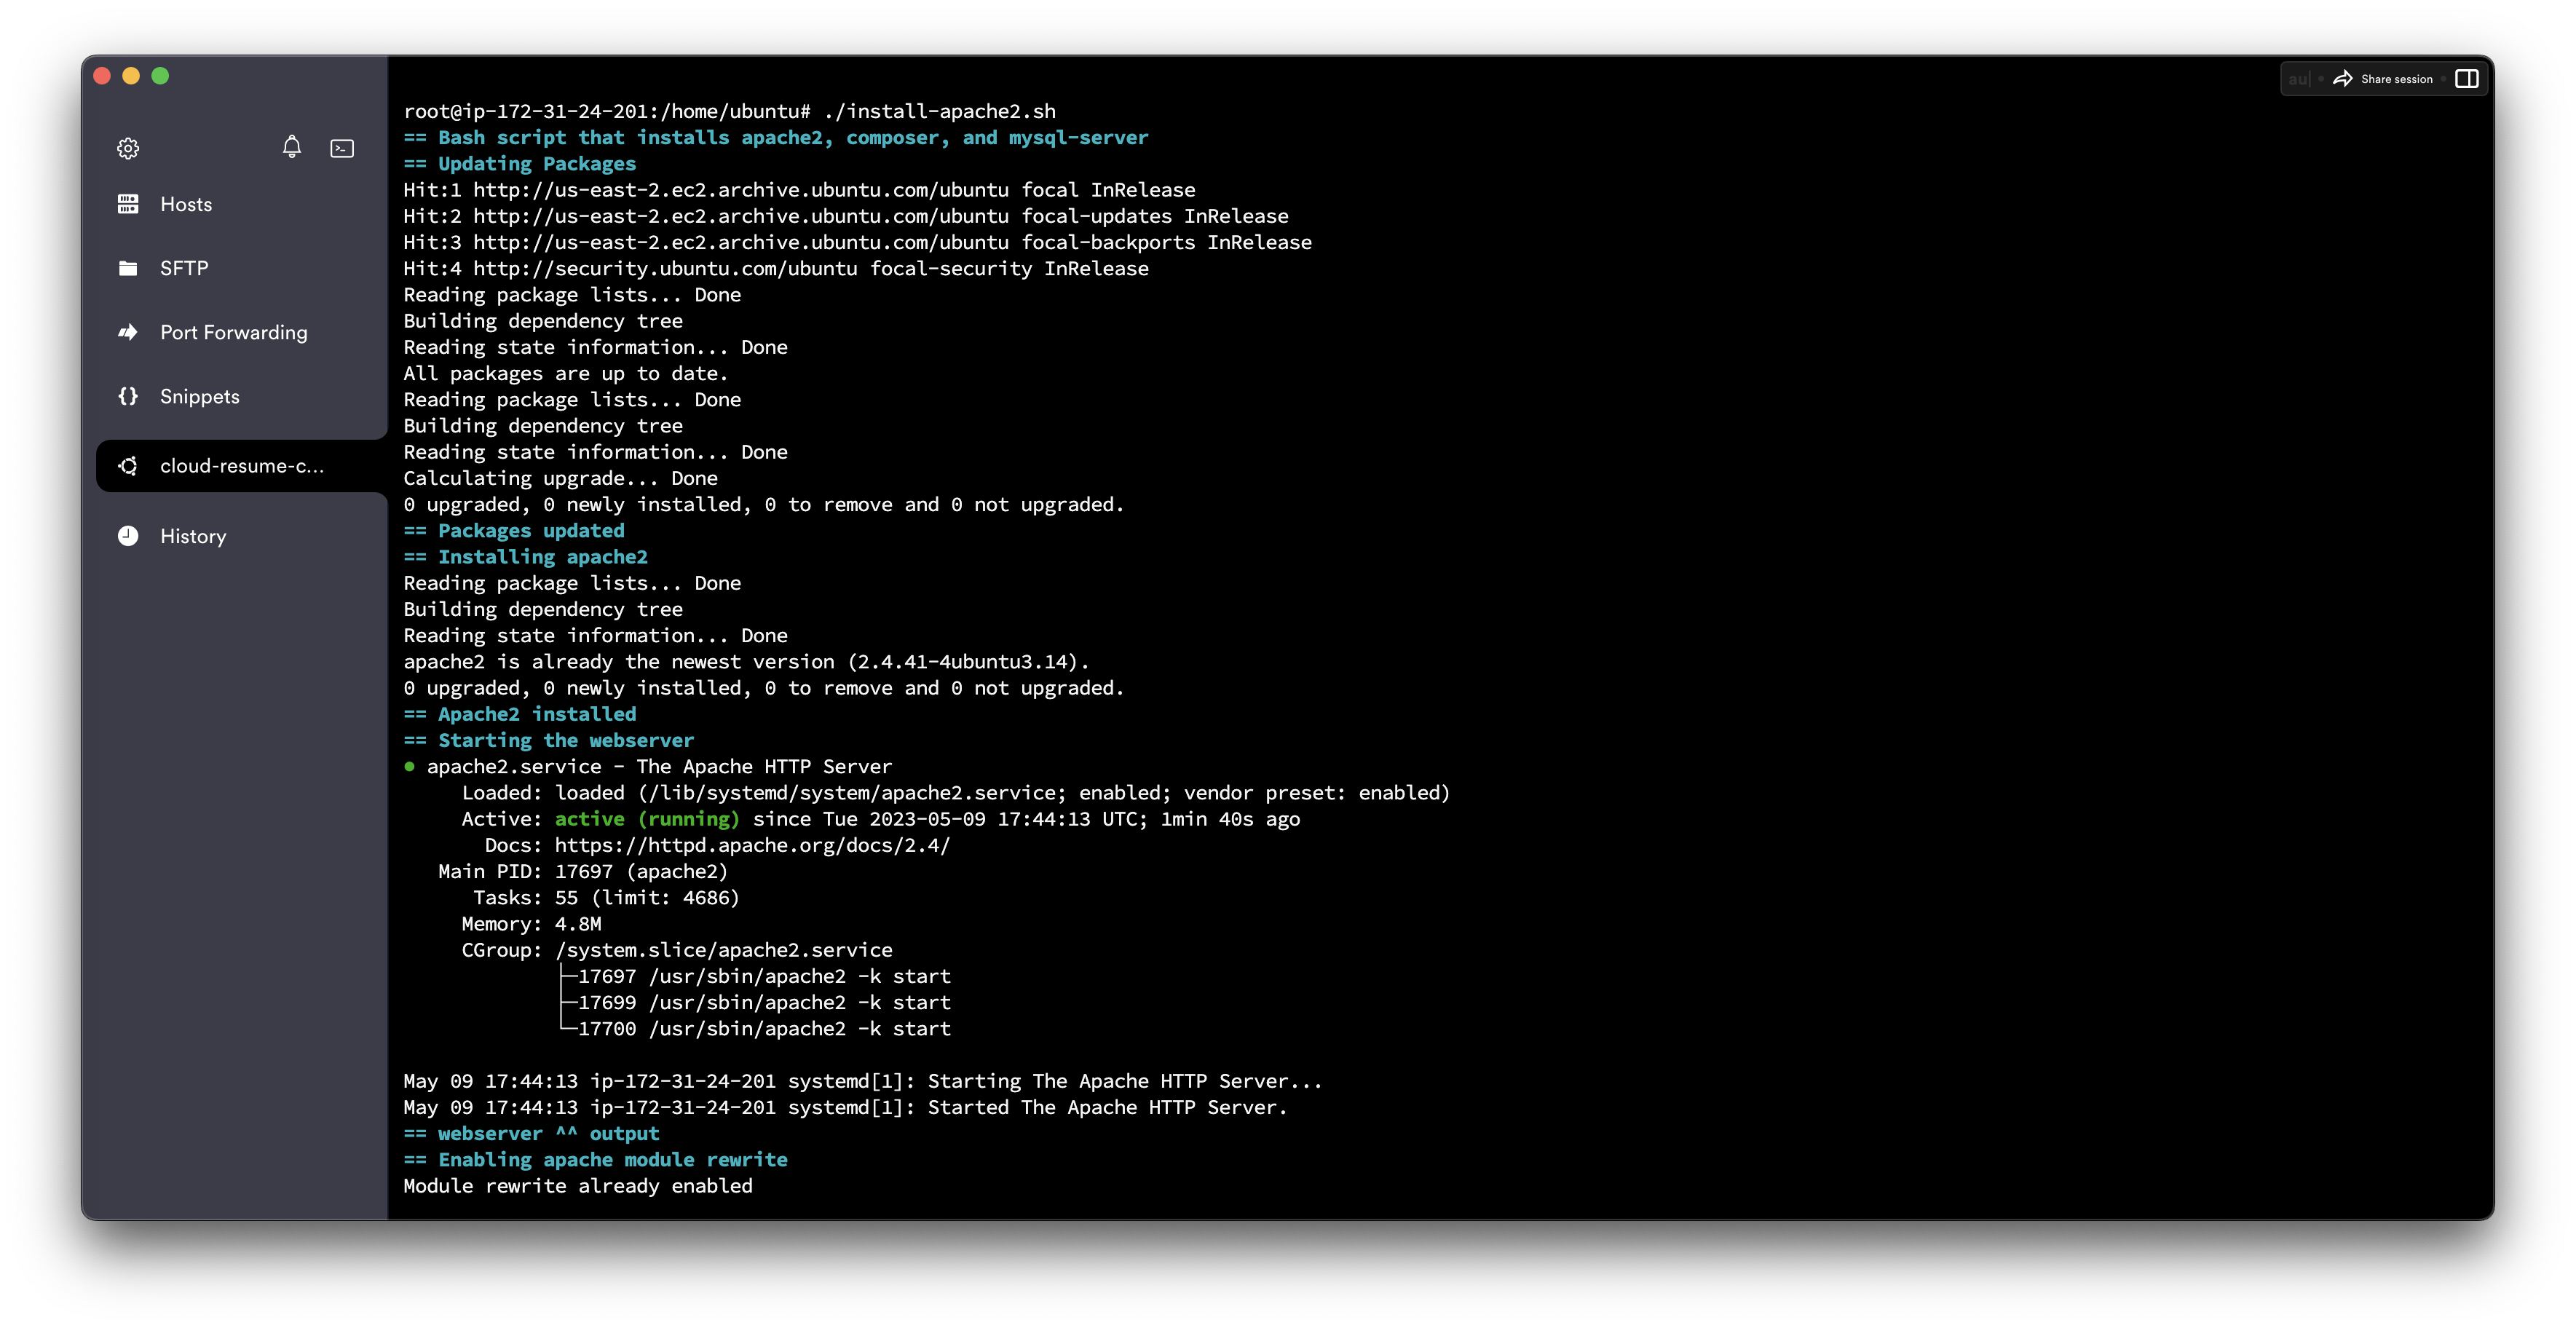
Now that my domain name is pointing to my AWS EC2 Instance. I can go ahead and configure the server with all the necessary tools I'll need such as Apache and Certbot. I try my best to always automate my server setup with bash scripts so I created one below to do that for me.
#!/usr/bin/env bash

CYAN='\033[1;36m'
NO_COLOR='\033[0m'
LABEL="Bash script that installs Apache and certbot"
printf "${CYAN}== ${LABEL}${NO_COLOR}\n"

# update packages
CYAN='\033[1;36m'
NO_COLOR='\033[0m'
LABEL="Updating Packages"
printf "${CYAN}== ${LABEL}${NO_COLOR}\n"
sudo apt update
sudo apt upgrade -y
CYAN='\033[1;36m'
NO_COLOR='\033[0m'
LABEL="Packages updated"
printf "${CYAN}== ${LABEL}${NO_COLOR}\n"

# Install apache
CYAN='\033[1;36m'
NO_COLOR='\033[0m'
LABEL="Installing apache2"
printf "${CYAN}== ${LABEL}${NO_COLOR}\n"
sudo apt install apache2 -y
CYAN='\033[1;36m'
NO_COLOR='\033[0m'
LABEL="Apache2 installed"
printf "${CYAN}== ${LABEL}${NO_COLOR}\n"

# Start the webserver
CYAN='\033[1;36m'
NO_COLOR='\033[0m'
LABEL="Starting the webserver"
printf "${CYAN}== ${LABEL}${NO_COLOR}\n"
sudo systemctl start apache2.service
sudo systemctl status apache2.service
CYAN='\033[1;36m'
NO_COLOR='\033[0m'
LABEL="webserver ^^ output"
printf "${CYAN}== ${LABEL}${NO_COLOR}\n"

# enable apache module rewrite
CYAN='\033[1;36m'
NO_COLOR='\033[0m'
LABEL="Enabling apache module rewrite"
printf "${CYAN}== ${LABEL}${NO_COLOR}\n"
sudo a2enmod rewrite
CYAN='\033[1;36m'
NO_COLOR='\033[0m'
LABEL="Apache module rewrite enabled"
printf "${CYAN}== ${LABEL}${NO_COLOR}\n"

# restart apache
CYAN='\033[1;36m'
NO_COLOR='\033[0m'
LABEL="Restarting Apache"
printf "${CYAN}== ${LABEL}${NO_COLOR}\n"
systemctl restart apache2
CYAN='\033[1;36m'
NO_COLOR='\033[0m'
LABEL="Apache restarted"
printf "${CYAN}== ${LABEL}${NO_COLOR}\n"

# install certbot
CYAN='\033[1;36m'
NO_COLOR='\033[0m'
LABEL="Installing certbot"
printf "${CYAN}== ${LABEL}${NO_COLOR}\n"
sudo apt install certbot python3-certbot-apache -y
CYAN='\033[1;36m'
NO_COLOR='\033[0m'
LABEL="Certbot installed"
printf "${CYAN}== ${LABEL}${NO_COLOR}\n"
Output:

Clone your repository
My porfolio website is pushed on GitHub. I will SSH into the server and clone the repo in the directory known as /var/www/cloud-resume-challenge.

Create a config file for your Site
A config file for your site is very important because Certbot will need to correct it. So using the command vim /etc/apache2/sites-available/cloud-resume-challenge/ we will add the following lines of code:
# Static website
<VirtualHost *:80>
        DocumentRoot /var/www/cloud-resume-challenge/website/dist
        ServerName topsideboss2.tech
        ServerAlias www.topsideboss2.tech

        <Directory /var/www/cloud-resume-challenge/website/dist>
        Options FollowSymlinks
        AllowOverride All
        Require all granted
        </Directory>

        ErrorLog ${APACHE_LOG_DIR}/error.log
        CustomLog ${APACHE_LOG_DIR}/access.log combined
</VirtualHost>
# Dynamic website
<VirtualHost *:80>
        ServerAdmin webmaster@localhost
        DocumentRoot /var/www/cloud-resume-challenge/website/dist
        DirectoryIndex index.html
        ServerName topsideboss2.tech
        ServerAlias www.topsideboss2.tech

        <Directory /var/www/cloud-resume-challenge/website/dist>
                RewriteEngine On
                RewriteBase /var/www/cloud-resume-challenge/website/dist
                RewriteRule ^index.html$ - [L]
                RewriteCond %{REQUEST_FILENAME} !-d
                RewriteCond %{REQUEST_FILENAME} !-f
                RewriteRule . /index.html [L]
        </Directory>
        ErrorLog ${APACHE_LOG_DIR}/error.log
        CustomLog ${APACHE_LOG_DIR}/access.log combined
</VirtualHost>
Save the file after you are done editing it and close it. Apache always has a default site that is always enabled known as 000-default.conf. We will disable that and enable our new config file. Then restart Apache to allow the changes to take place.
# Disable the default config file
sudo a2dissite 000-default.conf

# enable the new config file
sudo a2ensite cloud-resume-challenge.conf

# restart apache2 for changes to take place
sudo systemctl reload apache2.service
sudo service apache2 restart

# To validate all the changes, run the following command
sudo apache2ctl configtest
Obtain an SSL Certificate
Create an SSL certificate for your address by running either of the following commands:
# Run
sudo certbot --apache

# To be more specific on the domain
sudo certbot --apache -d www.topsideboss2.com -d topsideboss2.com
This script will prompt you to answer a series of questions to configure your SSL certificate. First, it will ask you for a valid e-mail address. This email will be used for renewal notifications and security notices.
After providing a valid e-mail address, hit ENTER to proceed to the next step. You will then be prompted to confirm if you agree to Let’s Encrypt terms of service. You can confirm by pressing A and then ENTER:
Next, you’ll be asked if you would like to share your email with the Electronic Frontier Foundation to receive news and other information. If you do not want to subscribe to their content, type N. Otherwise, type Y. Then, hit ENTER to proceed to the next step.
The next step will prompt you to inform Certbot of which domains you’d like to activate HTTPS for. The listed domain names are automatically obtained from your Apache virtual host configuration, that’s why it’s important to make sure you have the correct ServerName and ServerAlias settings configured.
Output:
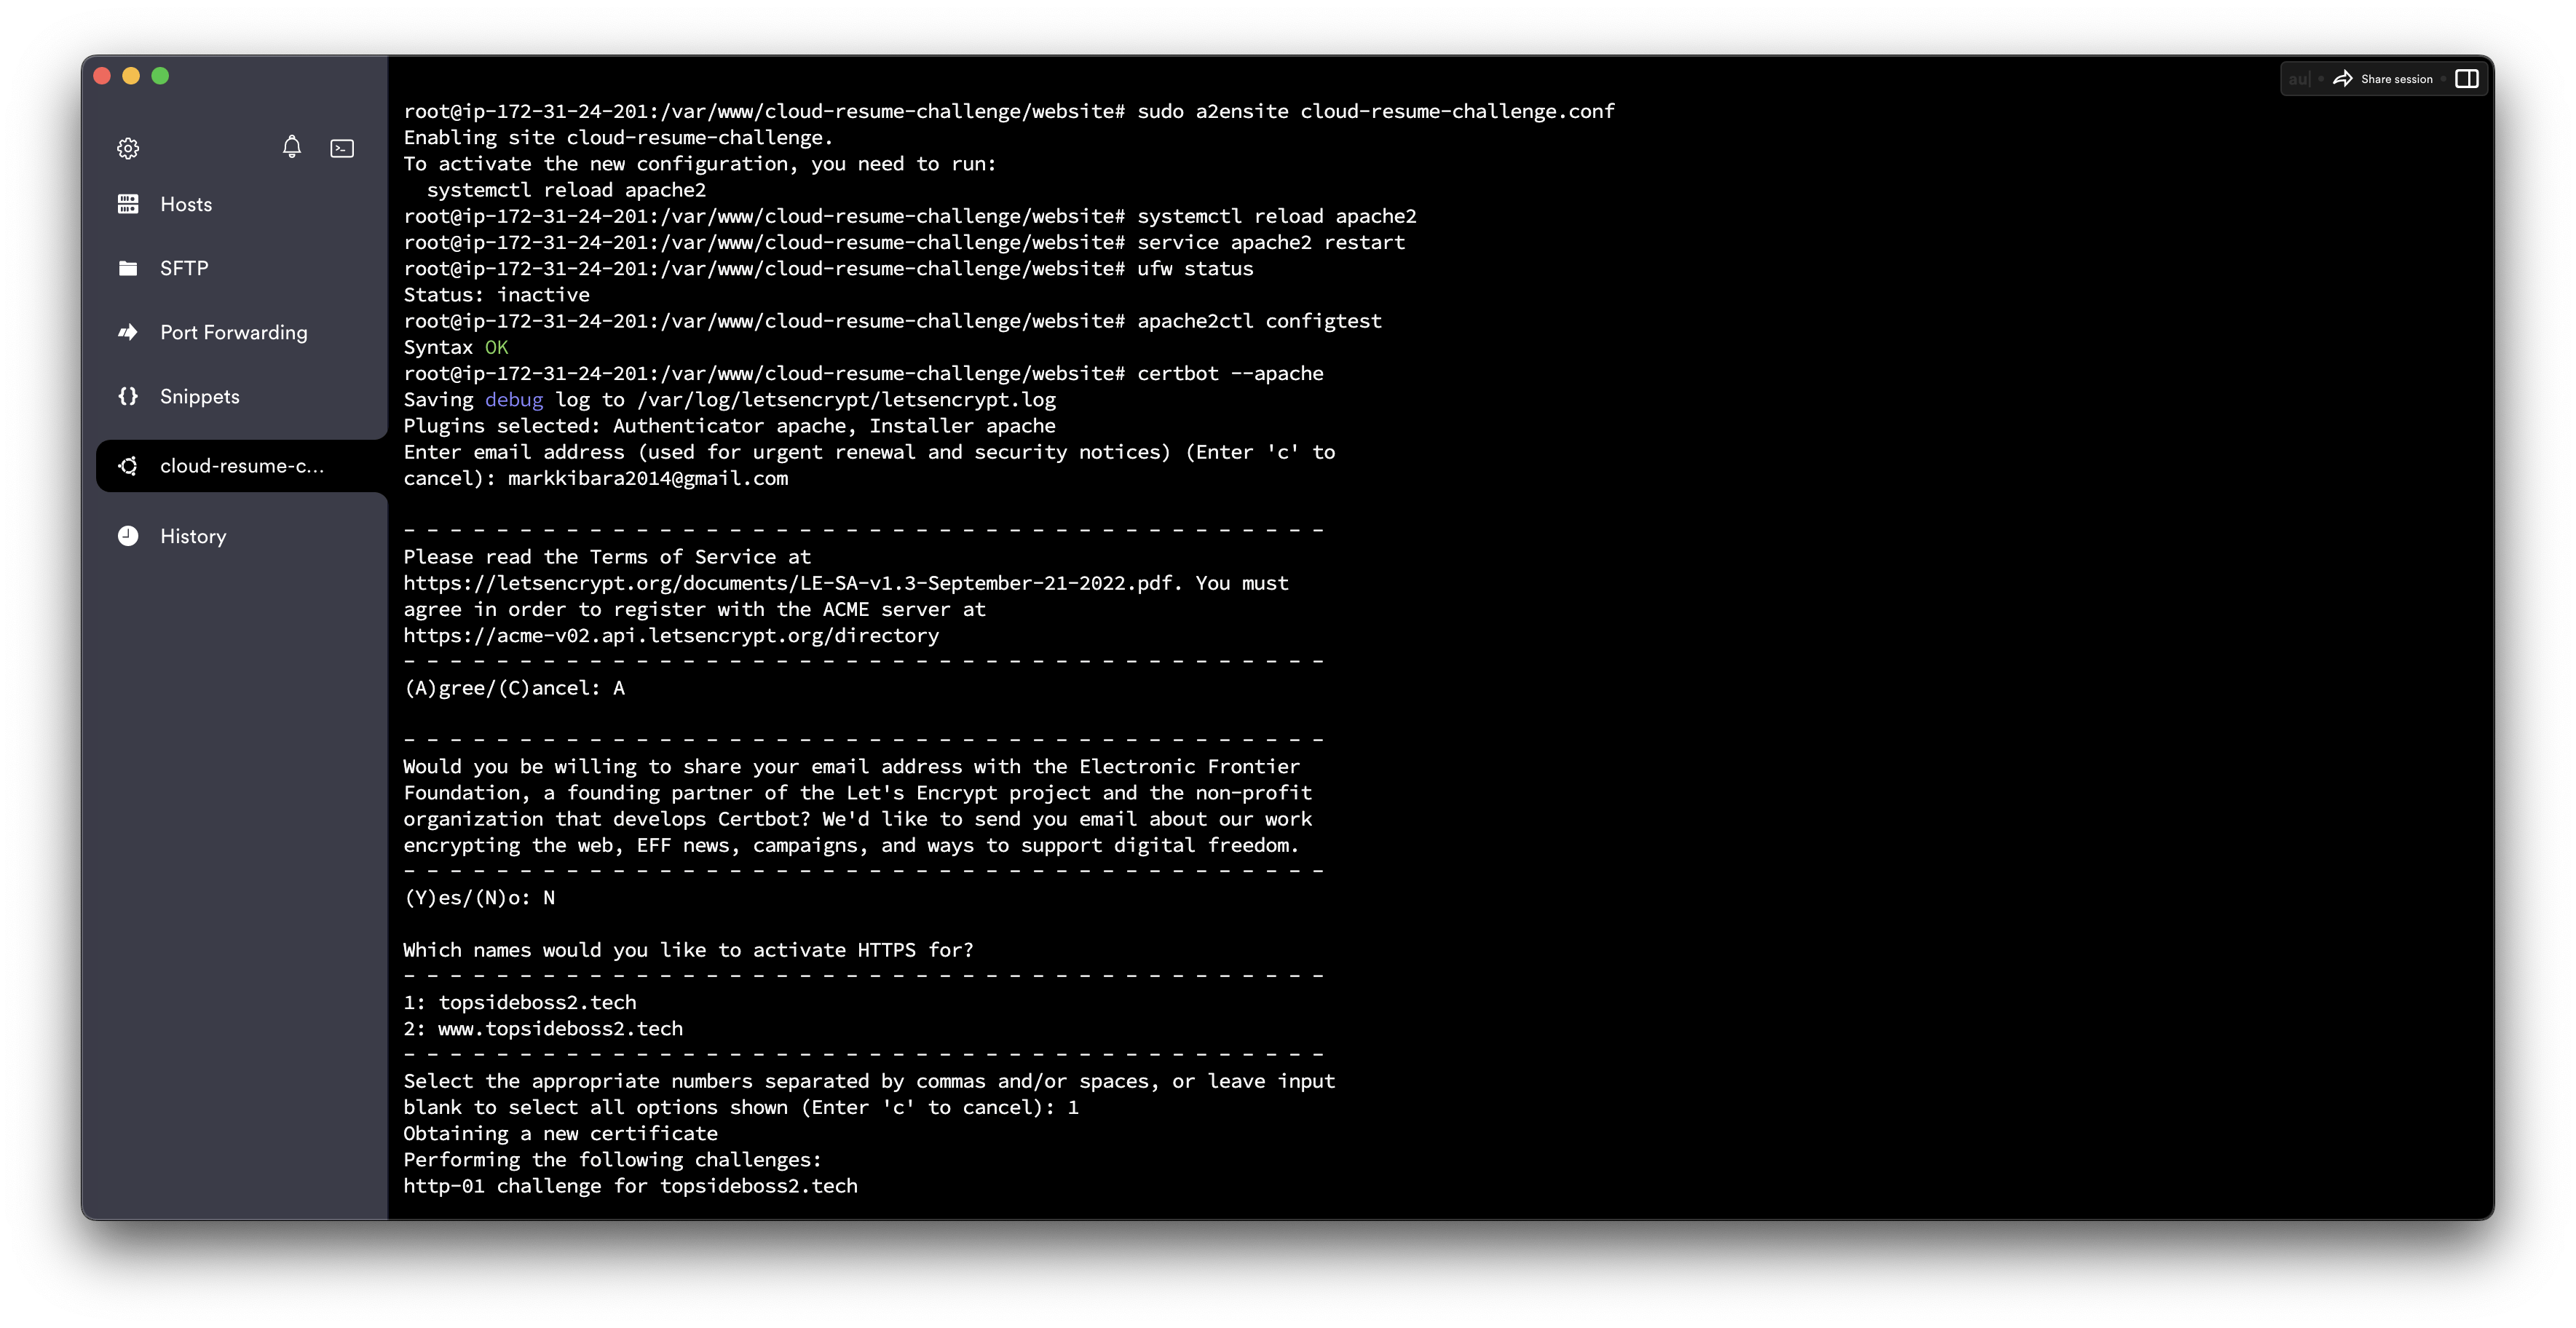
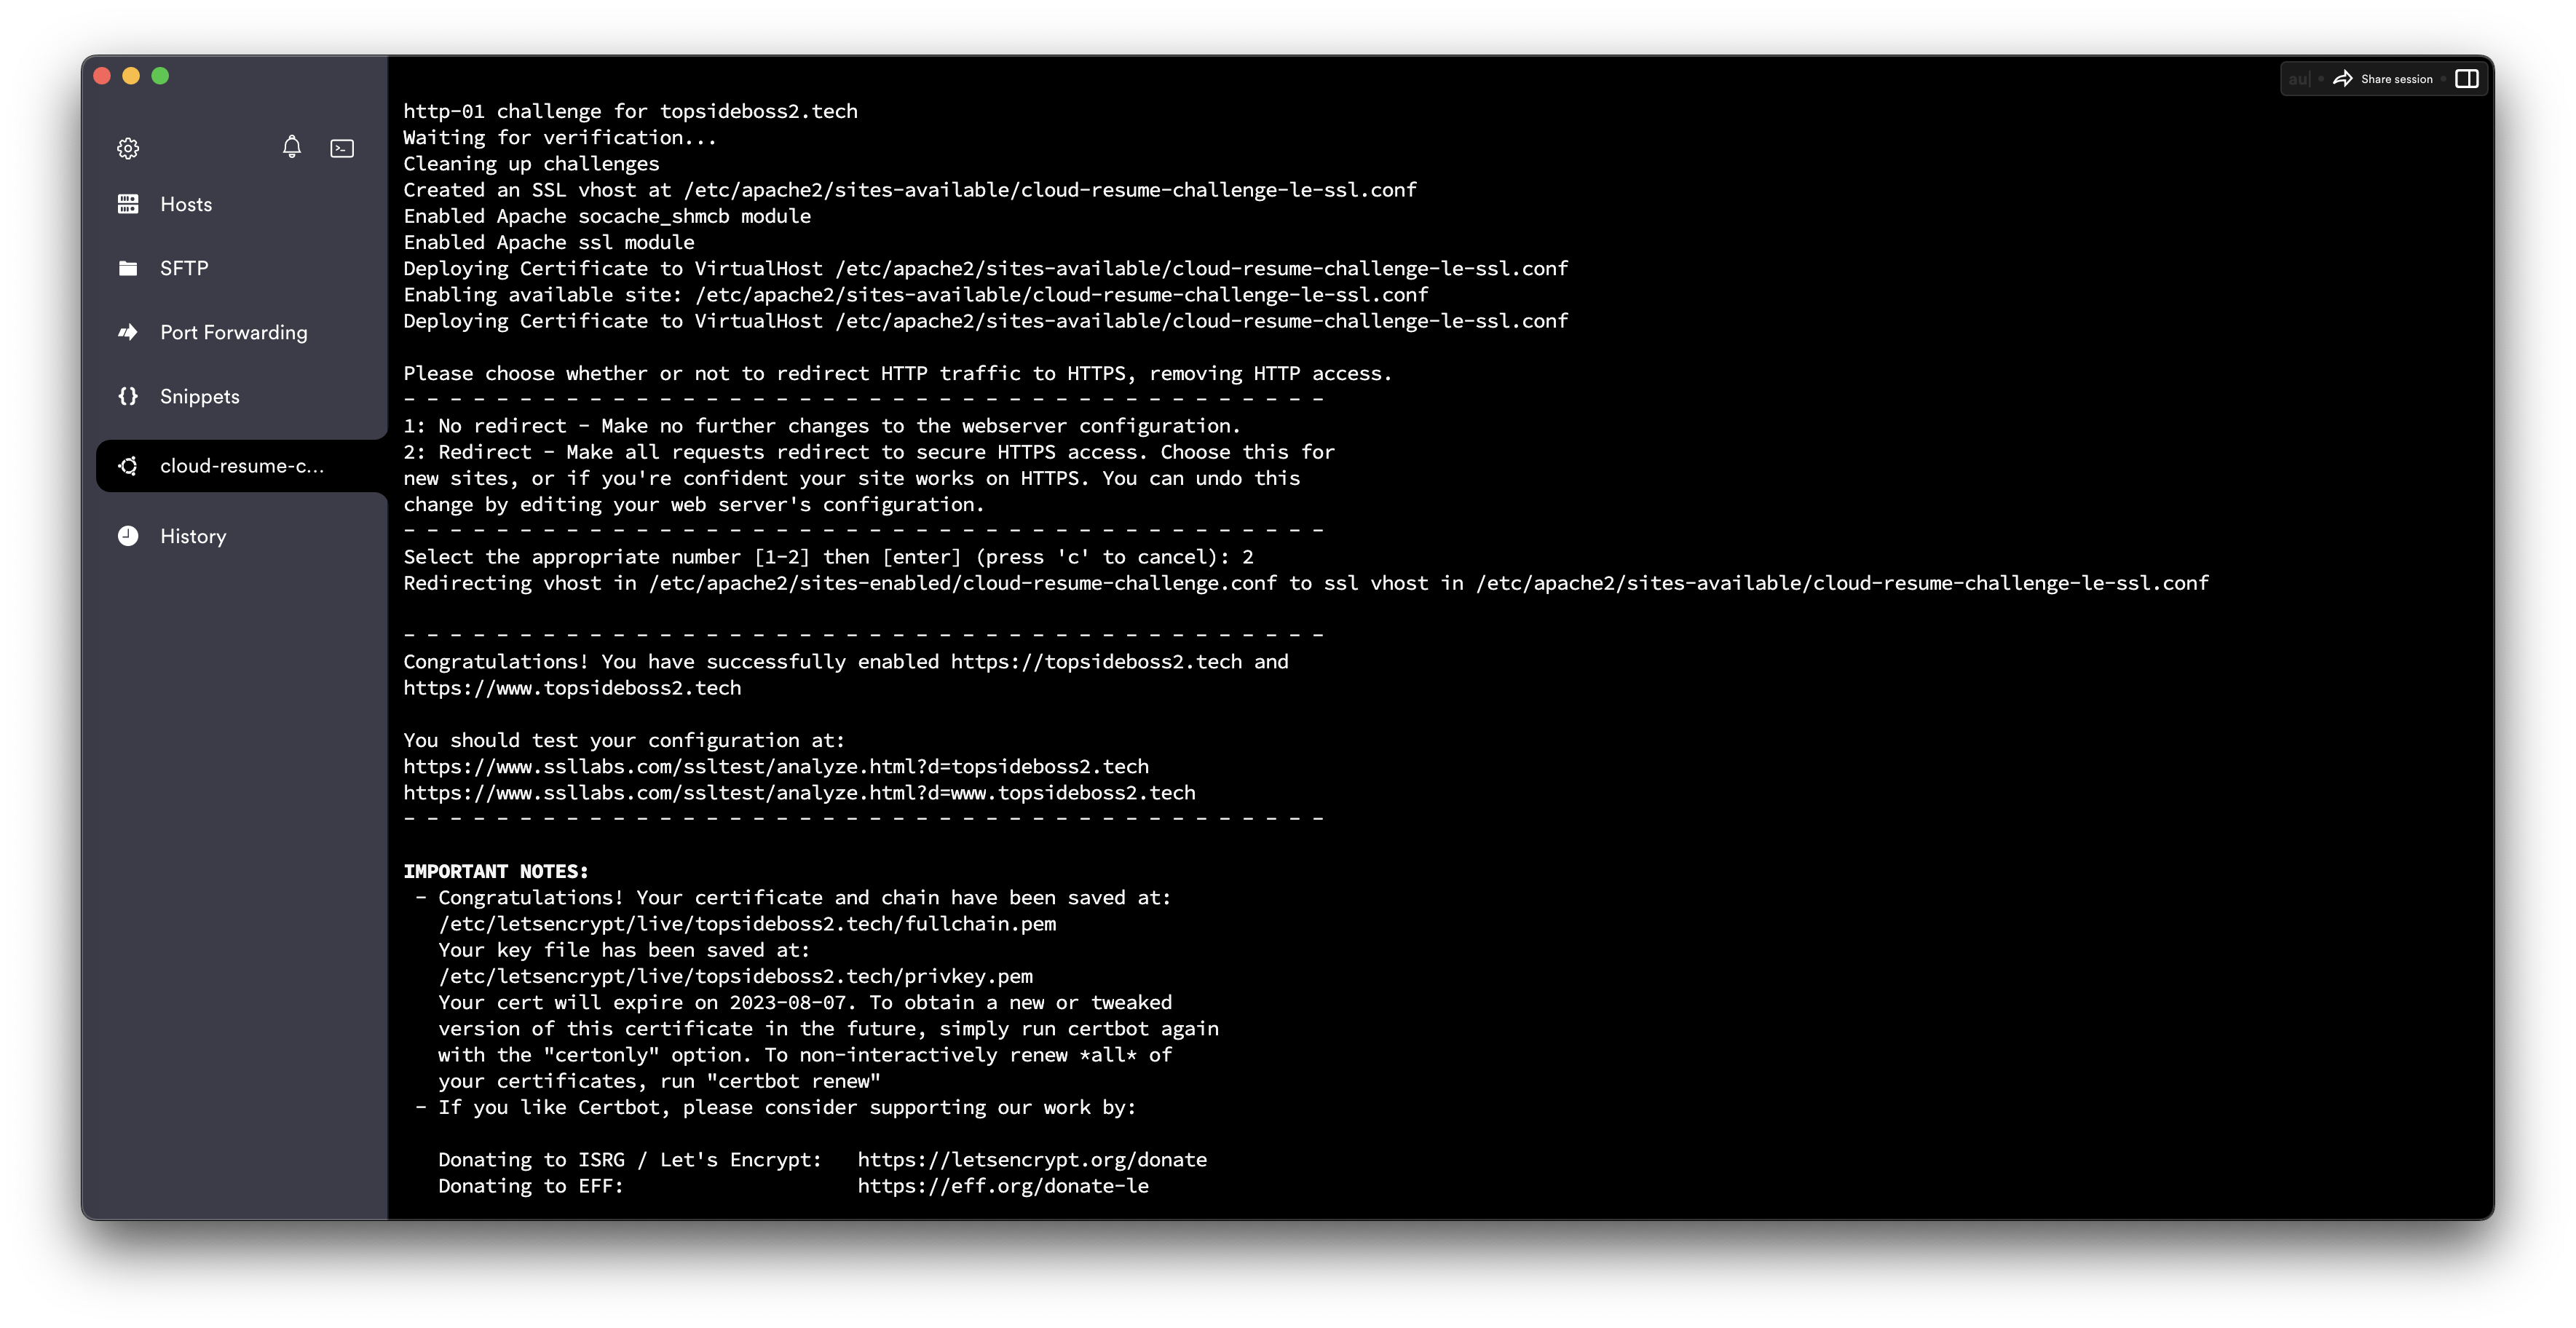
The configuration is finished and now you can confirm that the config file you created has been modified successfully.
Use the command: vim /etc/apache2/sites-available/cloud-resume-challenge.conf
Output:
# Static website
<VirtualHost *:80>
        DocumentRoot /var/www/cloud-resume-challenge/website/dist
        ServerName topsideboss2.tech
        ServerAlias www.topsideboss2.tech

        <Directory /var/www/cloud-resume-challenge/website/dist>
        Options FollowSymlinks
        AllowOverride All
        Require all granted
        </Directory>

        ErrorLog ${APACHE_LOG_DIR}/error.log
        CustomLog ${APACHE_LOG_DIR}/access.log combined
RewriteEngine on
RewriteCond %{SERVER_NAME} =topsideboss2.tech [OR]
RewriteCond %{SERVER_NAME} =www.topsideboss2.tech
RewriteRule ^ https://%{SERVER_NAME}%{REQUEST_URI} [END,NE,R=permanent]
</VirtualHost>
# Dynamic website
<VirtualHost *:80>
        ServerAdmin webmaster@localhost
        DocumentRoot /var/www/cloud-resume-challenge/website/dist
        DirectoryIndex index.html
        ServerName topsideboss2.tech
        ServerAlias www.topsideboss2.tech

        <Directory /var/www/cloud-resume-challenge/website/dist>
                RewriteEngine On
                RewriteBase /var/www/cloud-resume-challenge/website/dist
                RewriteRule ^index.html$ - [L]
                RewriteCond %{REQUEST_FILENAME} !-d
                RewriteCond %{REQUEST_FILENAME} !-f
                RewriteRule . /index.html [L]
        </Directory>
        ErrorLog ${APACHE_LOG_DIR}/error.log
        CustomLog ${APACHE_LOG_DIR}/access.log combined
RewriteCond %{SERVER_NAME} =topsideboss2.tech [OR]
RewriteCond %{SERVER_NAME} =www.topsideboss2.tech
RewriteRule ^ https://%{SERVER_NAME}%{REQUEST_URI} [END,NE,R=permanent]
</VirtualHost>
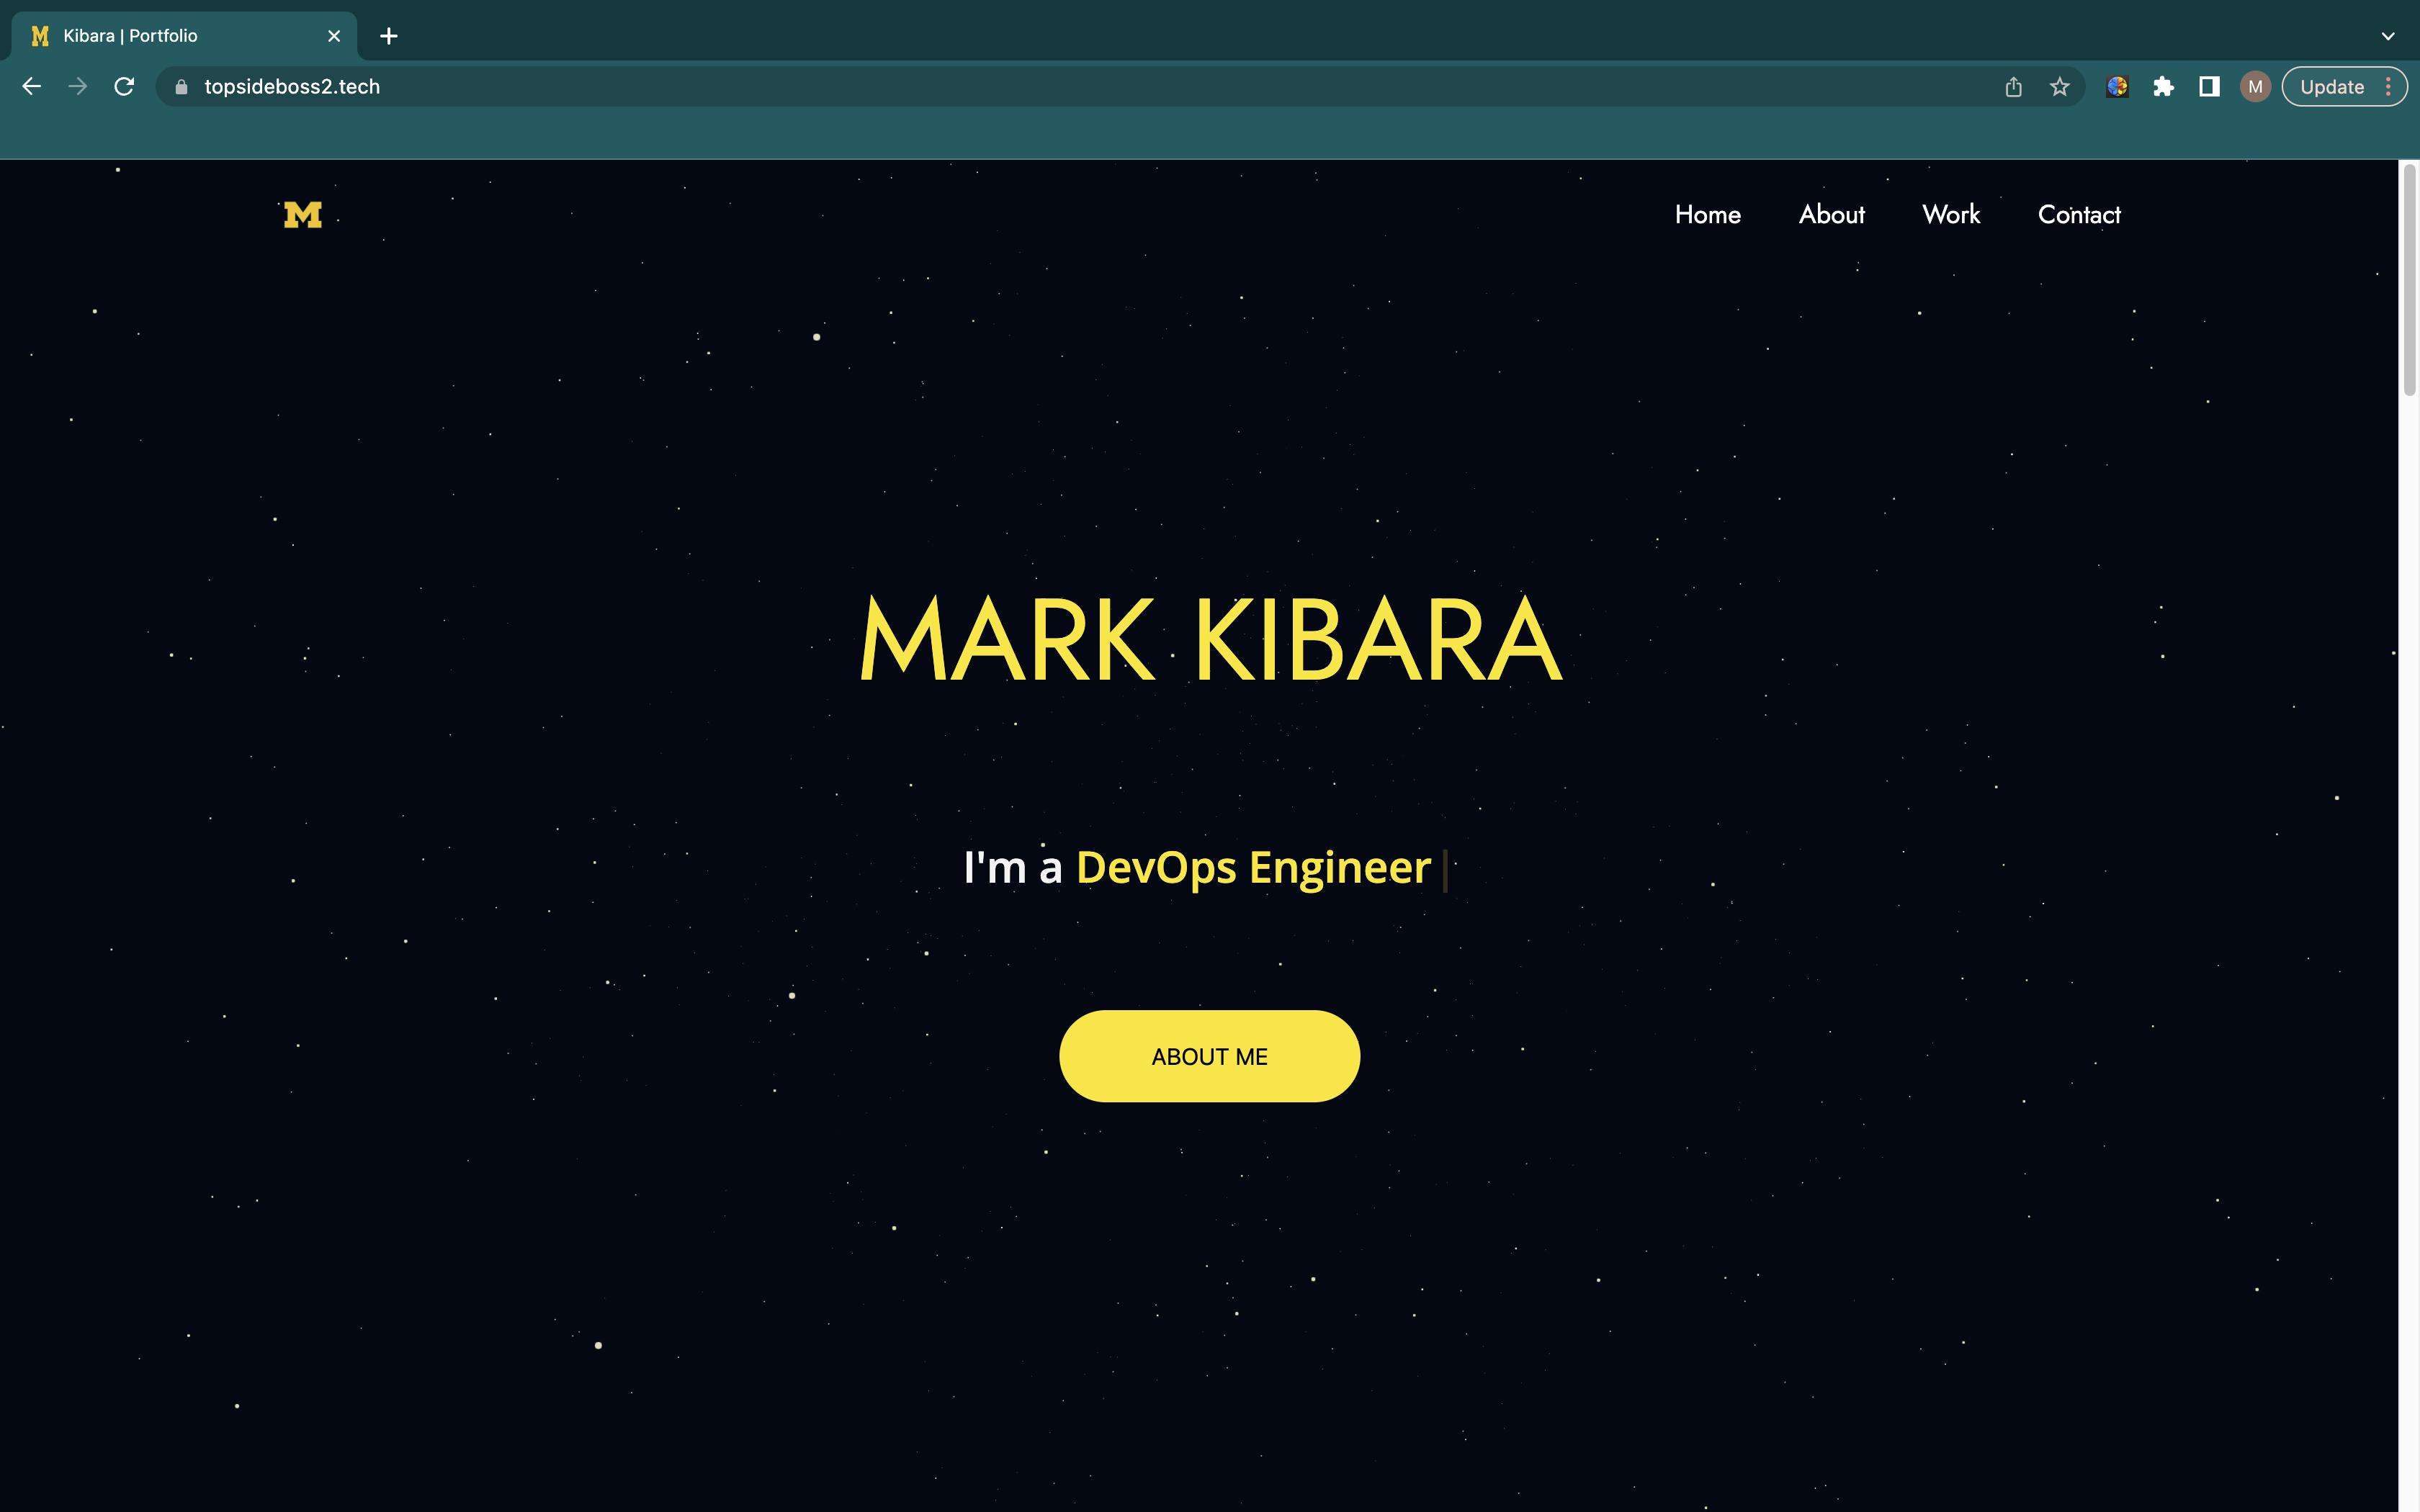
When we visit either https://topsideboss2.tech or https://www.topsideboss2.tech:
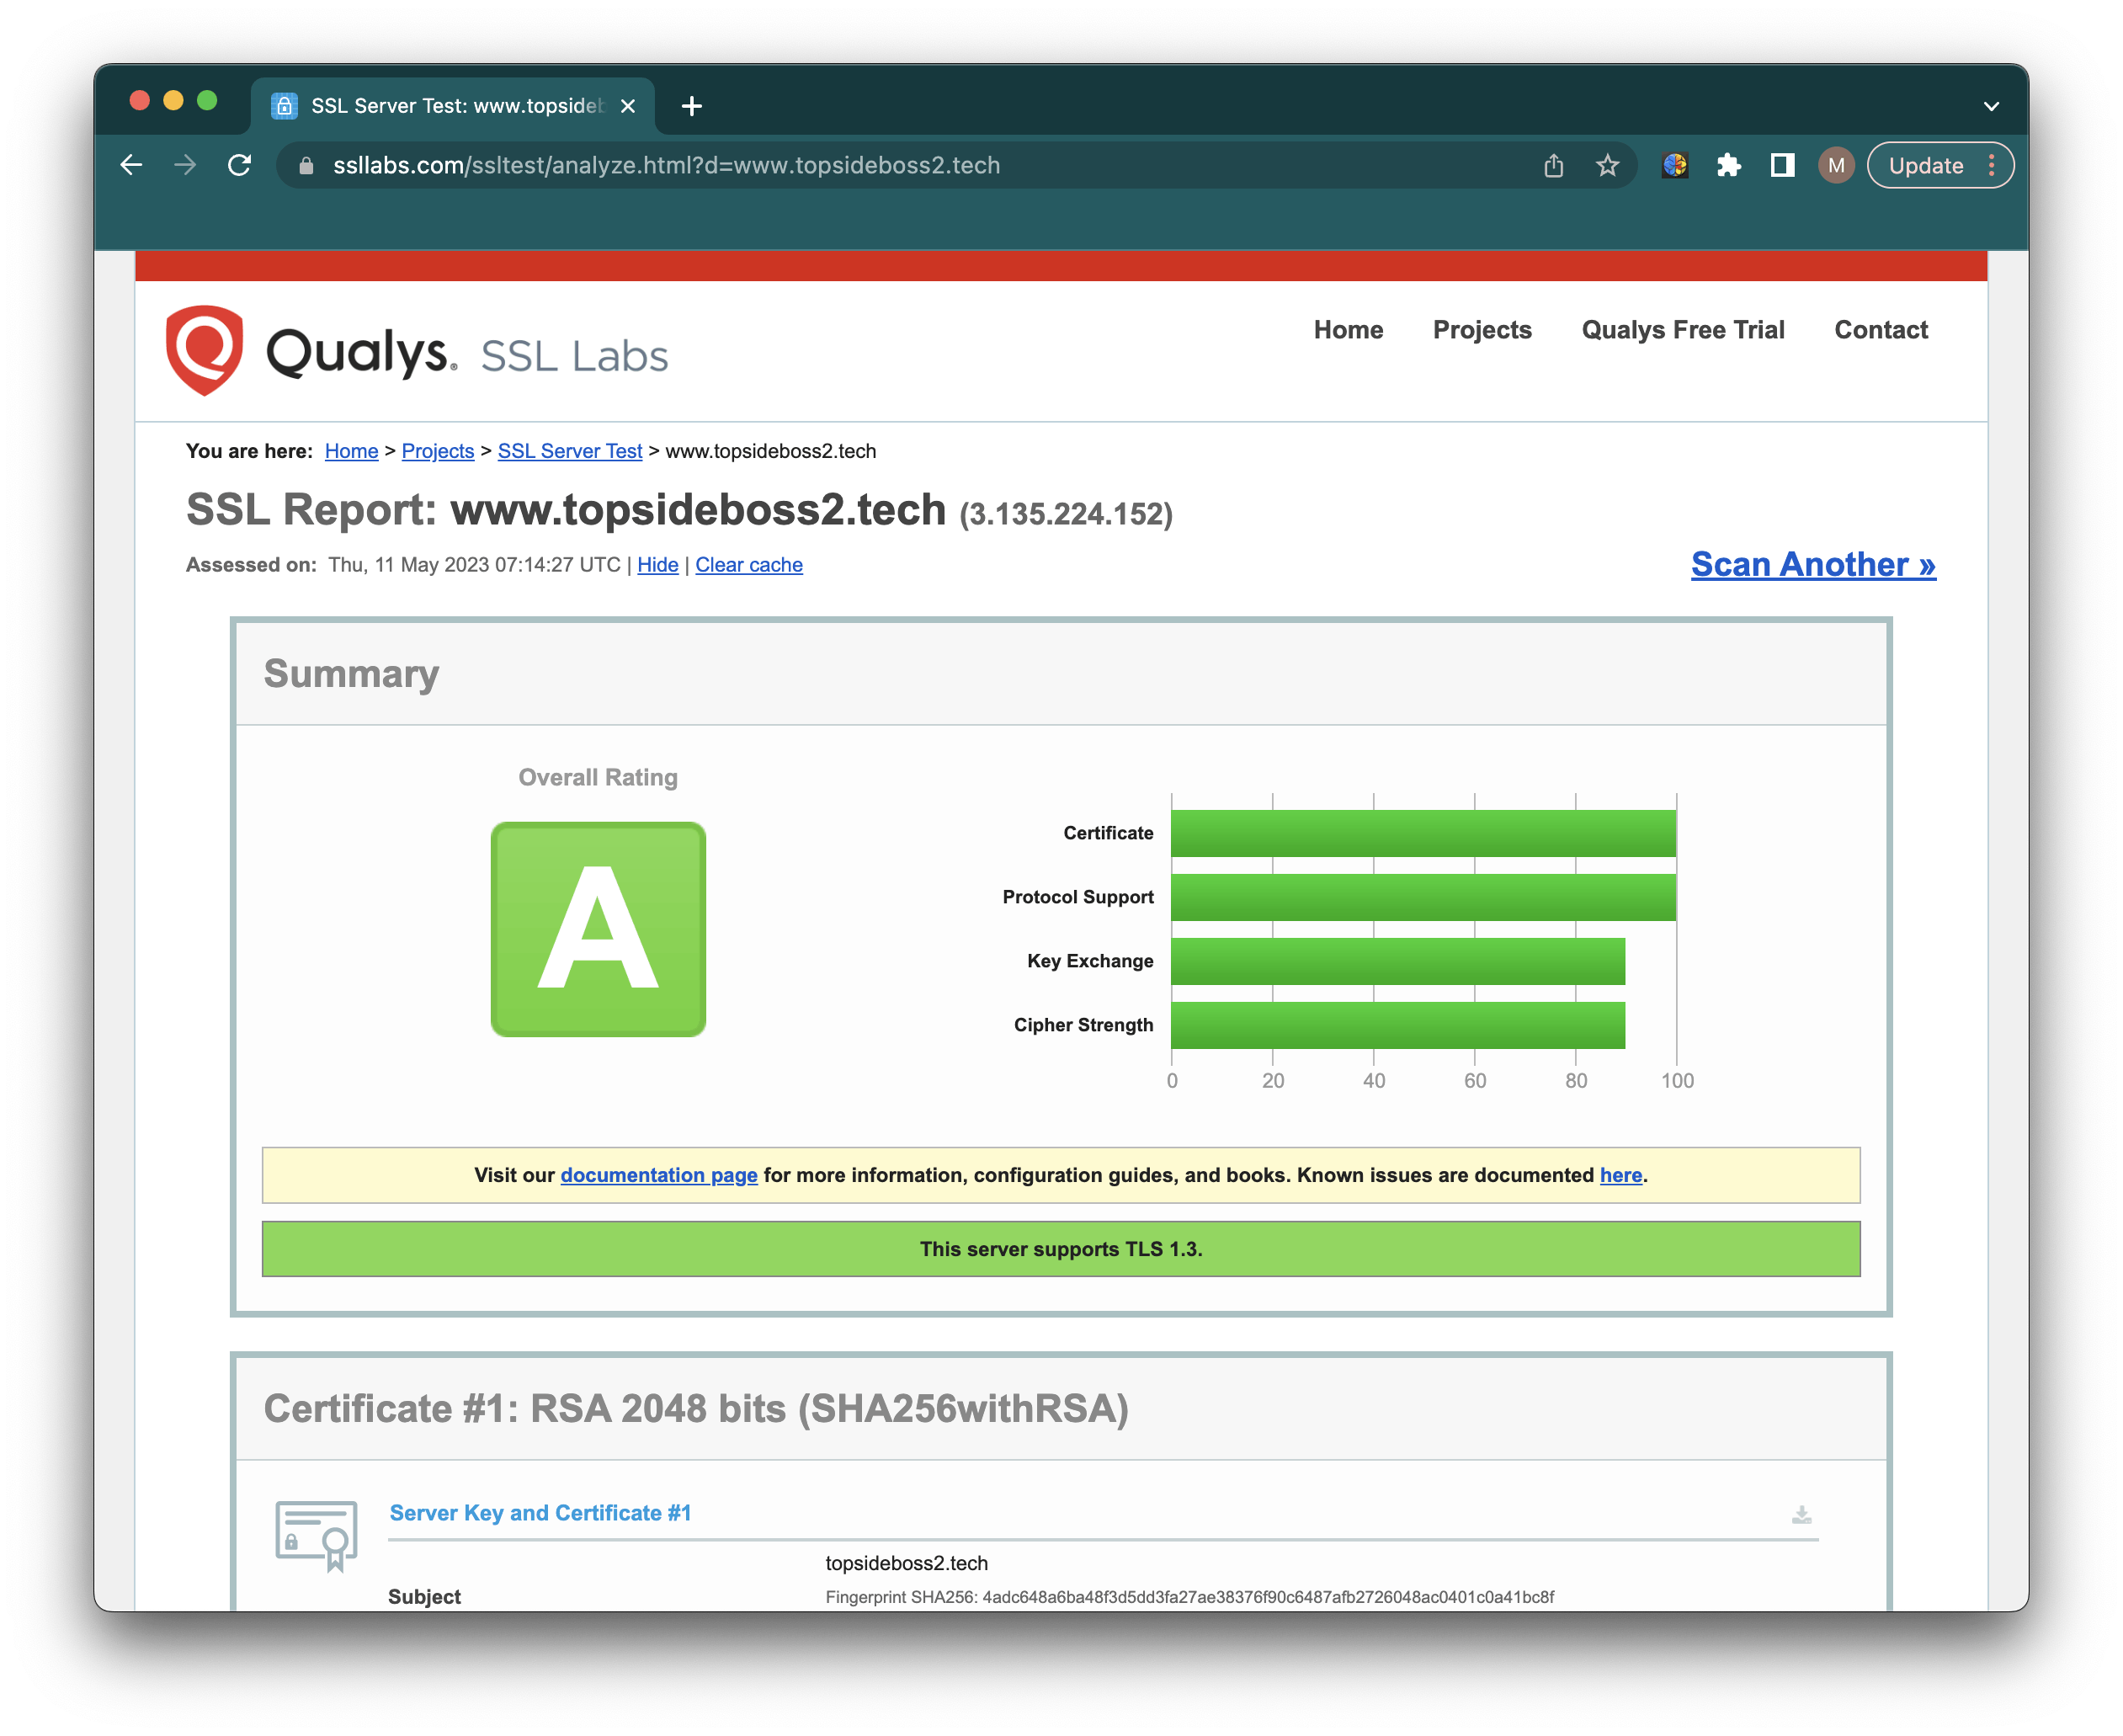
You can use the SSL Labs Server Test to verify your certificate’s grade and obtain detailed information about it, from the perspective of an external service.
Automatically Renewing Let’s Encrypt Certificates
Let’s Encrypt certificates have a validity period of 90 days. To ensure seamless certificate renewal, it is recommended to automate the process. Follow these steps to set up automatic renewal using a cron job:
Open the crontab file:
Execute the following command to open the crontab file:
crontab -e
Add the Certbot command:
Add the certbot command to run daily. In the example below, the command runs every day at noon. It checks if any certificate on the server will expire within the next 30 days and renews it if necessary. The --quiet directive prevents certbot from generating unnecessary output.
0 12 * * * /usr/bin/certbot renew --quiet
Save and close the file:
After adding the cron job, save and close the crontab file. The installed certificates will now be automatically renewed and reloaded as required.
By implementing this cron job, you ensure that your Let’s Encrypt certificates are regularly renewed, eliminating the need for manual intervention and ensuring continuous SSL/TLS certificate validity.
Conclusion
In conclusion, installing Let's Encrypt SSL on Ubuntu 20.04 is a great way to secure your website without breaking the bank. It is easy to install and maintain, and it offers a high level of security for your website visitors. On the other hand, AWS services such as Route53, Certificate Manager and the use of a Load Balancer offer more security features and customization options, which can come at a small fee, but they provide a more efficient and reliable way to secure your website without requiring much technical expertise to set up and maintain. Ultimately, the choice between Let's Encrypt SSL and AWS services depends on your specific needs and budget.

