

Deploying a Dynamic Website on AWS using a 3-Tier Architecture
How to create a web-tier, application-tier, and database-tier for a highly available and scalable architecture


Table of contents
- Introduction
- Project Description
- Create a VPC
- Create Security Groups
- Create RDS Instance
- Deploy Project
- Create an Amazon AMI
- Create an Application Load Balancer
- Create a record set in Route 53
- Register for an SSL certificate in Certificate Manager
- Create an Auto-Scaling Group
- Repeat the steps above for our web-server.
Introduction
The success of any application heavily relies on the architectural design, as it sets the foundation for scalability, security, and performance. One of the most commonly used architectures in the cloud industry is the three-tier architecture and Amazon Web Services (AWS) offers a comprehensive set of tools and services one can utilize. In this article, we will explore the AWS three-tier architecture and how it can help you build a scalable and reliable application. We'll dive into each tier's components and their roles, and we'll also discuss some best practices for designing and deploying a three-tier architecture on AWS. Let's get started.
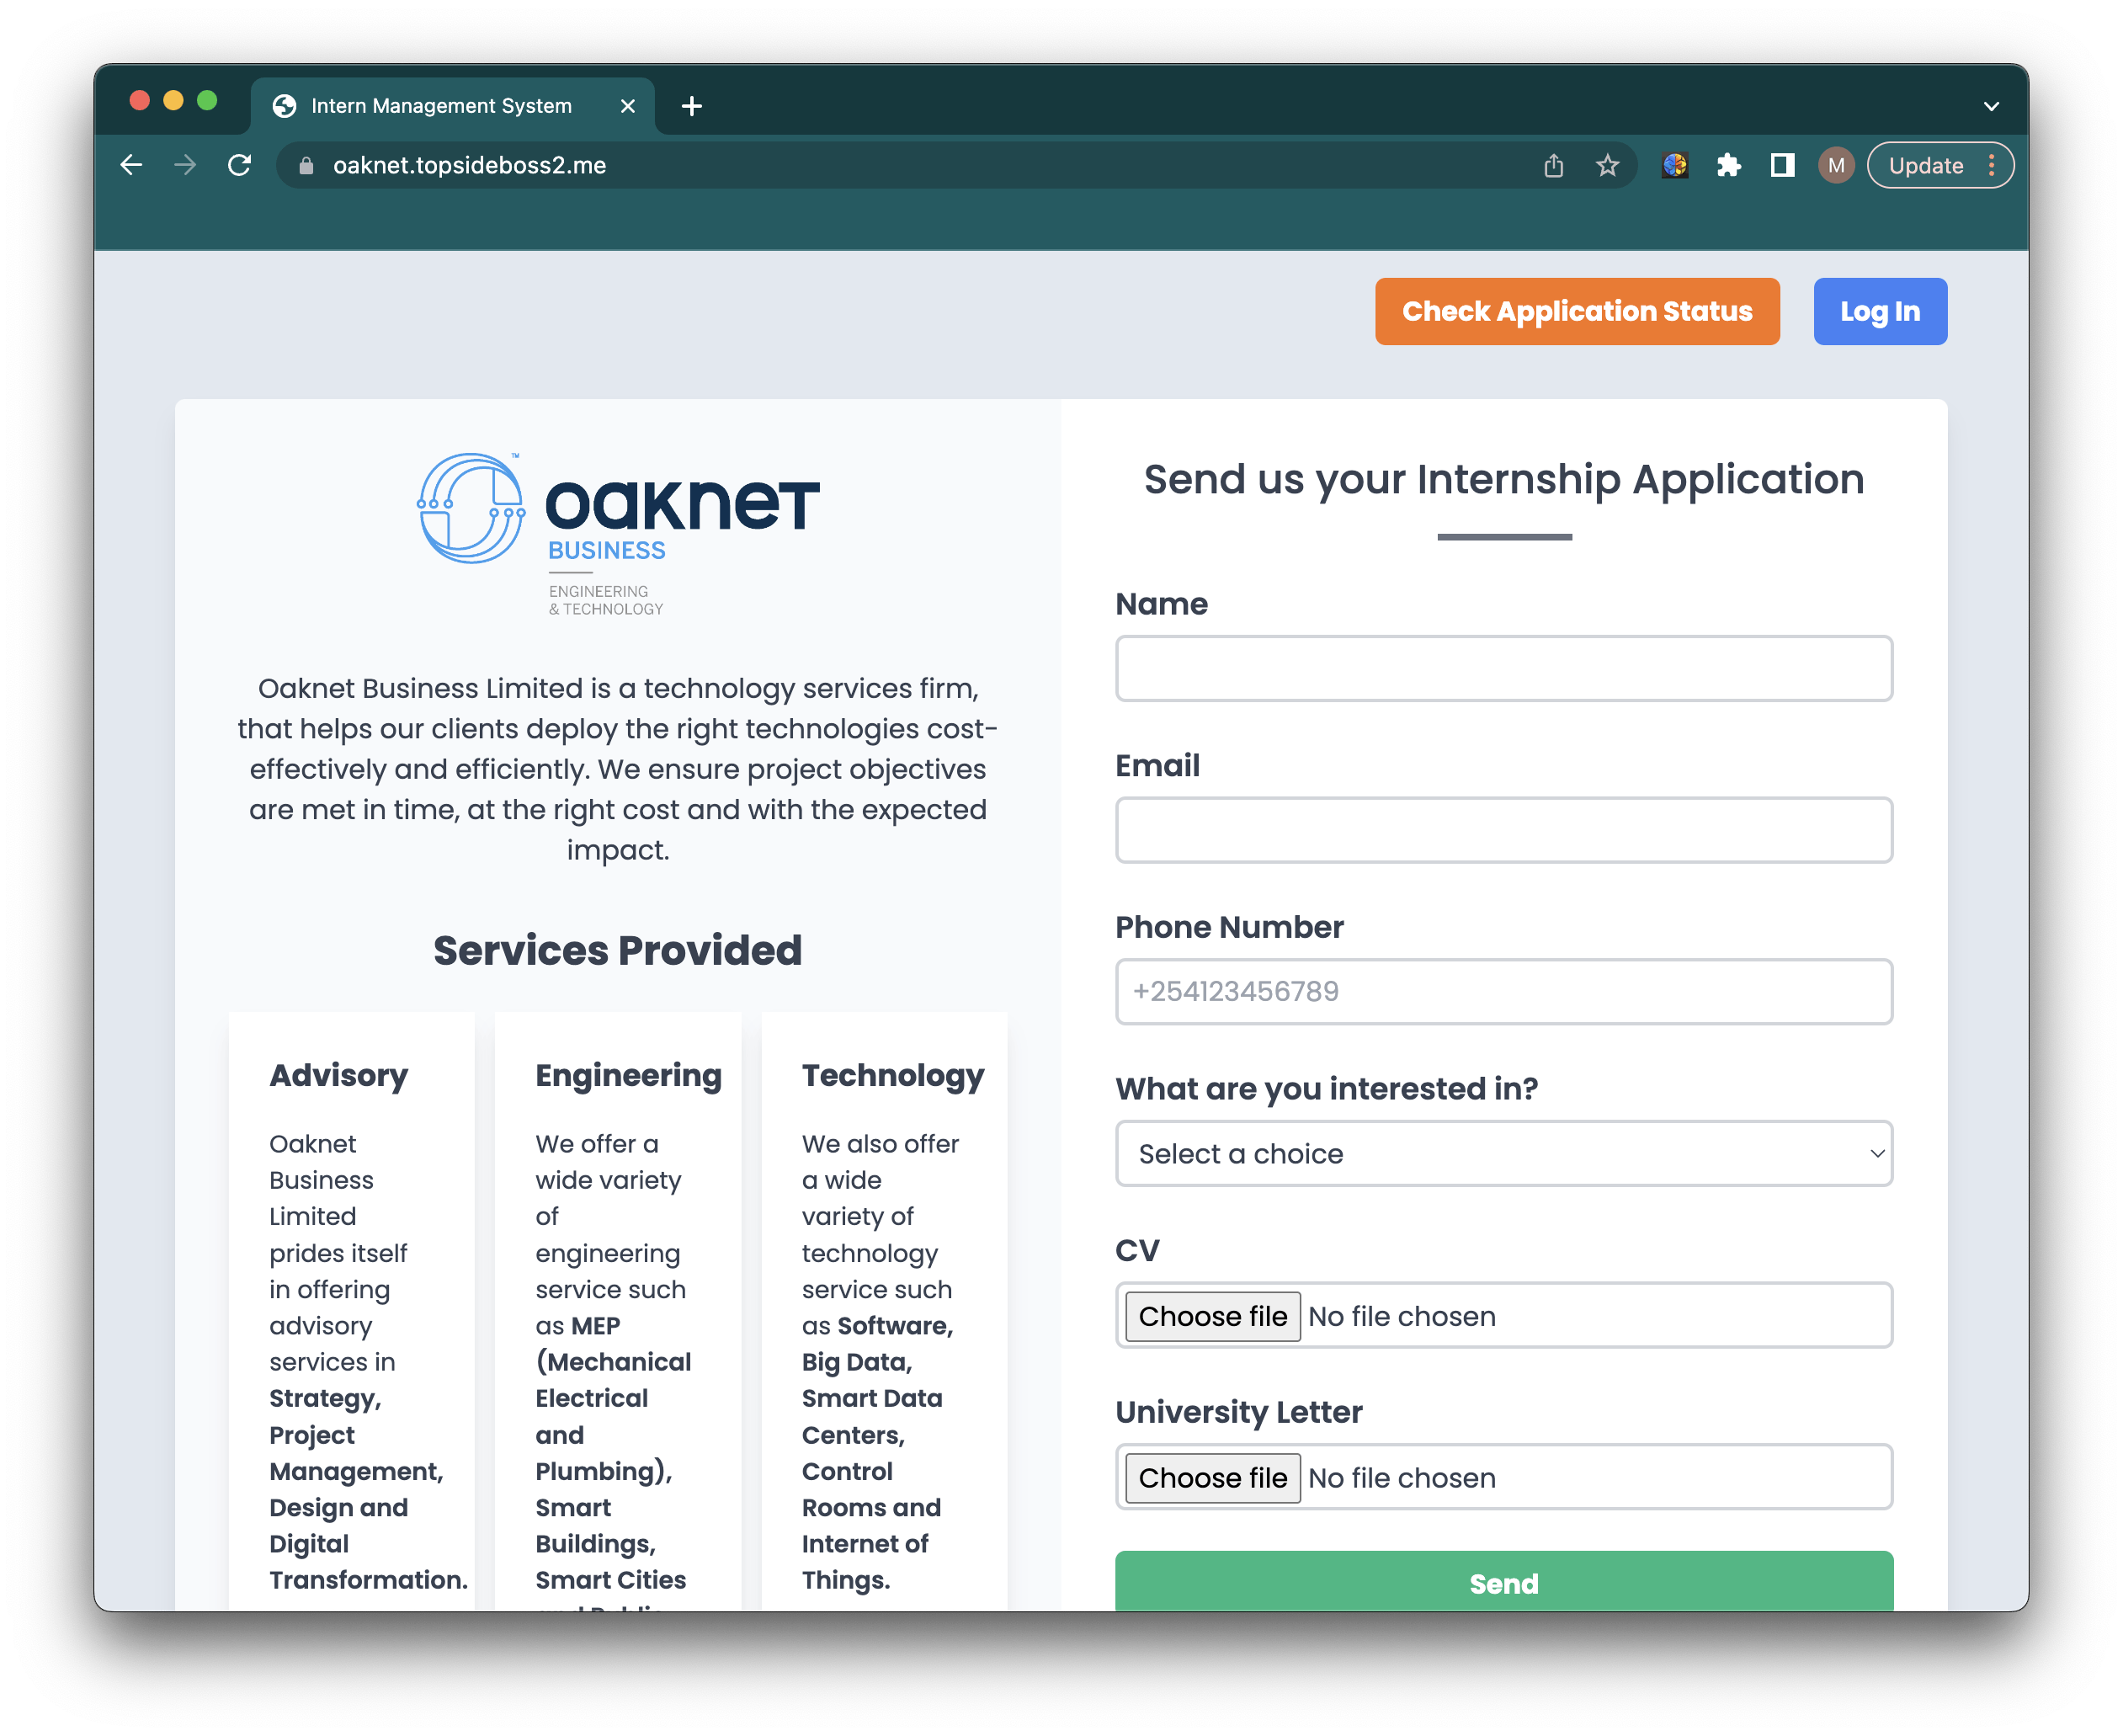
Project Description
The project I will be hosting is an intern management system built on a LAMP stack that I worked on during my attachment period in Oaknet Business. One thing I came to appreciate during my time as a DevOps intern was that documenting is a huge part of working in this field. The sooner one starts to document the steps taken to deploy a project, the better it'll help them in the long run.
AWS services used in this project include:
VPC
Security Groups
EC2
NAT Gateway
RDS
Application Load Balancer
Route 53
Autoscaling Group
Certificate Manager
Among others.....
Create a VPC
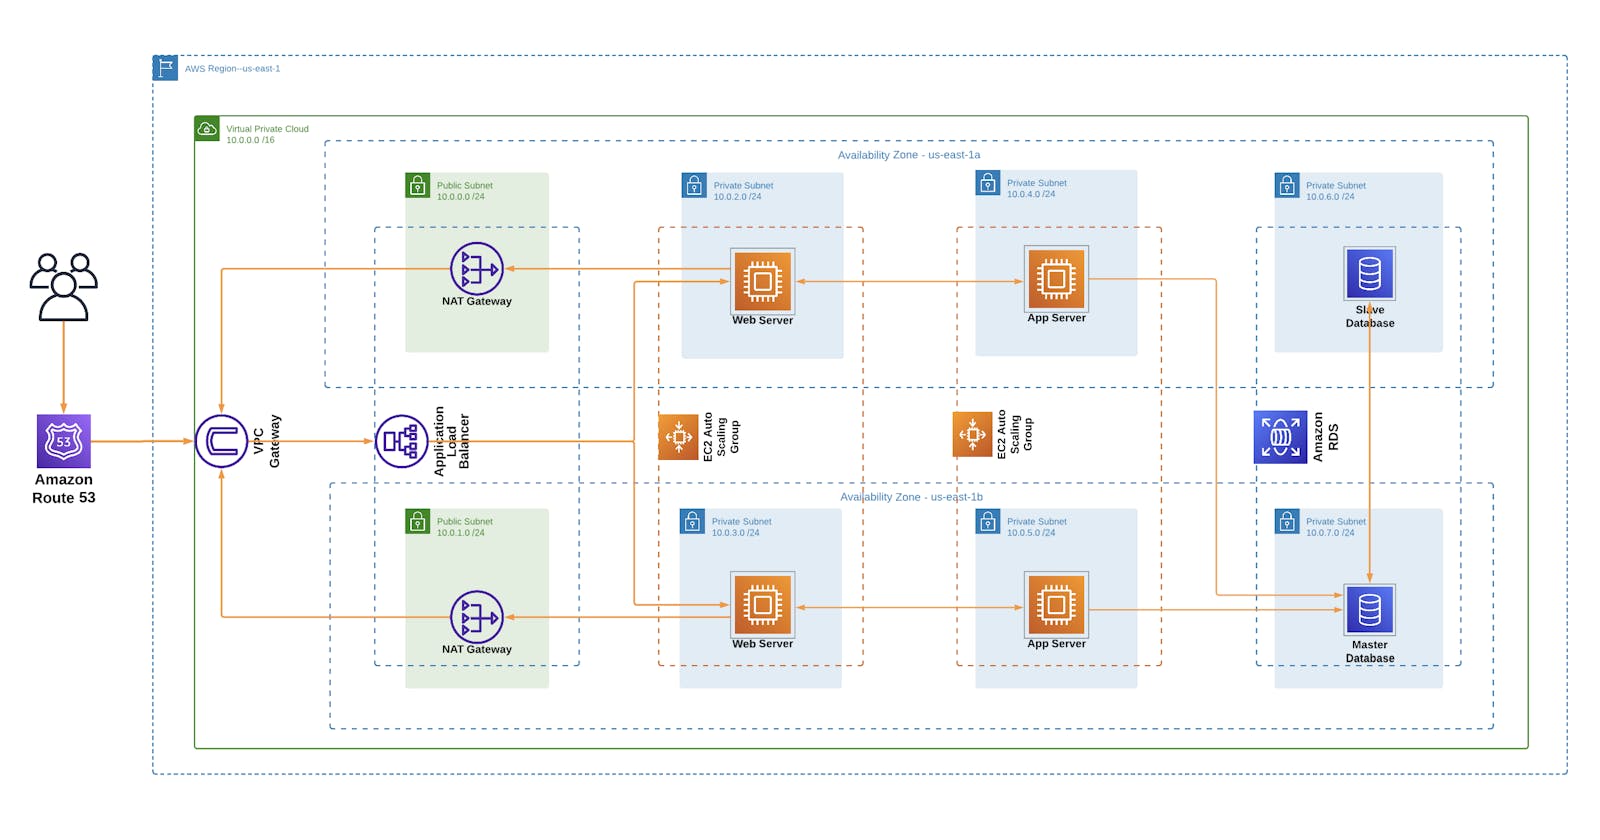
First, create a custom VPC in the desired AWS Region. In my case, I used the us-east-1 region. The IP address I assigned for my VPC is 10.0.0.0/16. Therefore all my resources will have an IP address that is in this network. I went on to create and attach an Internet Gateway that will provide resources in our VPC with access to the internet.
NB: Ensure you enable DNS hostname in your VPC
According to our referenced architecture above, our VPC should have public and private subnets in each Availability Zone. The resources in these public subnets can be accessed through the internet. These resources are our NAT-gateways, bastion host and load balancers. It is also important to note that there is a shared route table for our public subnets. On this route table, we should create a route to 0.0.0.0/0 pointing to the internet gateway we created.
| Subnet | IP Address |
| Public Subnet AZ1 | 10.0.0.0/24 |
| Public Subnet AZ2 | 10.0.1.0/24 |
| Private Web Subnet AZ1 | 10.0.2.0/24 |
| Private Web Subnet AZ2 | 10.0.3.0/24 |
| Private App Subnet AZ1 | 10.0.4.0/24 |
| Private App Subnet AZ2 | 10.0.5.0/24 |
| Private DB Subnet AZ1 | 10.0.6.0/24 |
| Private DB Subnet AZ2 | 10.0.7.0/24 |
In our first-tier, we will host our web-servers in private subnets. Namely, "Private-Web-Subnet-AZ1" and "Private-Web-Subnet-AZ2". Each Availabilty Zone has its own subnet.
In our second-tier, we will now host app-servers in private subnets. Namely, "Private-App-Subnet-AZ1" and "Private-App-Subnet-AZ2". Each AZ has its own subnet.
In our third-tier, we will have our database hosted in private subnets as well. Namely, "Private-DB-Subnet-AZ1" and "Private-DB-Subnet-AZ2". And you might've guessed it already, each AZ has its own subnet.
The private subnets we have created will not be directly accessible from the internet for security purposes. Now, you might ask yourself, "How is this gonna work if we can't even access our servers and database?" Well, this is where our NAT-gateways(located in the public subnets) come in. The NAT gateways will translate the private IP to a public IP that is going to be routed through the internet.
NAT-gateway | Subnet |
NAT-gateway AZ1 | Public Subnet AZ1 (10.0.0.0/24) |
NAT-gateway AZ2 | Public Subnet AZ2 (10.0.1.0/24) |
Just like how our public subnet has a route table, there is also a shared route table for our private subnets. In our private route table we will add a route to 0.0.0.0/0 pointing to the NAT-gateways corresponding to each AZ.
| Route Table | Destination | Target | Subnet Associations |
| Private Route Table (Default) | 10.0.0.0/16 | local | Default |
| Public Route Table | 0.0.0.0/0 | Internet Gateway | 10.0.0.0/24 & 10.0.1.0/24 |
| Private Route Table AZ1 | 0.0.0.0/0 | NAT-Gateway AZ1 | 10.0.2.0/24, 10.0.4.0/24, 10.0.6.0/24 |
| Private Route Table AZ2 | 0.0.0.0/0 | NAT-Gateway AZ2 | 10.0.3.0/24, 10.0.5.0/24, 10.0.7.0/24 |
Create Security Groups
When we created our VPC, it came with a default security group. But we need to create additional security groups for our resources. The work of our security groups is to control the traffic that is allowed to reach and leave the resources that it is associated with. So we create a securtiy group for each of our resource types
| Security Group | Port | Source |
| ALB Security Group | 80, 443 | 0.0.0.0/0 |
| SSH Security Group | 22 | <Your IP Address> |
| Server Security Group | 80, 443 | ALB Security Group |
| 22 | SSH Security Group | |
| Database Securtiy Group | 3306 | Server Security Group |
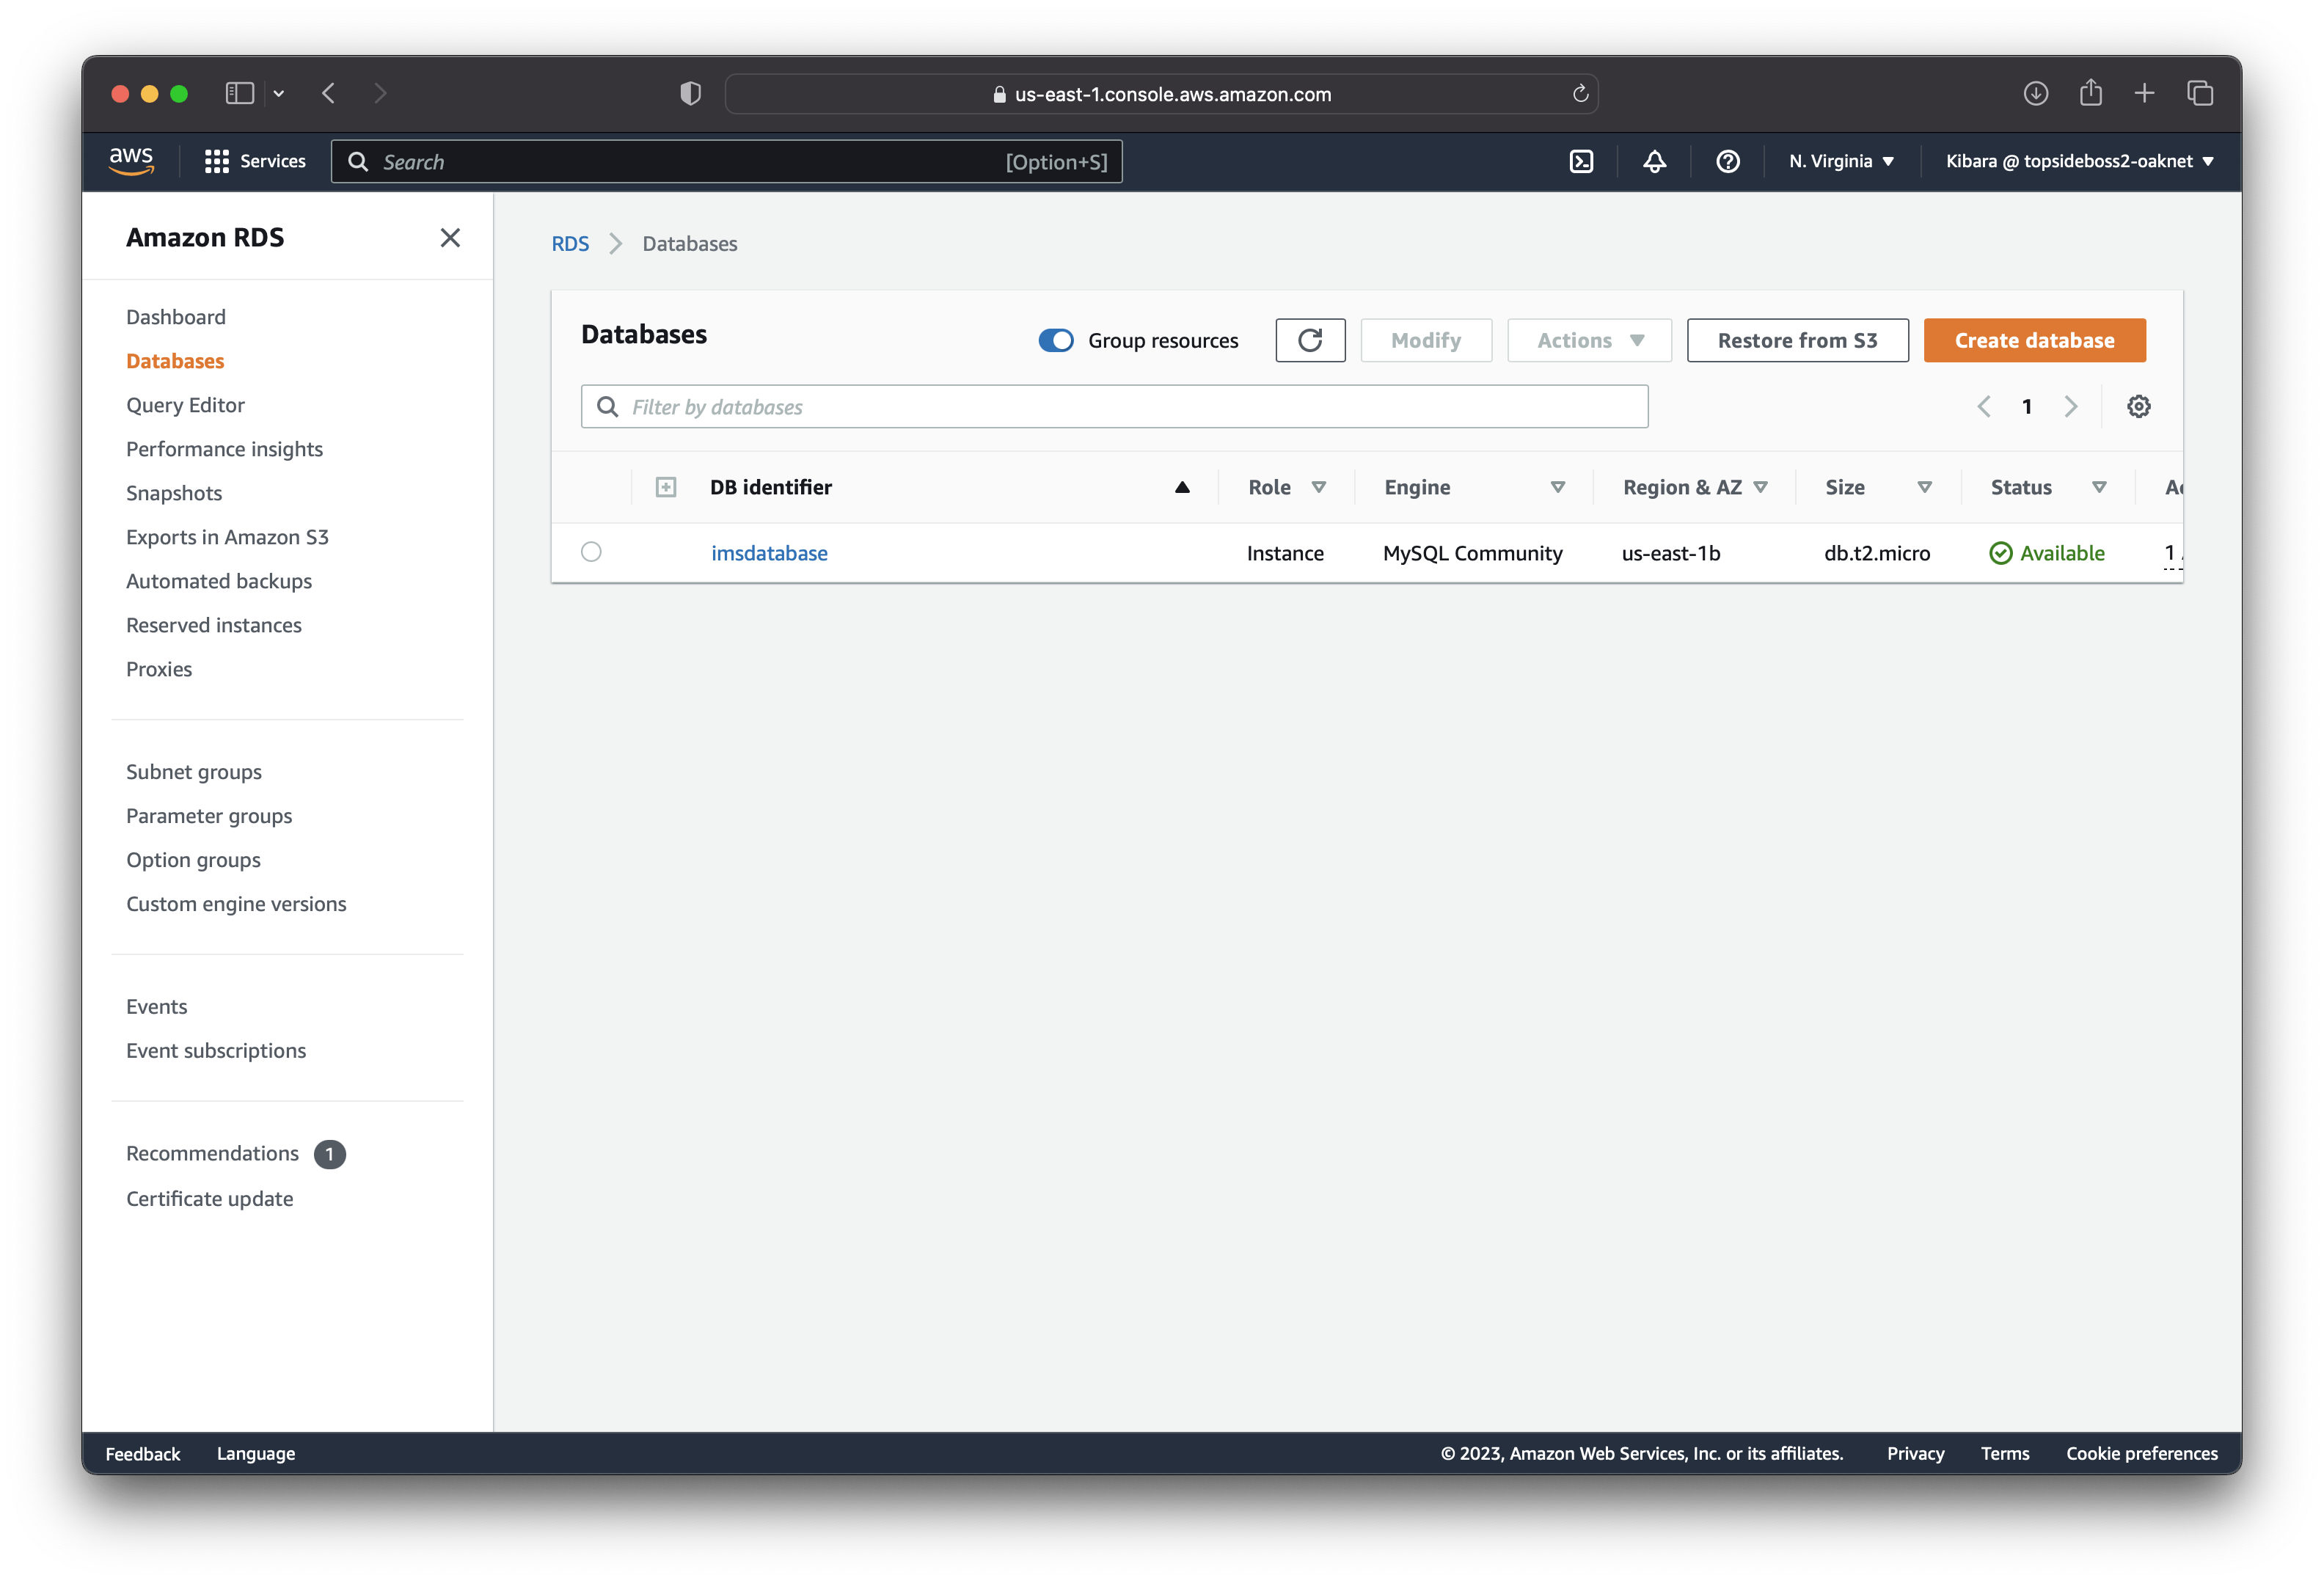
Create RDS Instance
We are using MySQL RDS database. We start by creating a subnet group for our database and specifying where our database can be accessed from. We will specify our database subnets in this subnet goup. That is "Private-DB-Subnet-AZ1" and "Private-DB-Subnet-AZ2"
Deploy Project
The next step is to setup an instance where we will deploy the backend of our IMS. We will ensure this app-server instance is up and running. Head over to the EC2 dashboard and create an instance (In my case I created an Ubuntu 20.04 t2.micro) that we will SSH into and run the following commands:
# Update instance
sudo apt update

# Install php 8.1 and respective packages
sudo apt install software-properties-common -y
sudo add-apt-repository ppa:ondrej/php -y
apt-get install php8.1 -y
apt-get install php8.1-{BCMath,Ctype,curl,DOM,Fileinfo,Mbstring,PDO,Tokenizer,XML,zip,mysql,fpm,gd} -y

# Confirm the php version installed is php8.1
php-v

# Navigate to the apache dir
cd /var/www/

# to rewrite requested URLs on the fly.
sudo a2enmod rewrite

# apache service restarting
systemctl restart apache2

# install mysql
apt-get install mysql-server -y
Create SSH public key that you will link to your VCM(Gitlab/Github) to allow you to clone your instance. In my case, the project was pushed to gitlab.
# navigate to the project dir
cd /var/www/intern-management-system-backend

# install composer
sudo apt-get install composer
composer install

# link storage and set permissions
php artisan storage: link
chmod -R 755 bootstrap/ public/ storage/
cd /var/www/
chown -R www-data:www-data intern-management-system-backend/

# create .env file and edit accordingly
cp .env.example .env

# generate key
php artisan key: generate

# create conf file for your site
vim /etc/apache2/sites-available/imsbackend.conf

# enable your site and disable default site
a2ensite msaas.conf
a2dissite 000-default.conf

# restart apache service
systemctl reload apache2
service apache2 restart

# connect to your database from your instance
mysql -u root -h imsdatabase.************.us-east-1.rds.amazonaws.com -p *******
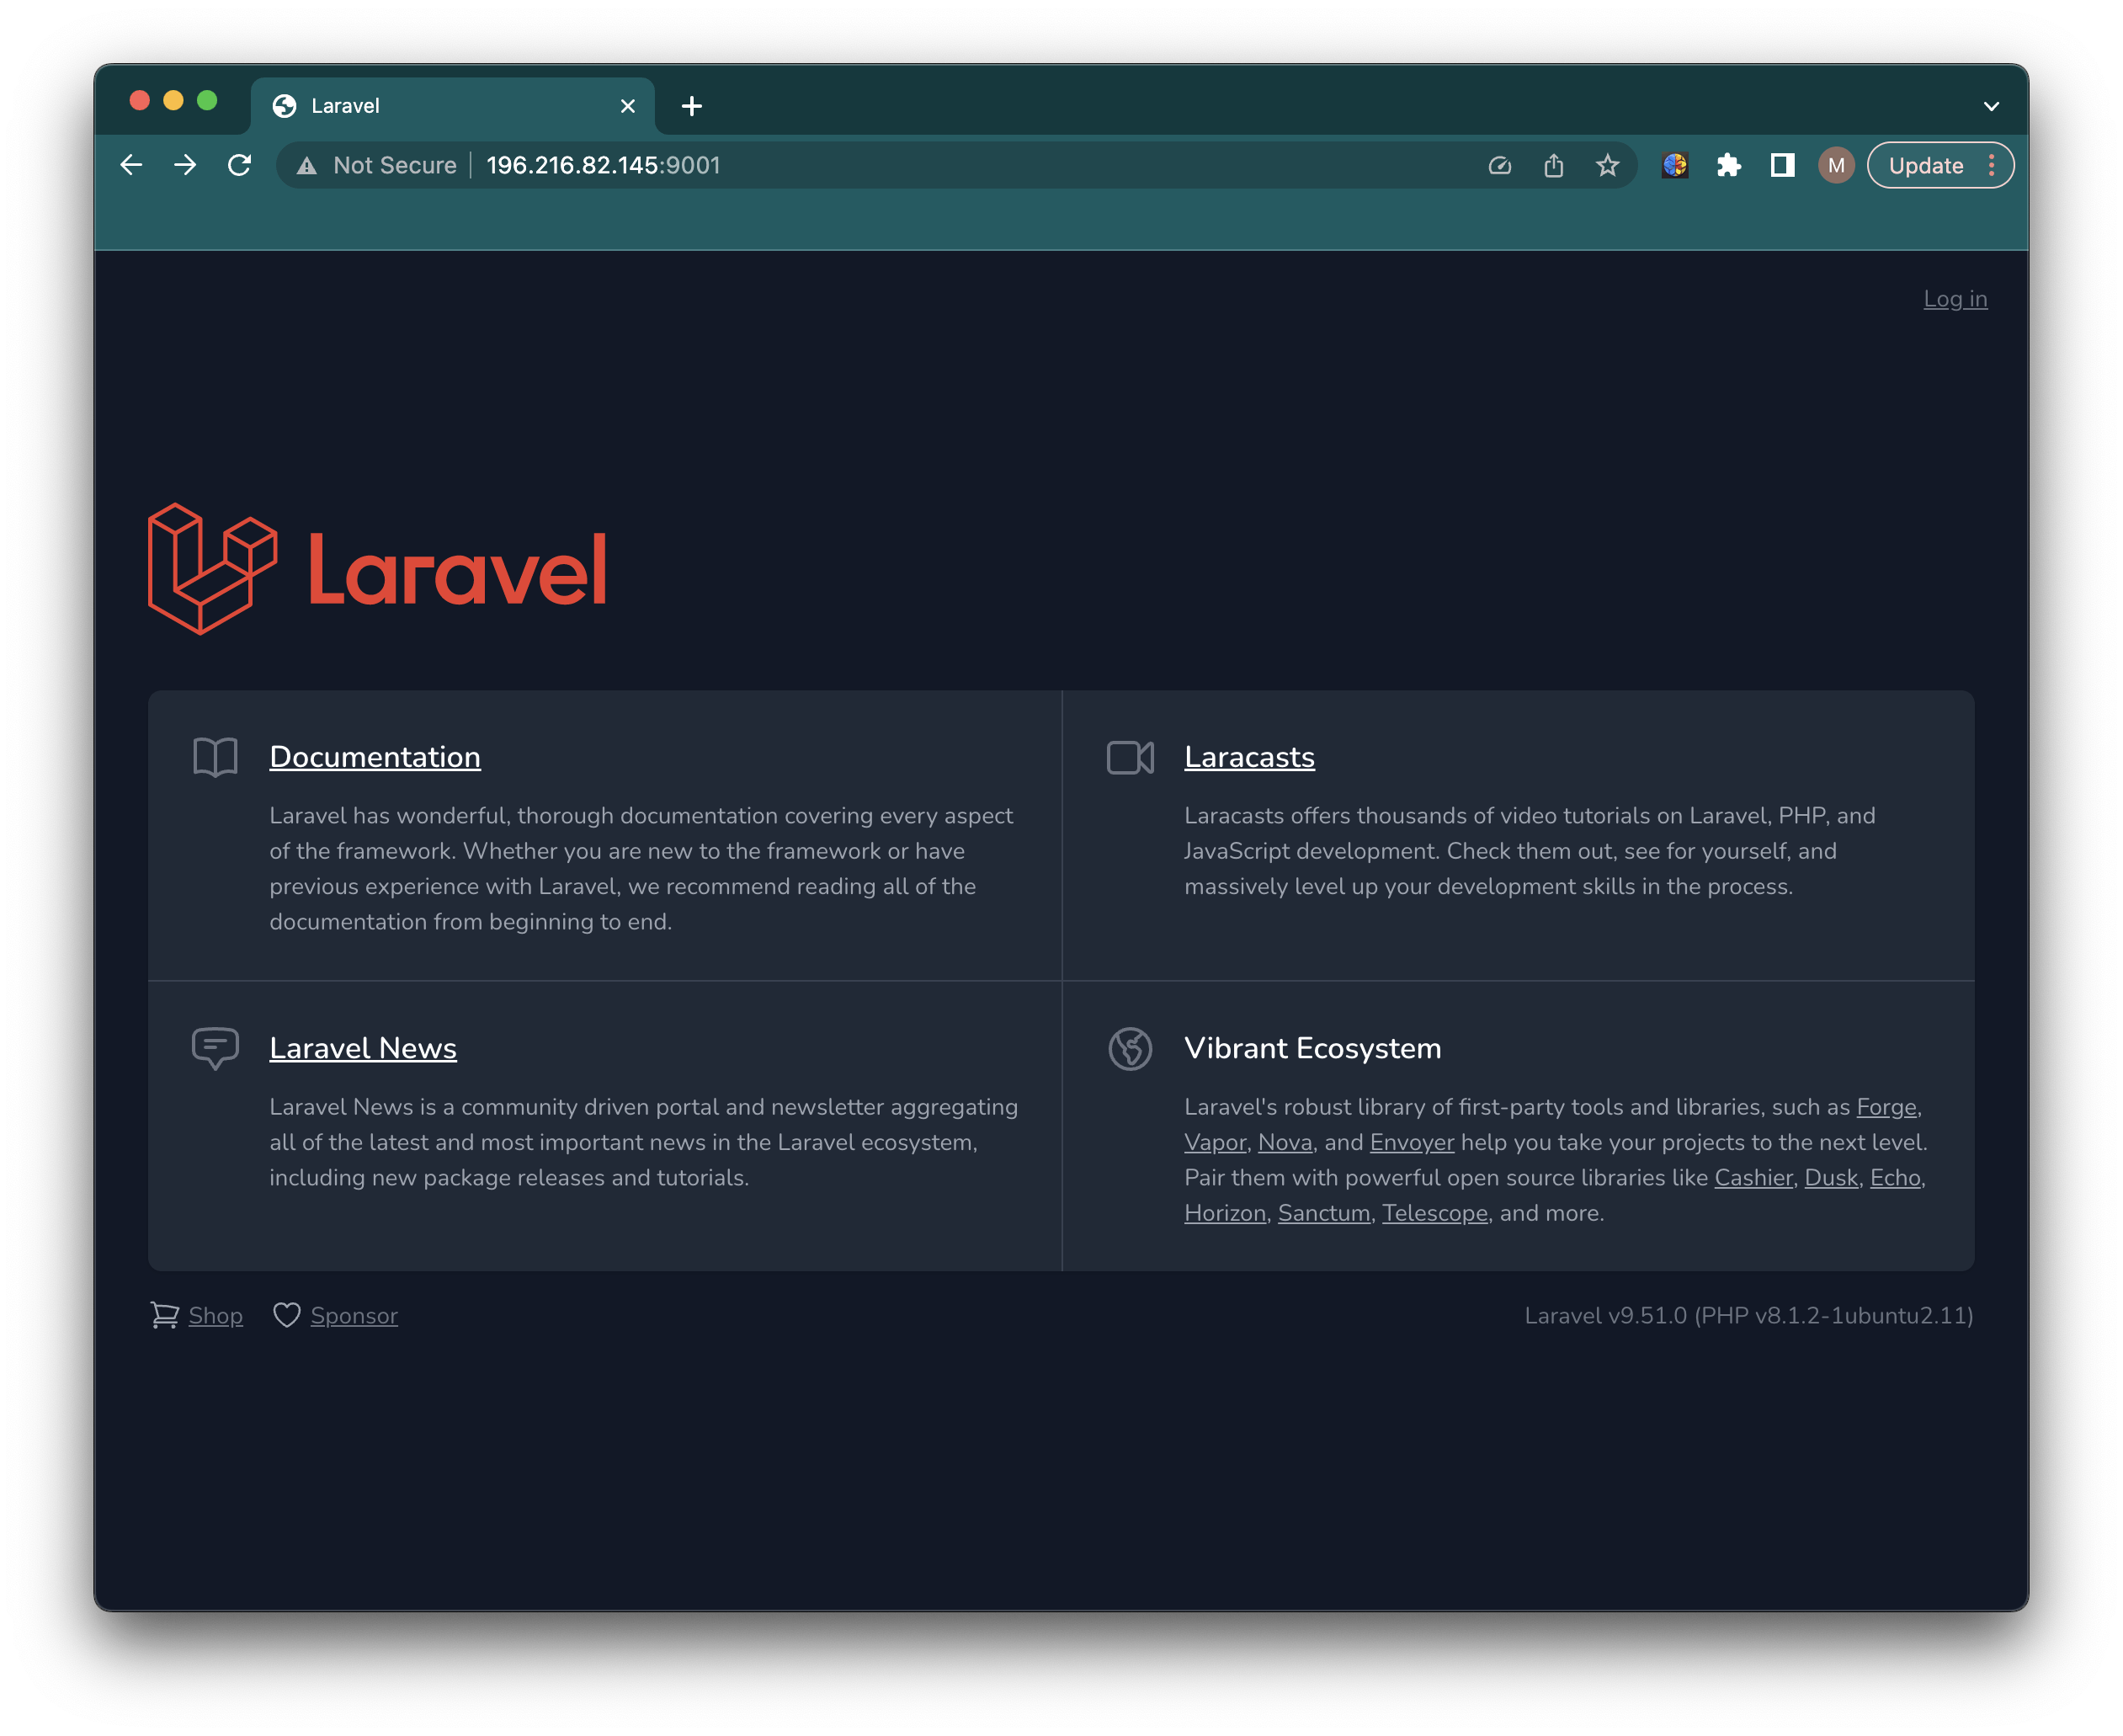
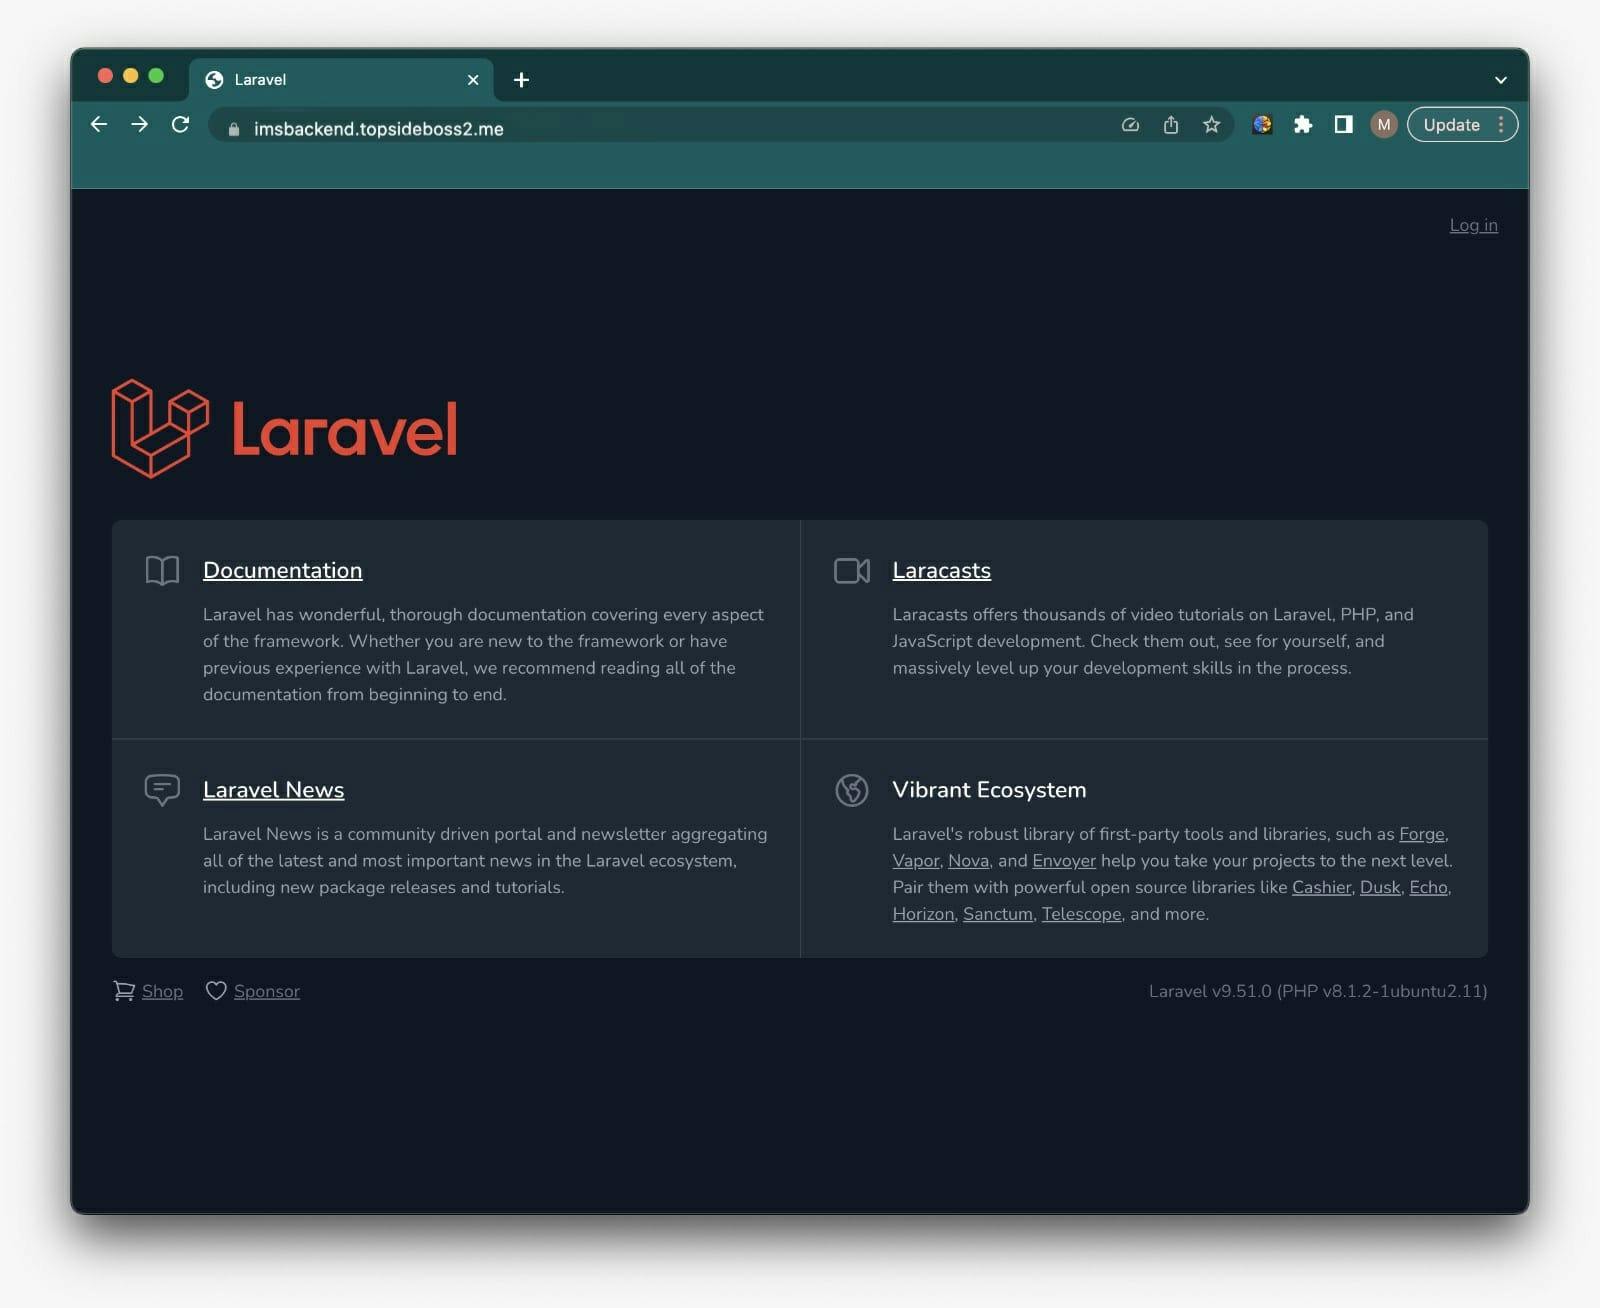
Now your ec2 instance backend should be accessible from your web browser. To access the website, copy the ipv4 address of the setup server and paste it in a new tab in your web browser.
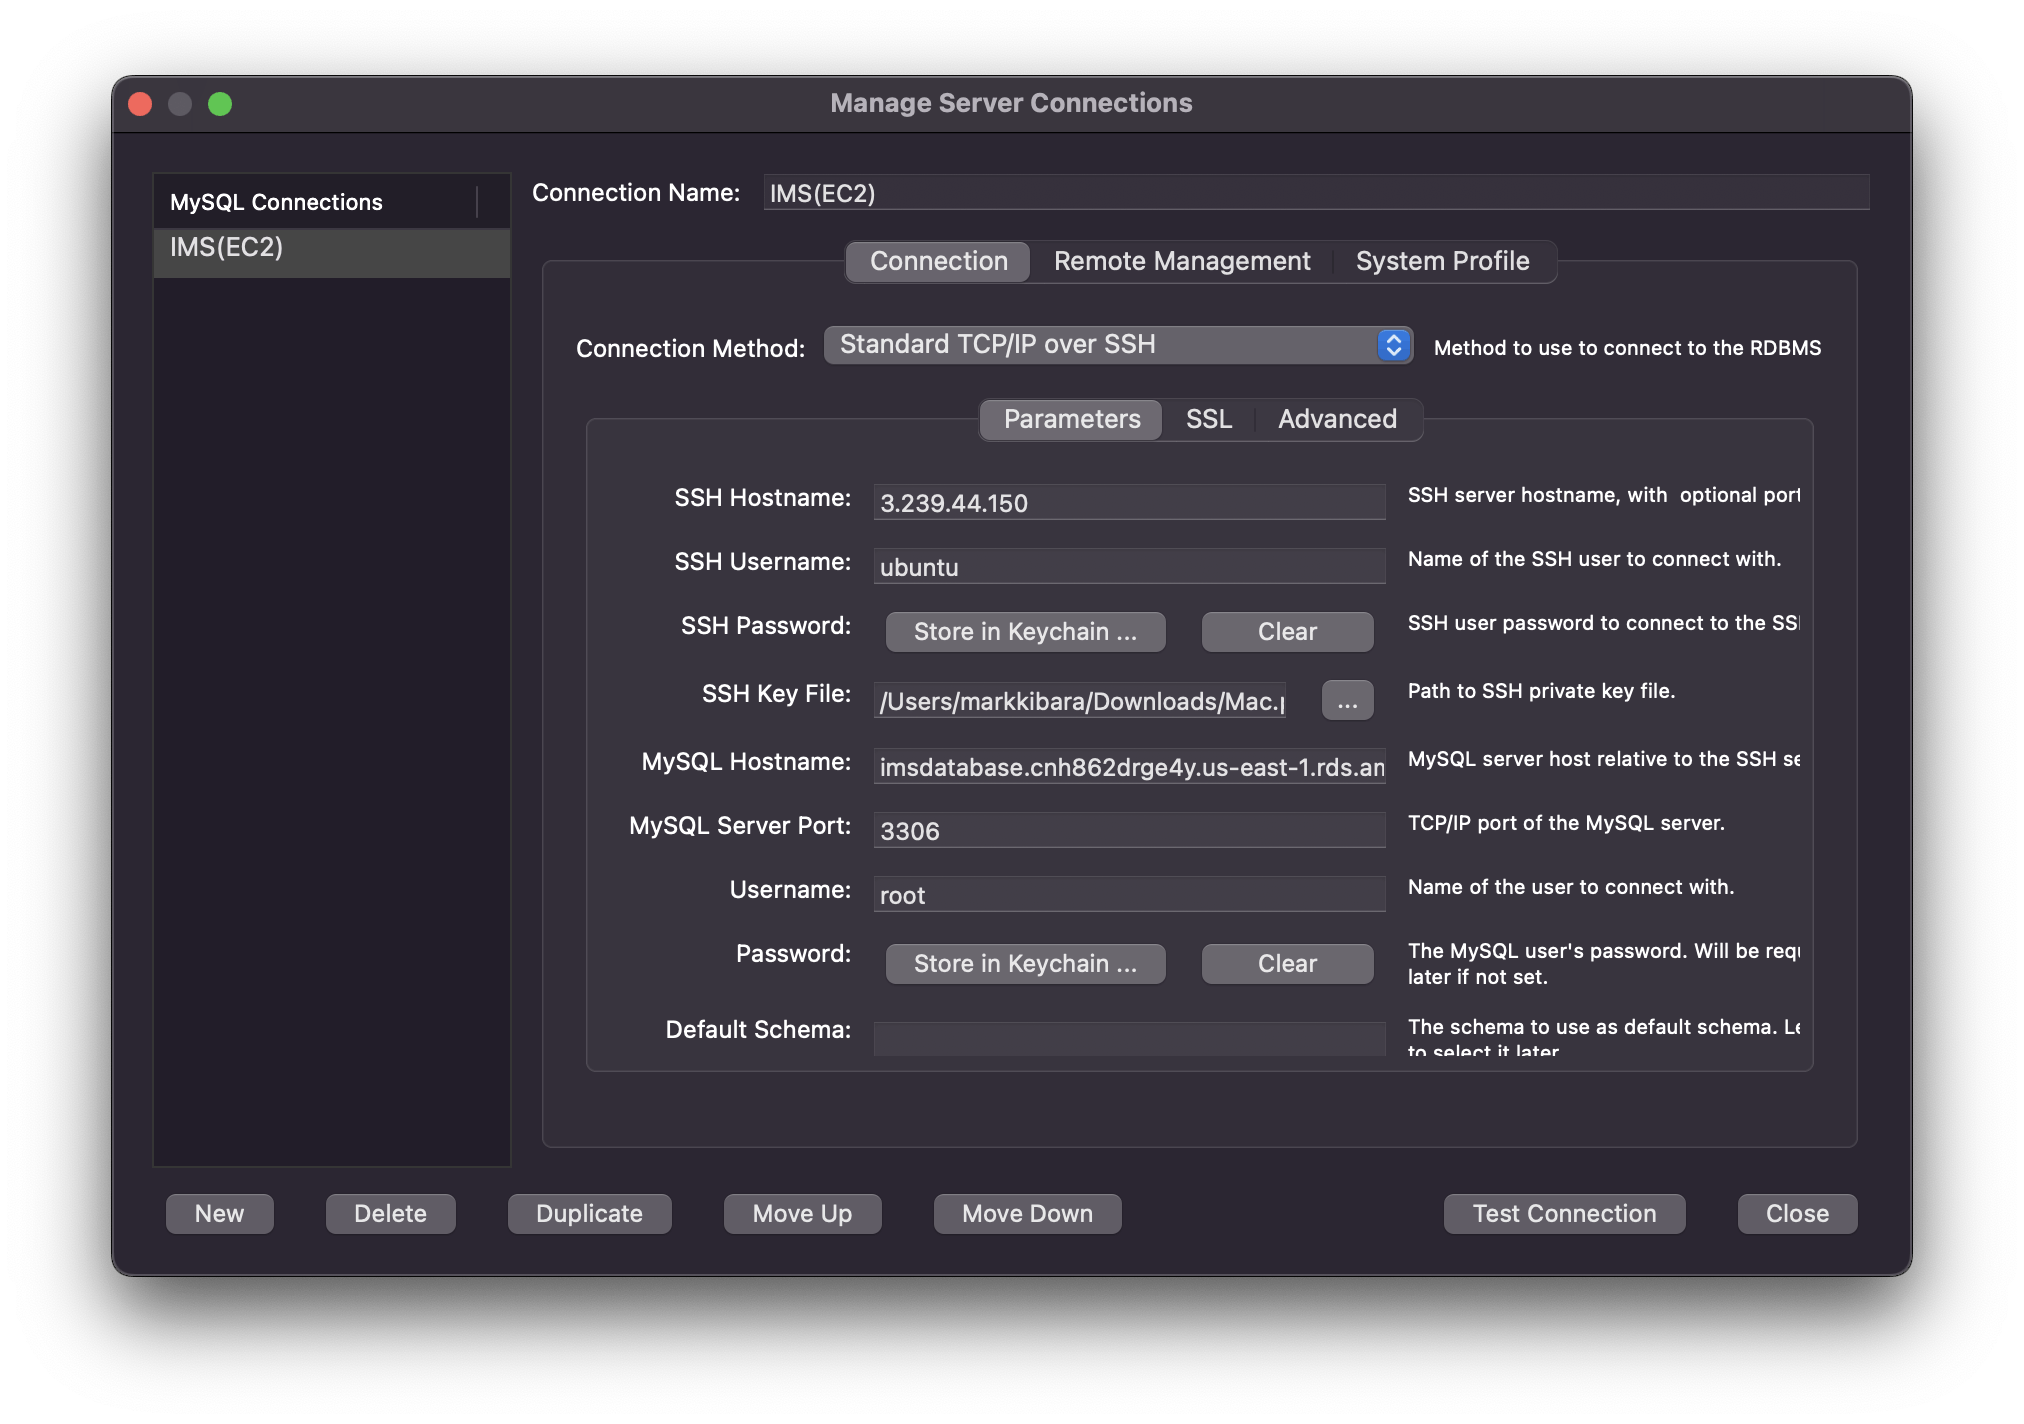
Now let's access the database using this instance. I used MySQL Workbench to import data to my database through this instance. SSH hostname is this EC2 instance, and because it is in the "Server Security Group" it can communicate with the RDS database we created earlier.
Create an Amazon AMI
Now we can create an AMI from our app-server so we can use it to launch new instances.
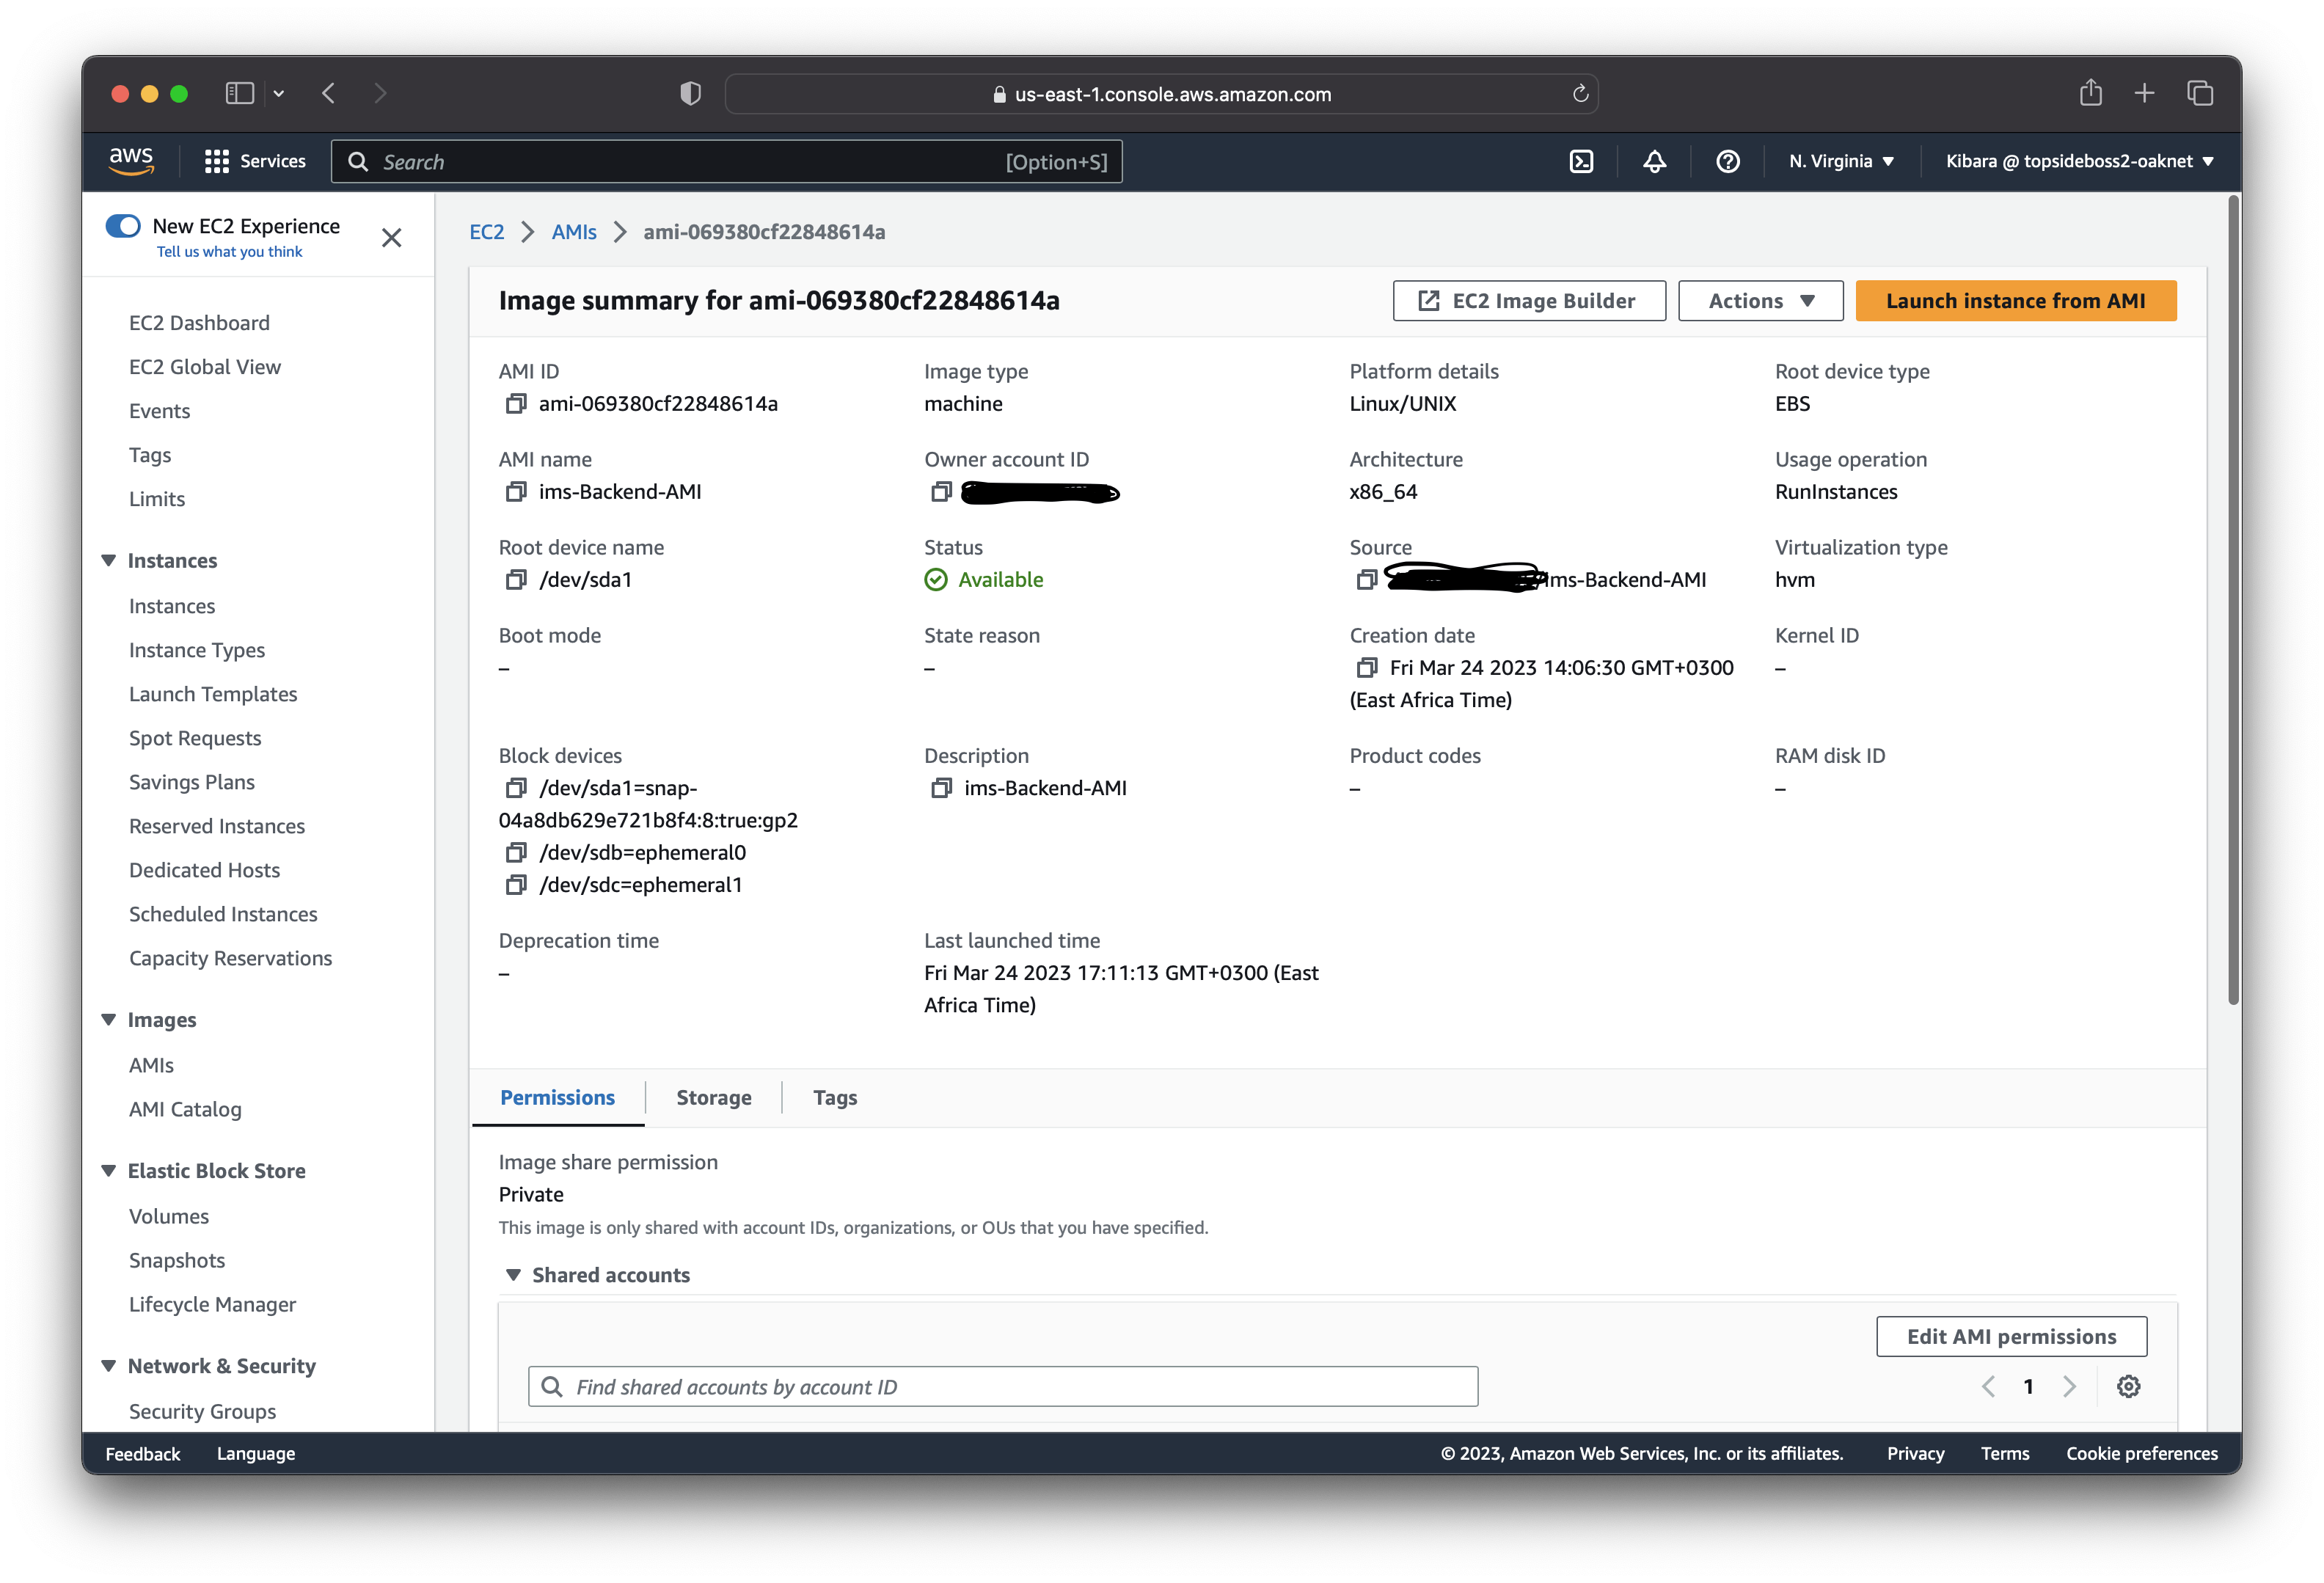
Launch app-server instances in the "Private-App-Subnet-AZ1" and "Private-App-Subnet-AZ2" located in our availability zones using this AMI we just created. After that terminate the backend EC2 instance we used to create the AMI.

Now we have two app-servers that unfortunately, we cannot access because they are in private app subnets. What can we do?
Create an Application Load Balancer
We will create a load-balancer that will help us route traffic to instances in our private app subnets. But first, we create a target group that has our app-servers as targets.
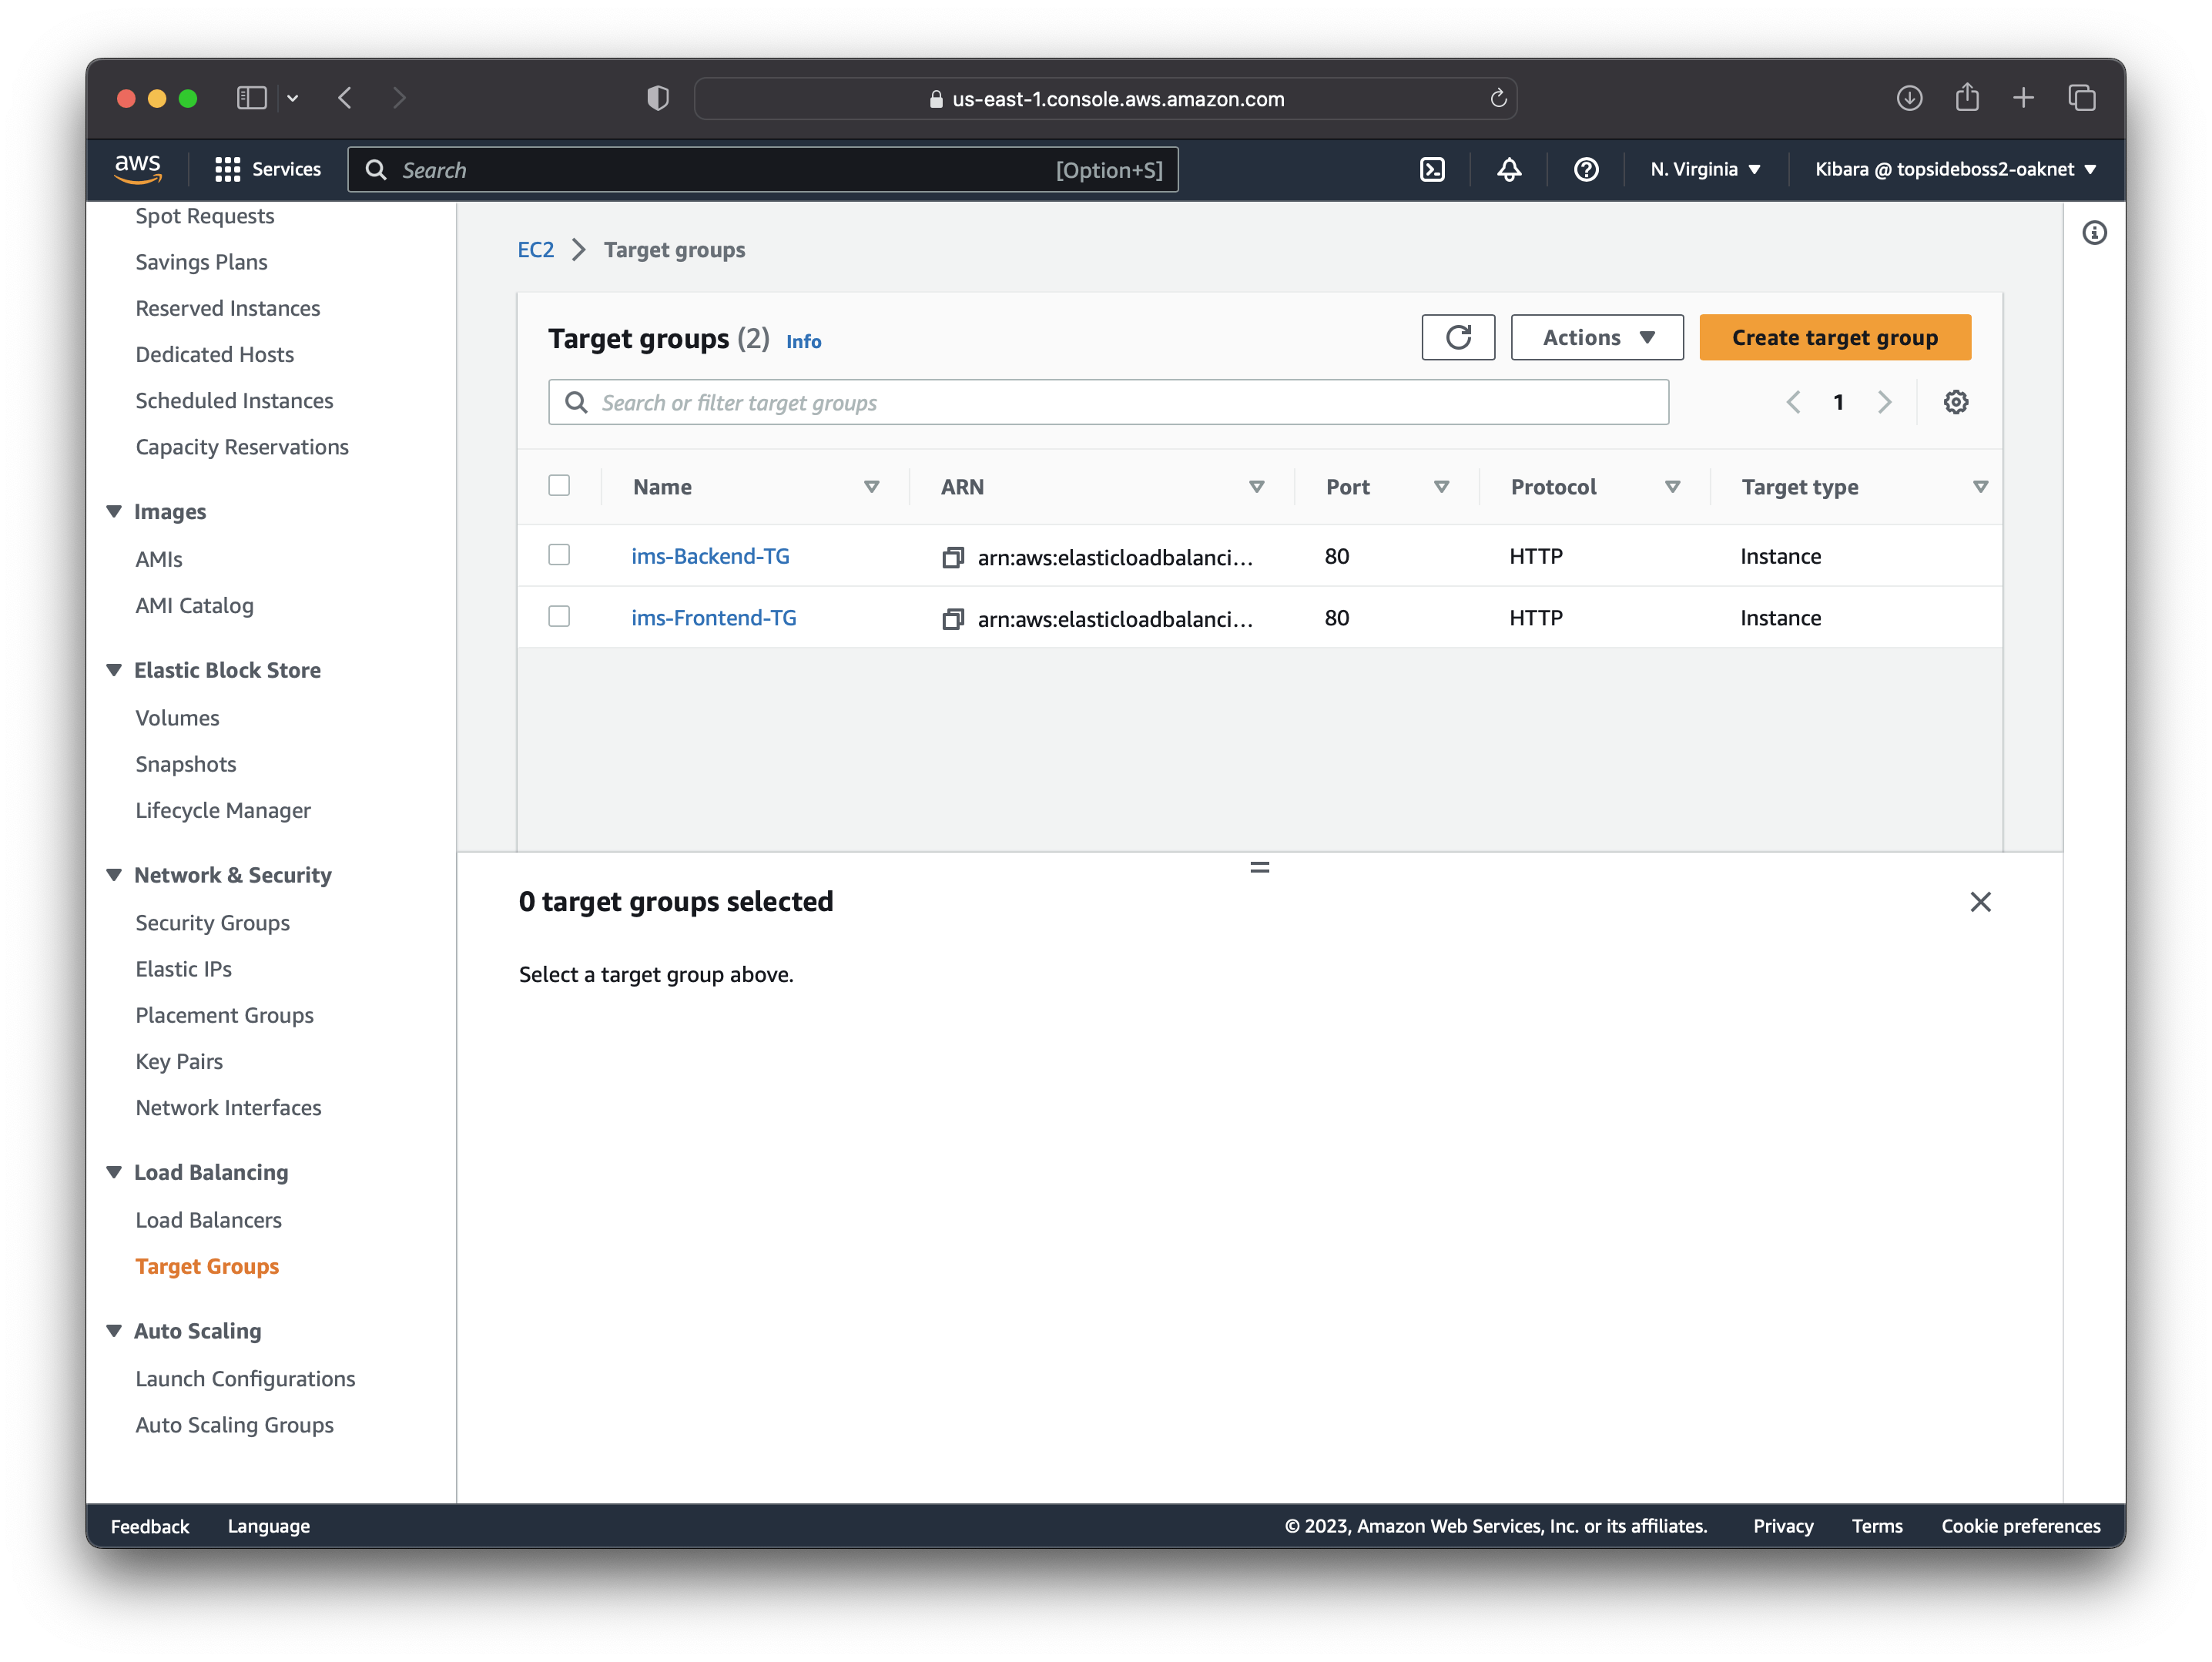
Using this target group, we can create an ALB that will be located in our us-east-1a and us-east-1b availability zones, configure port 80 as our listeners, security group is "ALB Security group" and target group is the one we created above. We can even copy the DNS name linked to our load-balancer and load it in your web-browser to confirm our app-servers are working.

Create a record set in Route 53
In order to access our app-servers with a dns-name, we need to configure a record set in Route 53. In our hosted zone, we select our domain and create a new record.
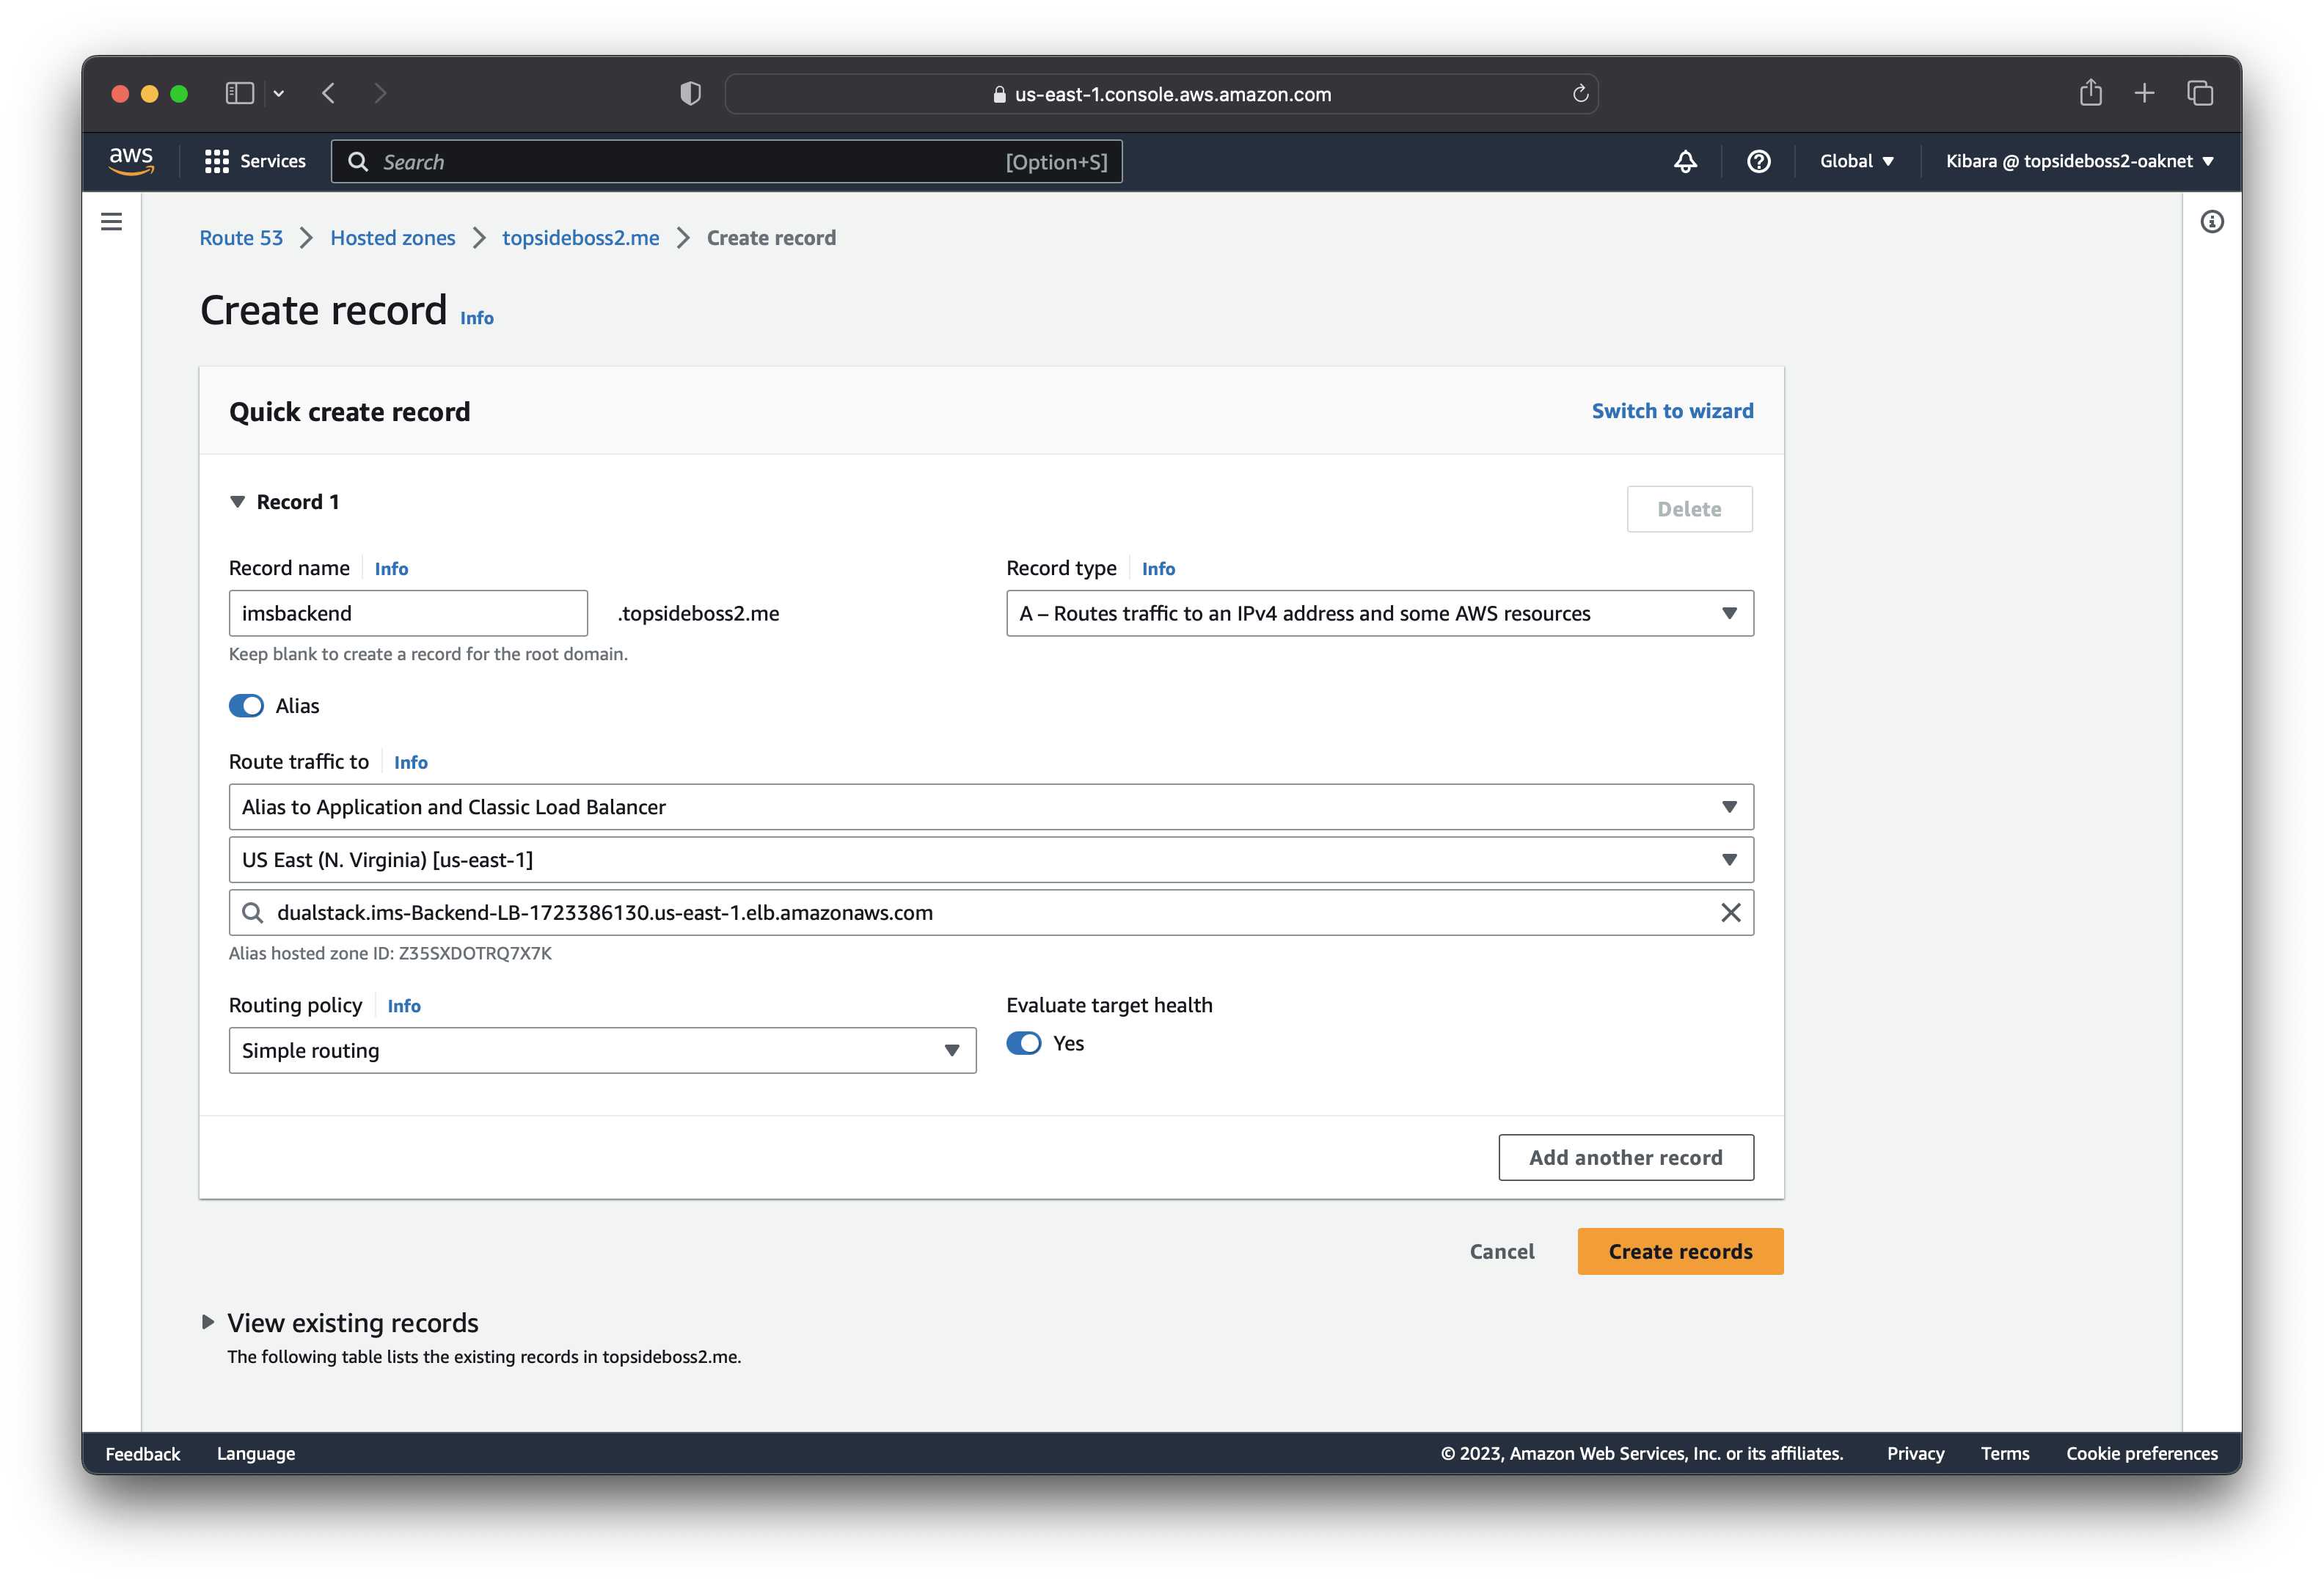
With our new domain name:
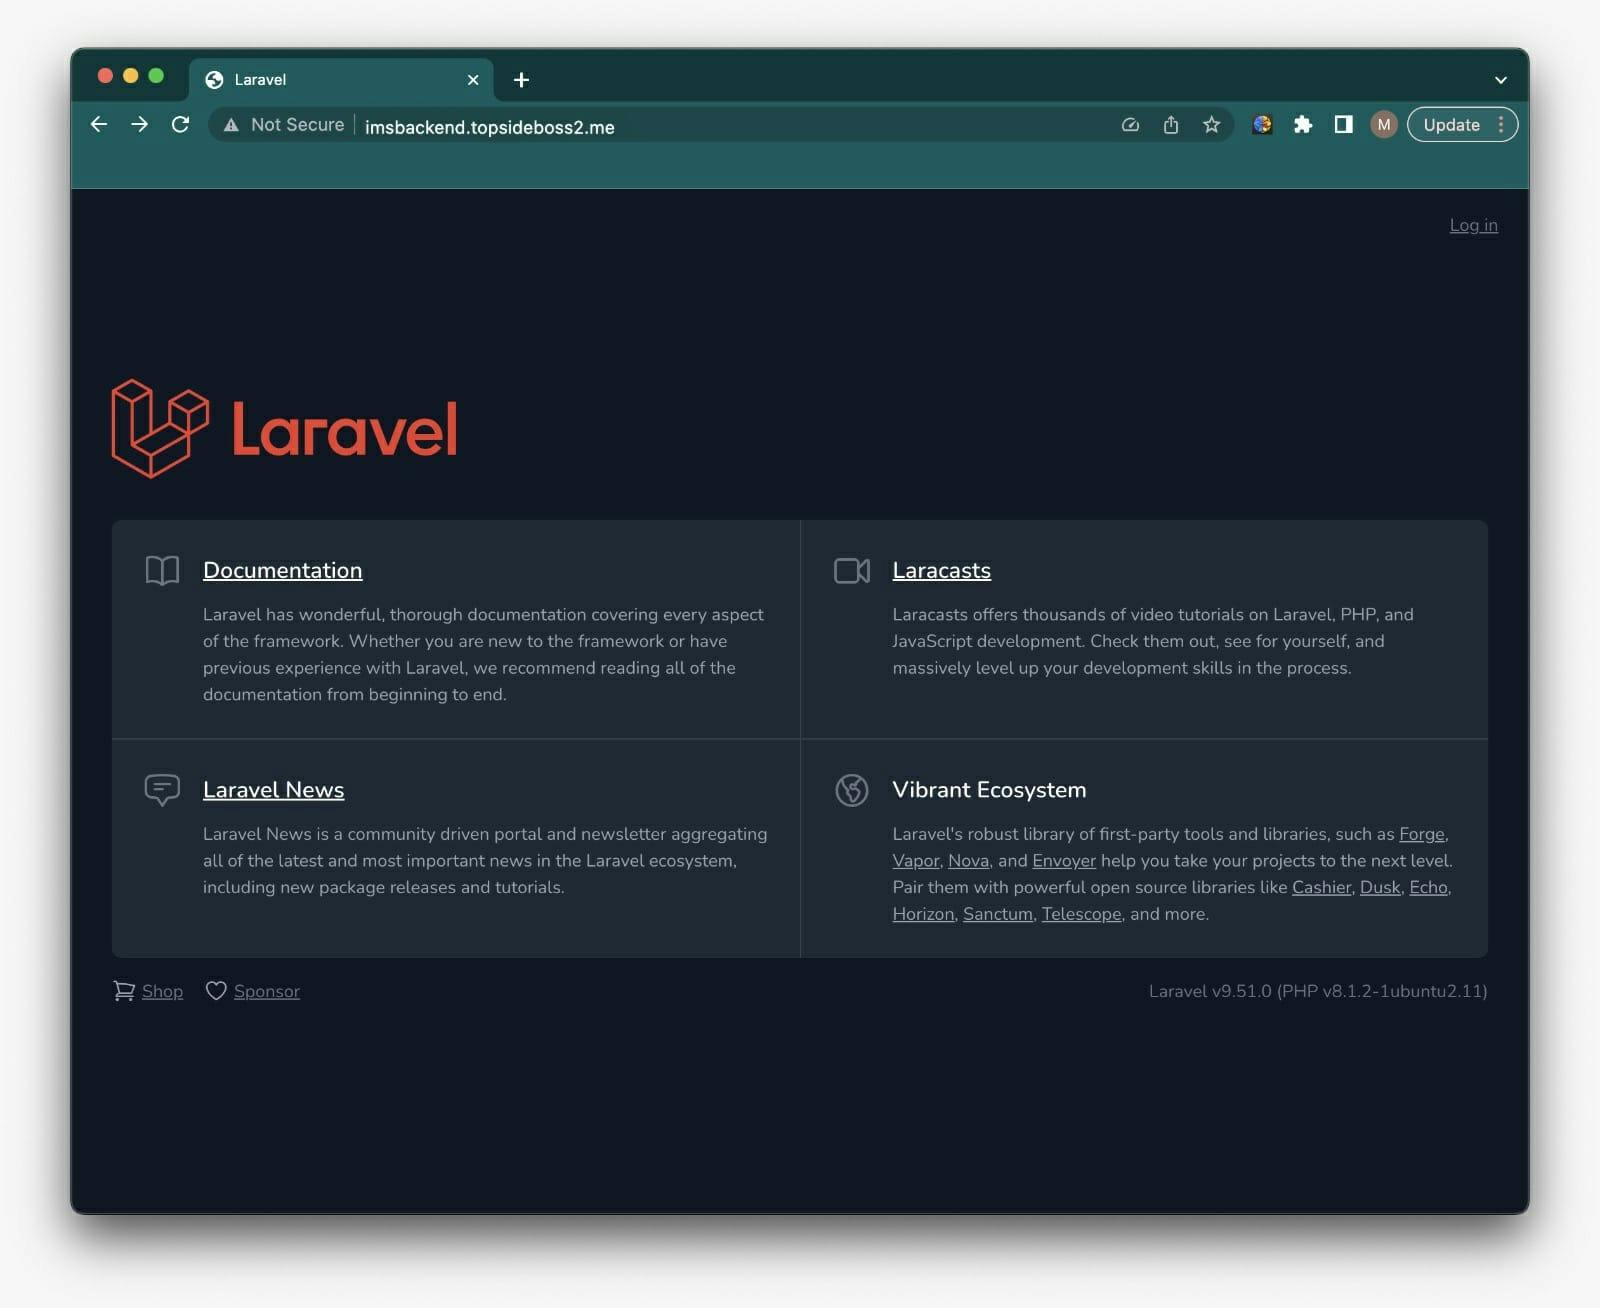
Register for an SSL certificate in Certificate Manager
To encrypt all communication for our app-server, we need an SSL certificate that we generate from Certificate Manager. Type the domain name you just assigned to your app-server and regularly confirm whether the status of your certificate changed to "issued".
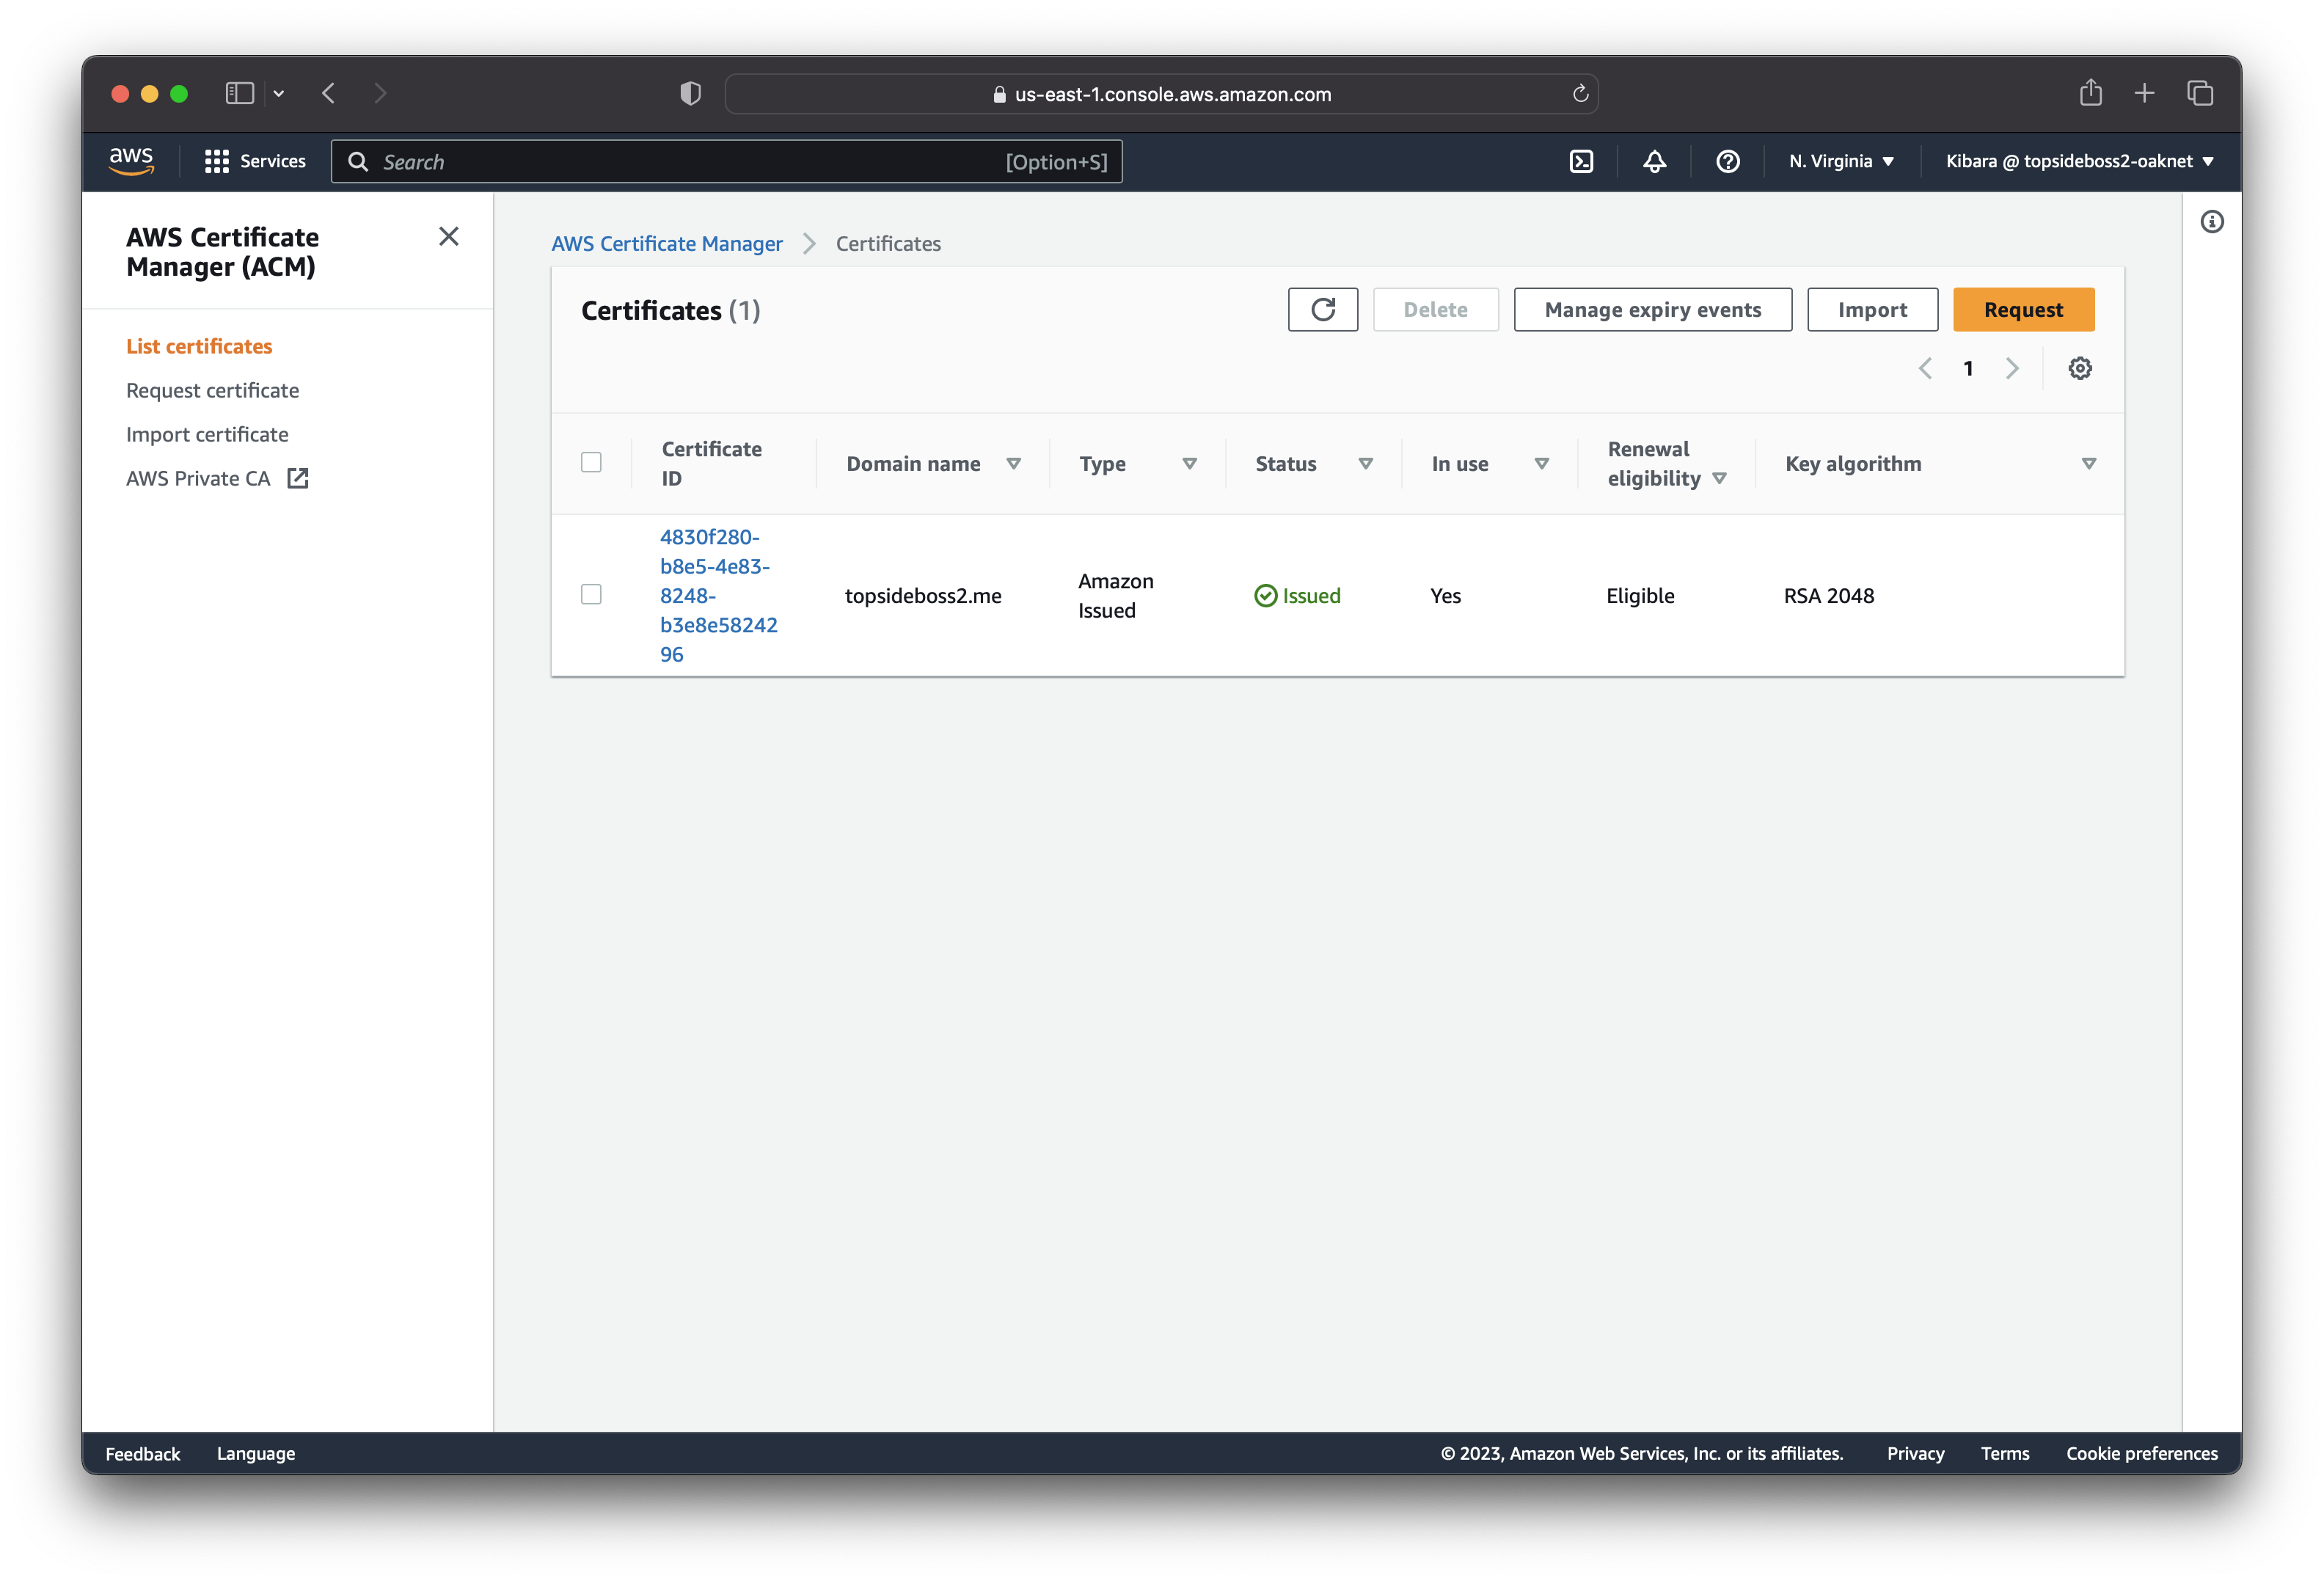
NB: Do not forget to add a HTTPS listener on the load balancer and edit the HTTP listener to redirect traffic to HTTPS.
Now our app-server is running on our domain name and it is secure.
Create an Auto-Scaling Group
First we terminate the app-servers that we created manually. Create a launch template that contains the configurations that our instance will use to launch new instances.
With this new template, we can create an Auto-Scaling Group in the "Private-App-Subnet-AZ1" and "Private-App-Subnet-AZ2". Configure the ASG to us-east-1a and us-east-1b availability zones.
Repeat the steps above for our web-server.
- Deploy Project
# Update instance
sudo apt update

# install apache
apt-get install apache2

# Navigate to the apache dir
cd /var/www/

# ssh-keygen
ssh-keygen -t rsa

# clone our repository
git clone -b Frontend-Design <url> intern-management-system-frontend

# to rewrite requested URLs on the fly.
sudo a2enmod rewrite

# apache service restarting
systemctl restart apache2

# cd into repo dir
cd /var/www/intern-management-system-frontend

# install nvm
curl -o- https://raw.githubusercontent.com/nvm-sh/nvm/v0.39.3/install.sh | bash
. ~/.nvm/nvm.sh

# install the required version of node
nvm install v18.13

# run nvm install
npm install

# create the config file for the site
nano /etc/apache2/sites-available/imsfrontend.conf

# enable the site and disable the default
a2ensite imsfrontend.conf
a2dissite 000-default.conf

# restart apache service
systemctl reload apache2
service apache2 restart

# run build
npm run build
Create Amazon AMI
Create Application Load Balancer
Create a record set in Route 53
Use the same SSL certificate from Certificate Manager
- Create an Auto-Scaling Group

In conclusion, building a three-tier architecture on AWS provides a solid foundation for developing scalable, secure, and highly available applications. By using AWS's comprehensive set of tools and services, developers can easily design and deploy applications that can adapt to changing business needs. In this article, we've discussed the key components of each tier, including the presentation, application, and database tiers. We've also outlined some best practices to follow when designing and deploying a three-tier architecture, such as implementing autoscaling groups and leveraging managed services. With this knowledge, you can confidently build a scalable and reliable application on AWS using the three-tier architecture.