

AWS Cloud Project Bootcamp
Week-1 Homework Challenge - How to Deploy Frontend & Backend Containers on an EC2 Instance

Telecommunication and Information Engineering student passionate about Cloud and DevOps. Join me as I document my journey "Above The Clouds".

AWS Ontario Virtual User Group's Cloud Project Bootcamp is a lot of things but easy isn't one of them. And for that, I am grateful to the organizers/instructors. In fact, the only appropriate response from Tintin should've been "Tell me about it, Cap".
Where we are now, is it week 6? Week 7? I'm gonna be honest, I lost count at week 4 guys. If you don't believe me? I'll let this tweet by Andrew Brown do the talking:
Now more than ever, I understand how easy it is for participants to fall behind. And in a bid to help nobody feel left out, I will try to share how I was able to complete some homework challenges throughout the course of the bootcamp. Let's get started:
This week, I take us back to Week 1's homework challenge: Launch an EC2 instance that has docker installed, and pull a container to demonstrate you can run your own docker processes. During week 1, we created a dockerfile for both our frontend and backend containers and a docker-compose.yml file as well. These are what we will use to build our images. Using these images we will build, we will then create a running instance(known as a container) on our EC2 instance.
NB: I will not be repeating what is taught on the bootcamp (primarily because I know I can't even do half the job Andrew Brown and the guest instructors do) so I will advise you to go and watch the linked videos at the end of this article for further understanding of what is going on.
Creating an EC2 Instance
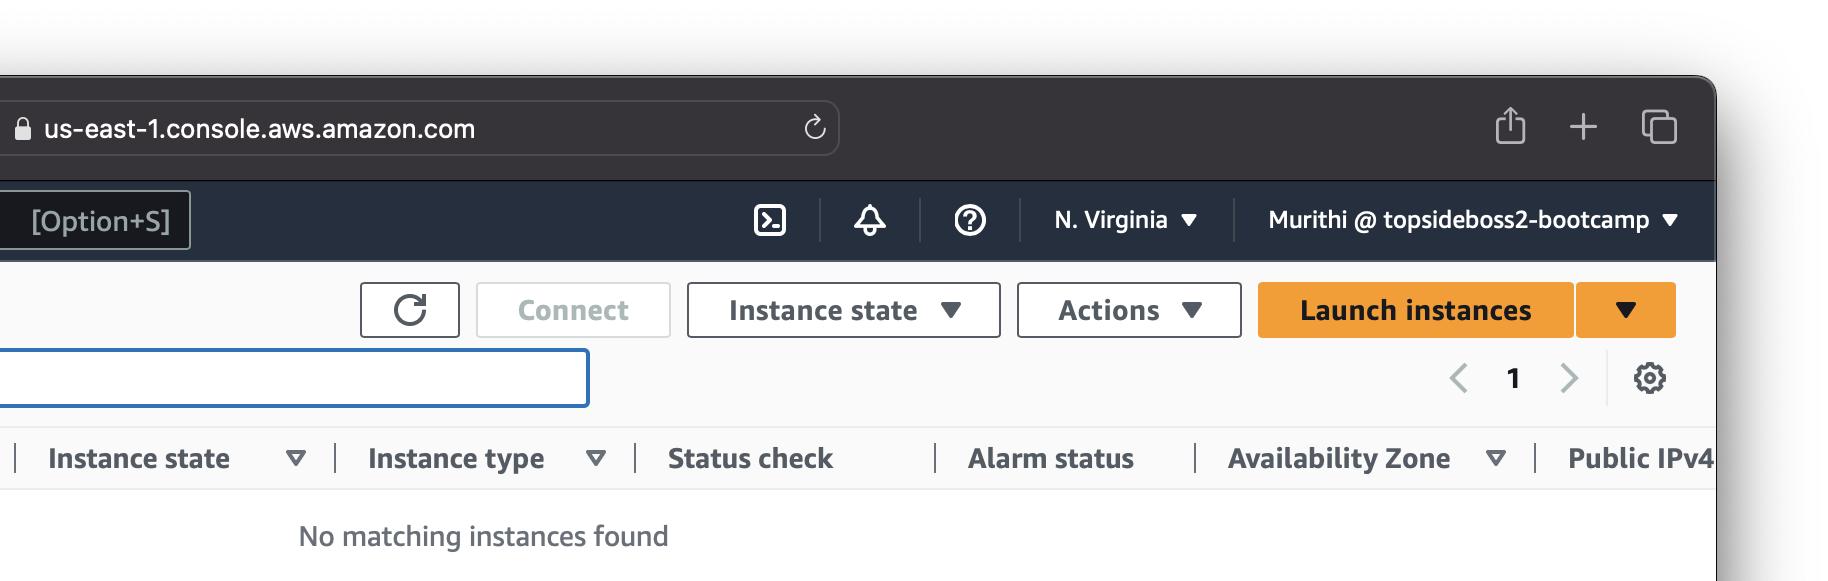
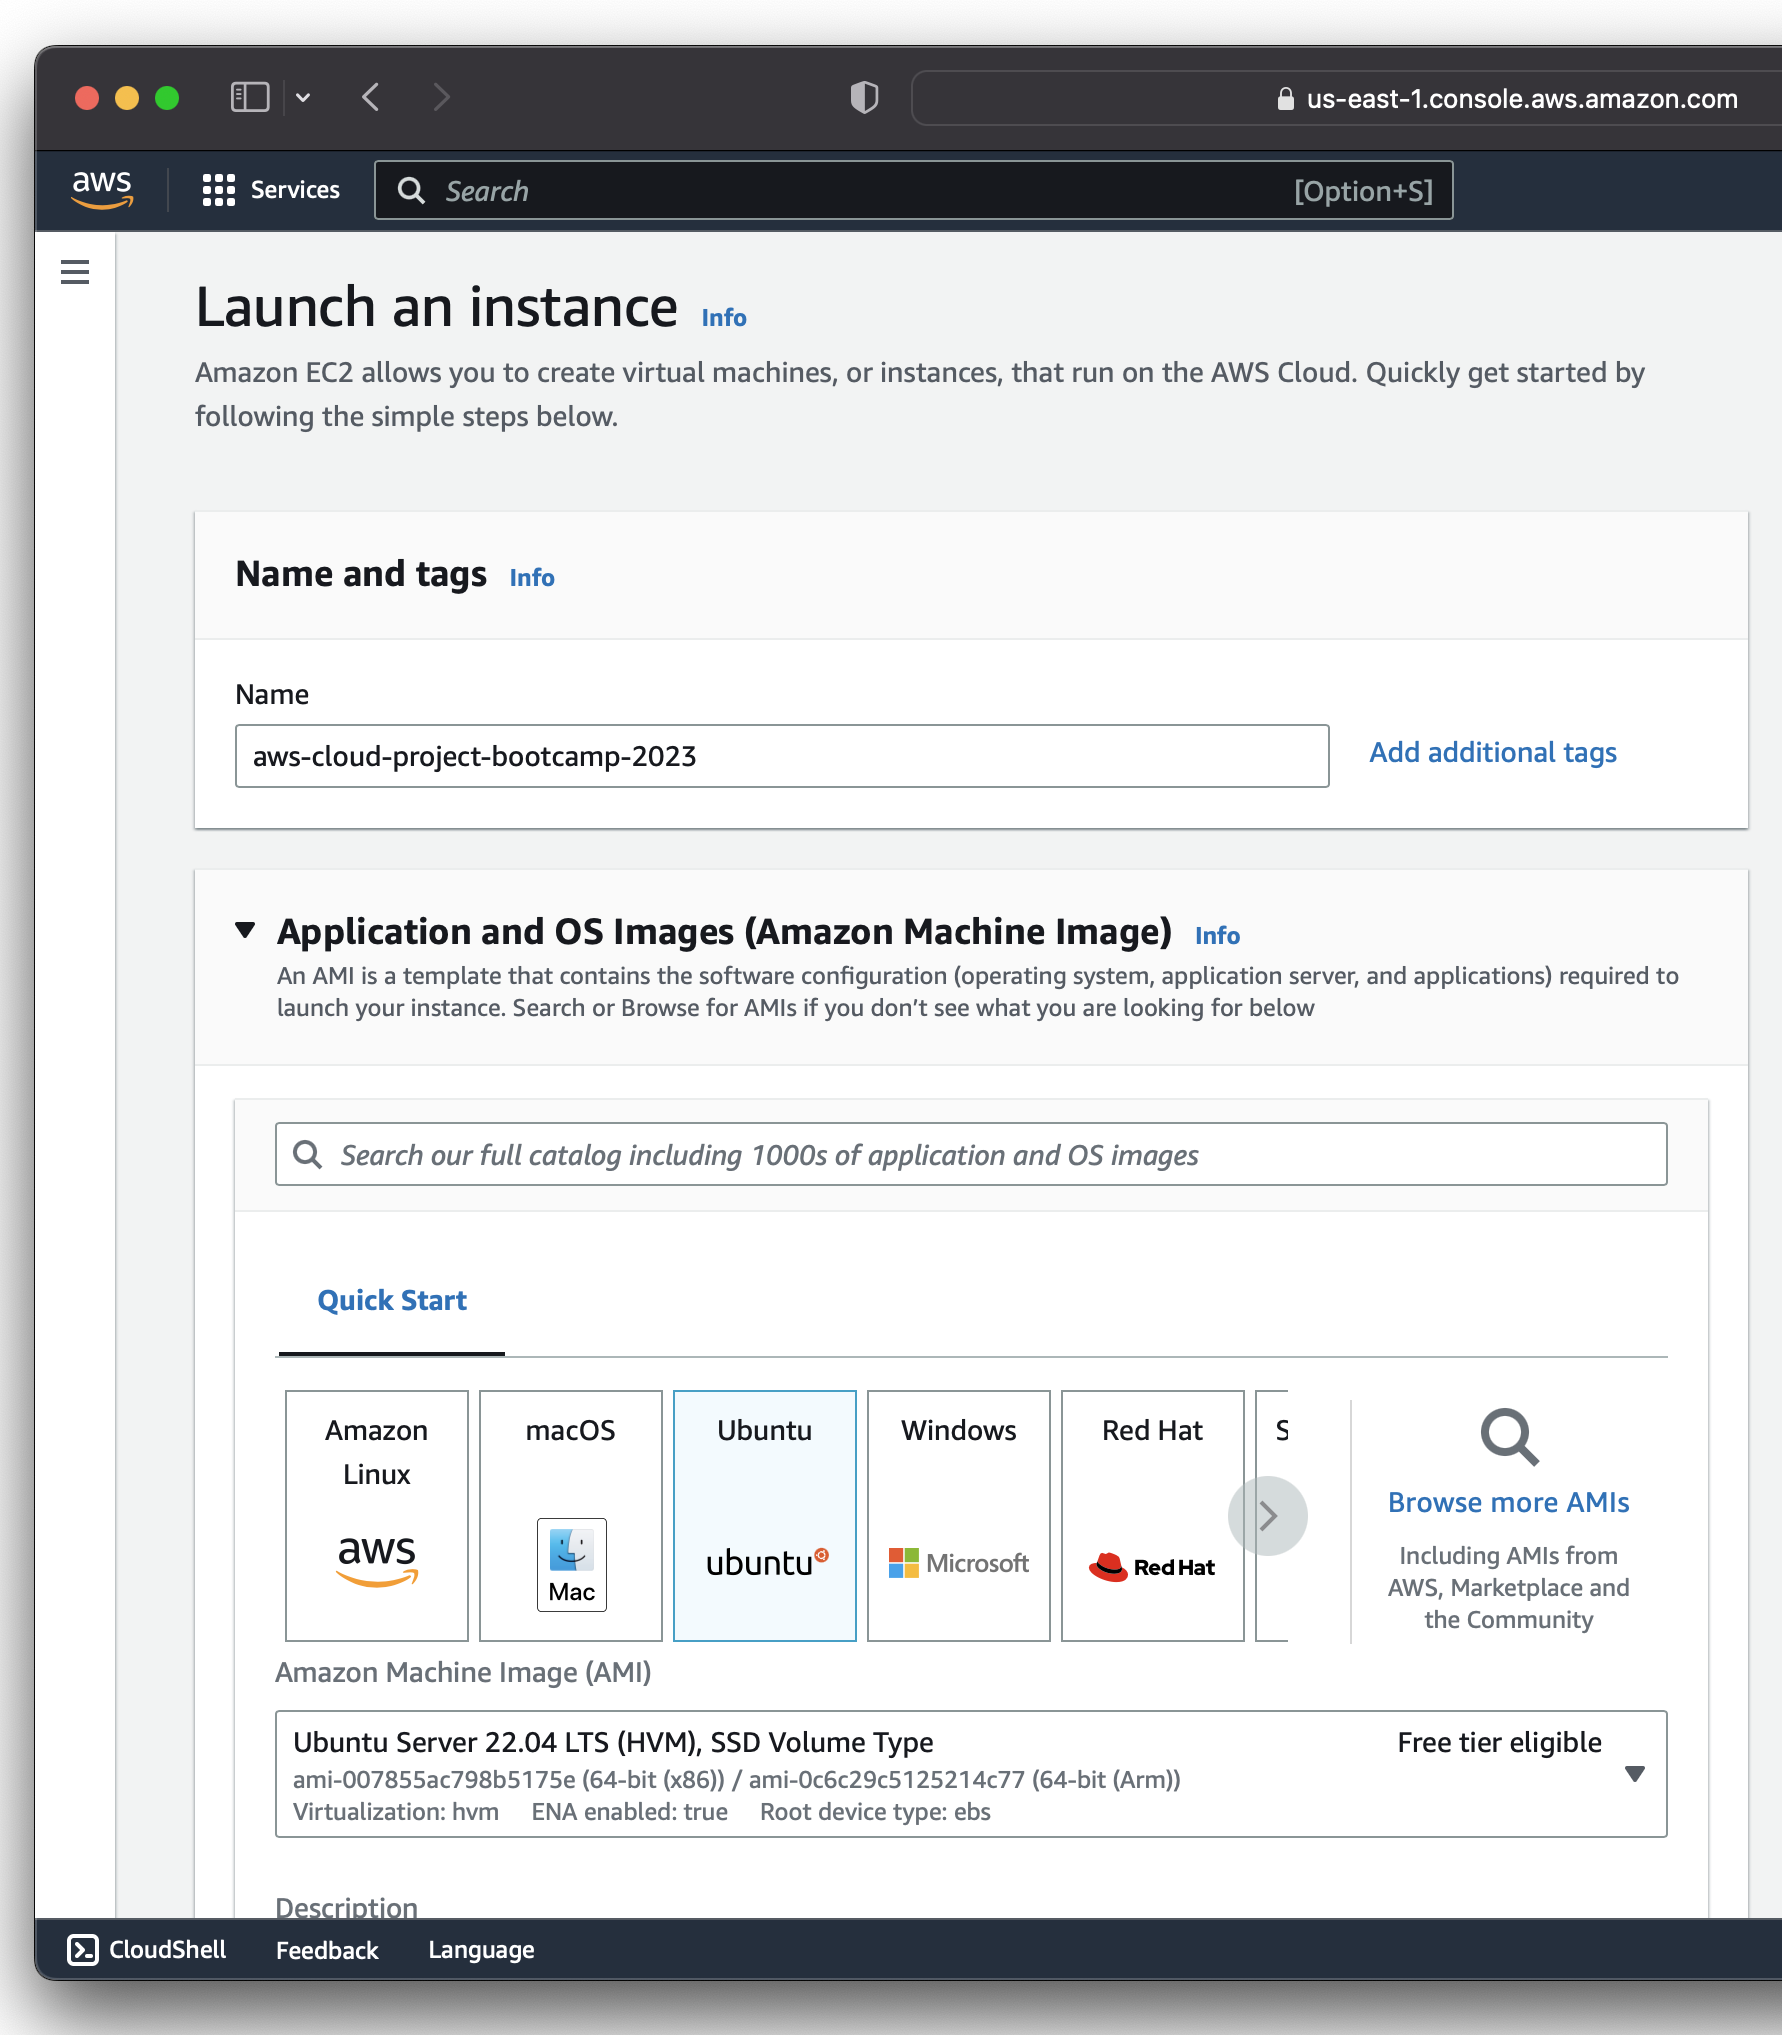
Log into the AWS Console (Use an IAM user account for best security practices) and navigate to the EC2 Instance console. Under Instances, click on the Launch Instance.
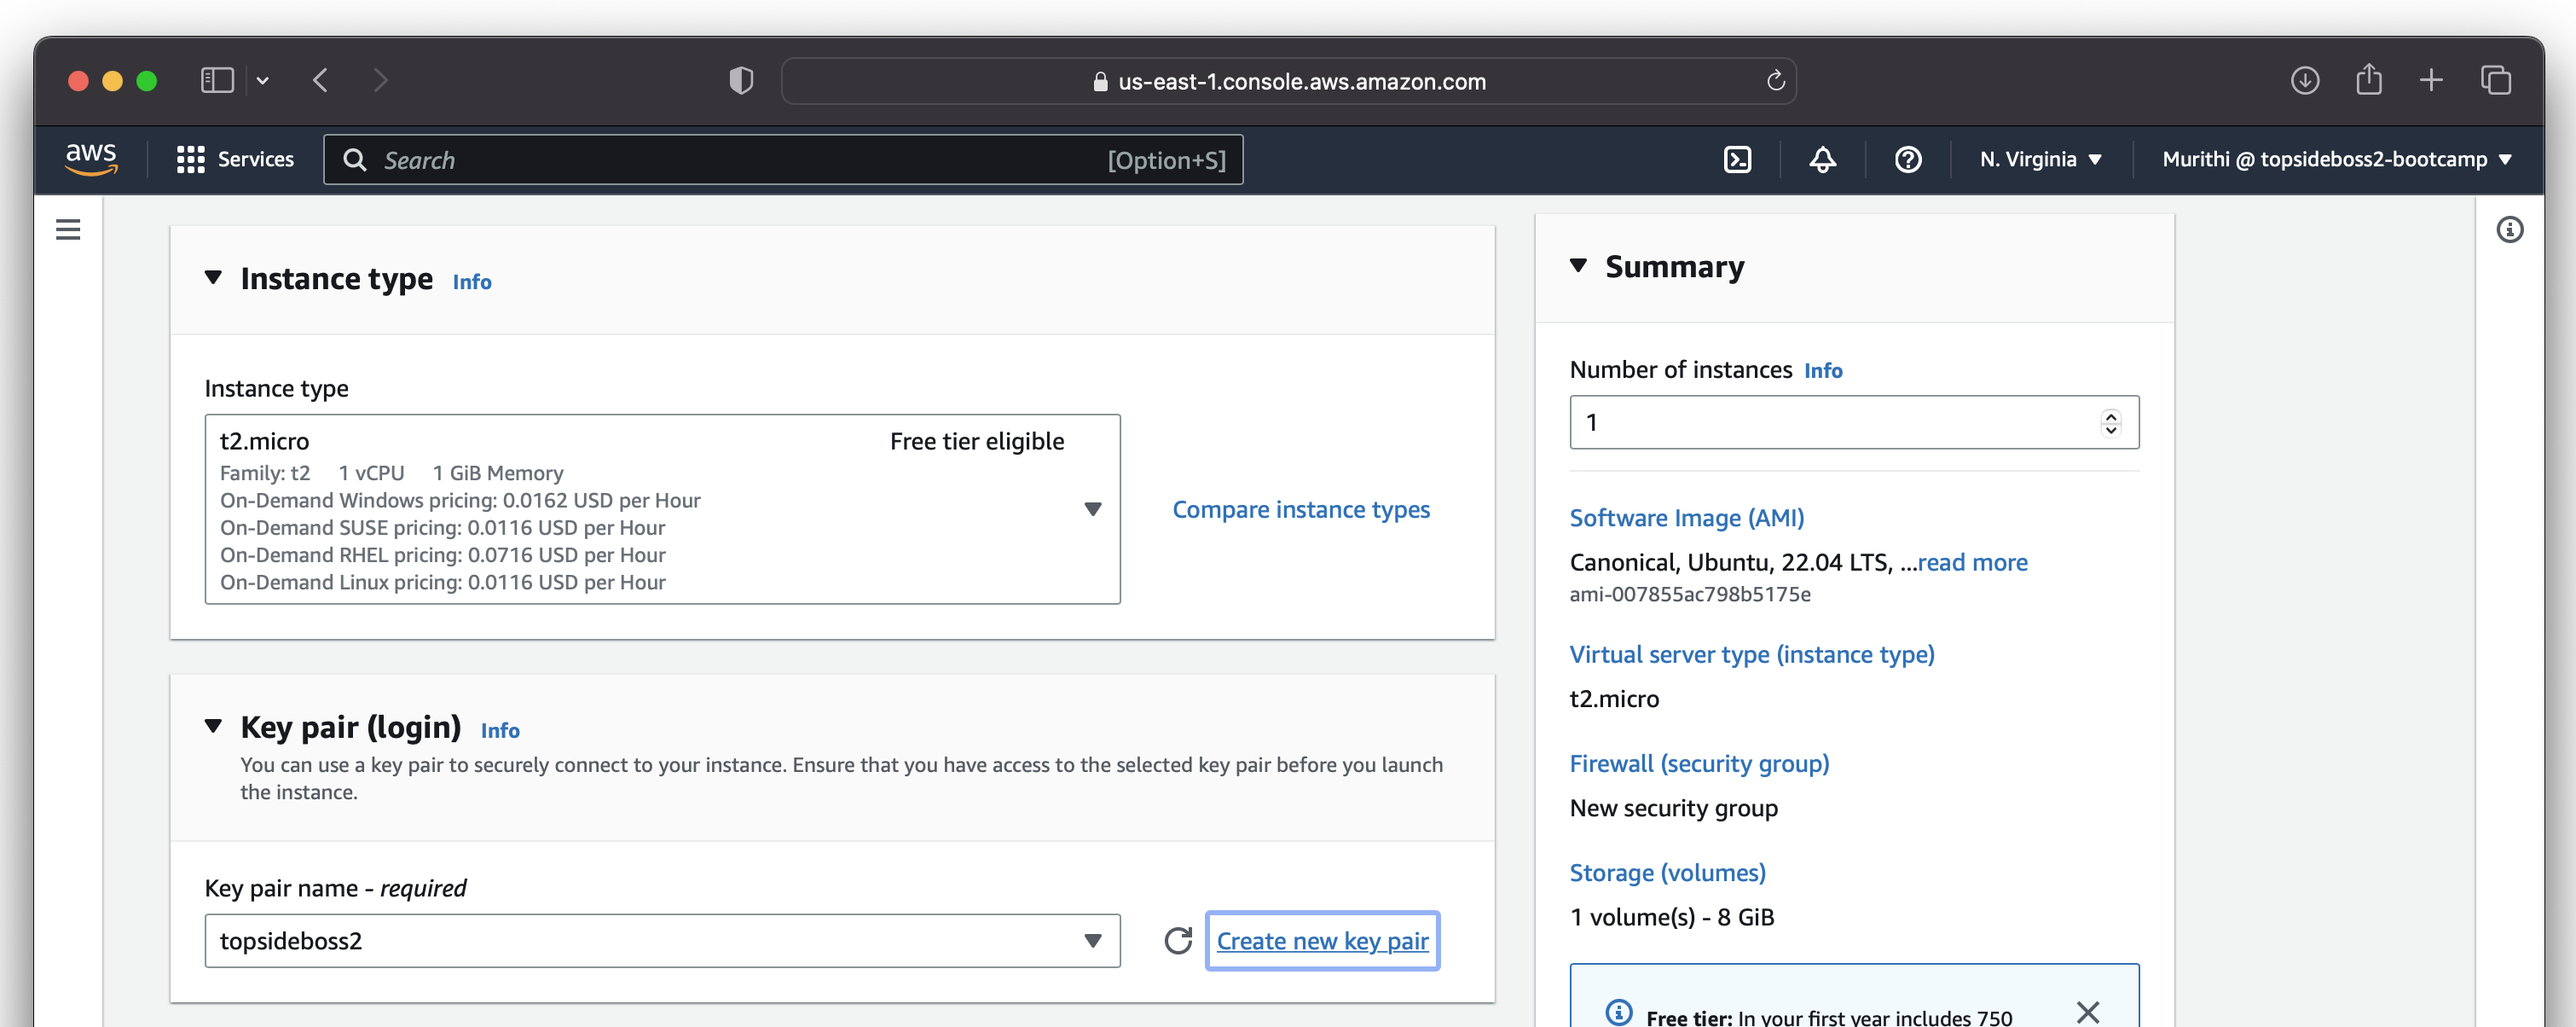
We will configure a simple EC2 instance with the following configurations:
Create a new key pair login that we will use to SSH to our instance
Go to advanced network settings and add ports 22(SSH), 3000(frontend), 4567(backend), 443(HTTPS) and 80(HTTP) to our security group.
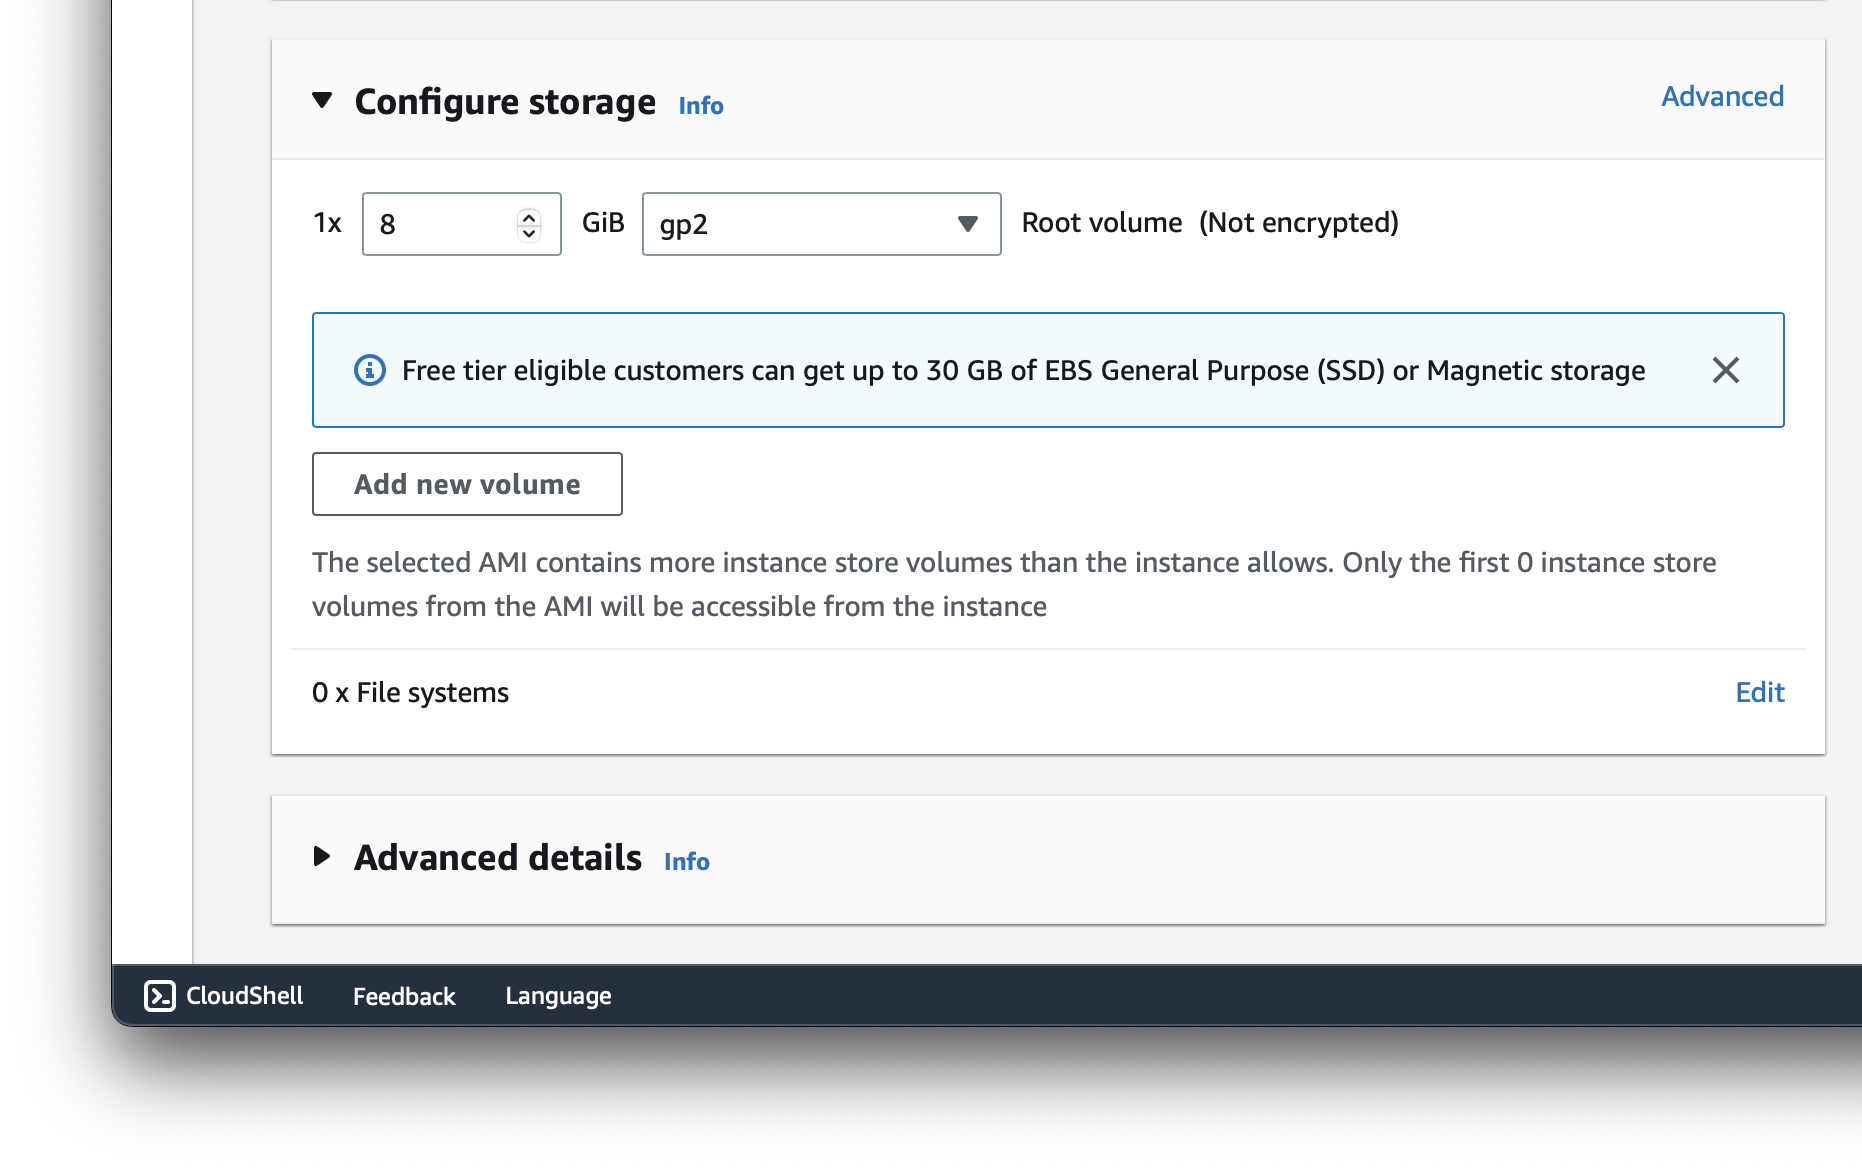
Configure storage settings as shown below and launch your instance.
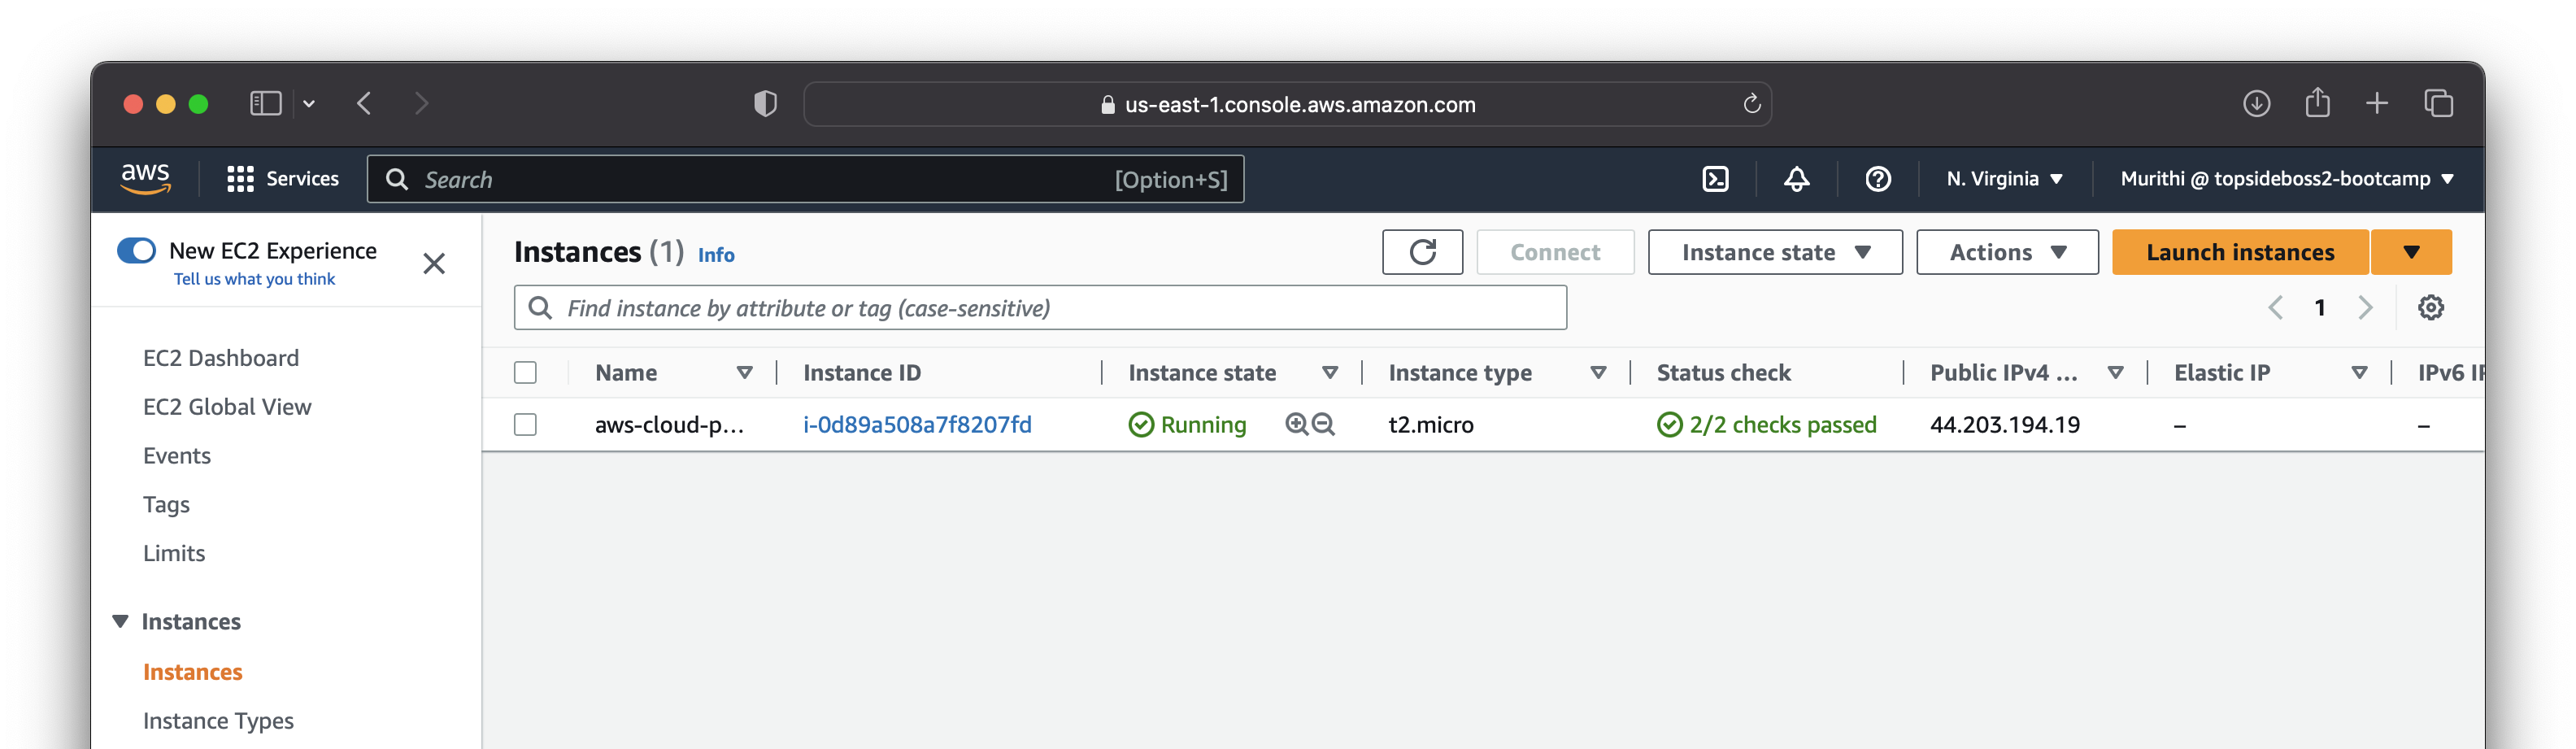
Now that our instance is running, let's SSH into it using the ipv4 address given to us. I will be using Termius to SSH into my instance with the key pair I just created.
Install Docker
My installation is on Ubuntu 22.04.
# First, update your existing list of packages
sudo apt update
# install a few prerequisite packages
sudo apt install apt-transport-https ca-certificates curl software-properties-common -y
# add the GPG key for the official Docker repository
curl -fsSL https://download.docker.com/linux/ubuntu/gpg | sudo gpg --dearmor -o /usr/share/keyrings/docker-archive-keyring.gpg
# Add the Docker repository to APT sources
echo "deb [arch=$(dpkg --print-architecture) signed-by=/usr/share/keyrings/docker-archive-keyring.gpg] https://download.docker.com/linux/ubuntu $(lsb_release -cs) stable" | sudo tee /etc/apt/sources.list.d/docker.list > /dev/null
# Update your existing list of packages again
sudo apt update
# Finally, install Docker
sudo apt install docker-ce -y
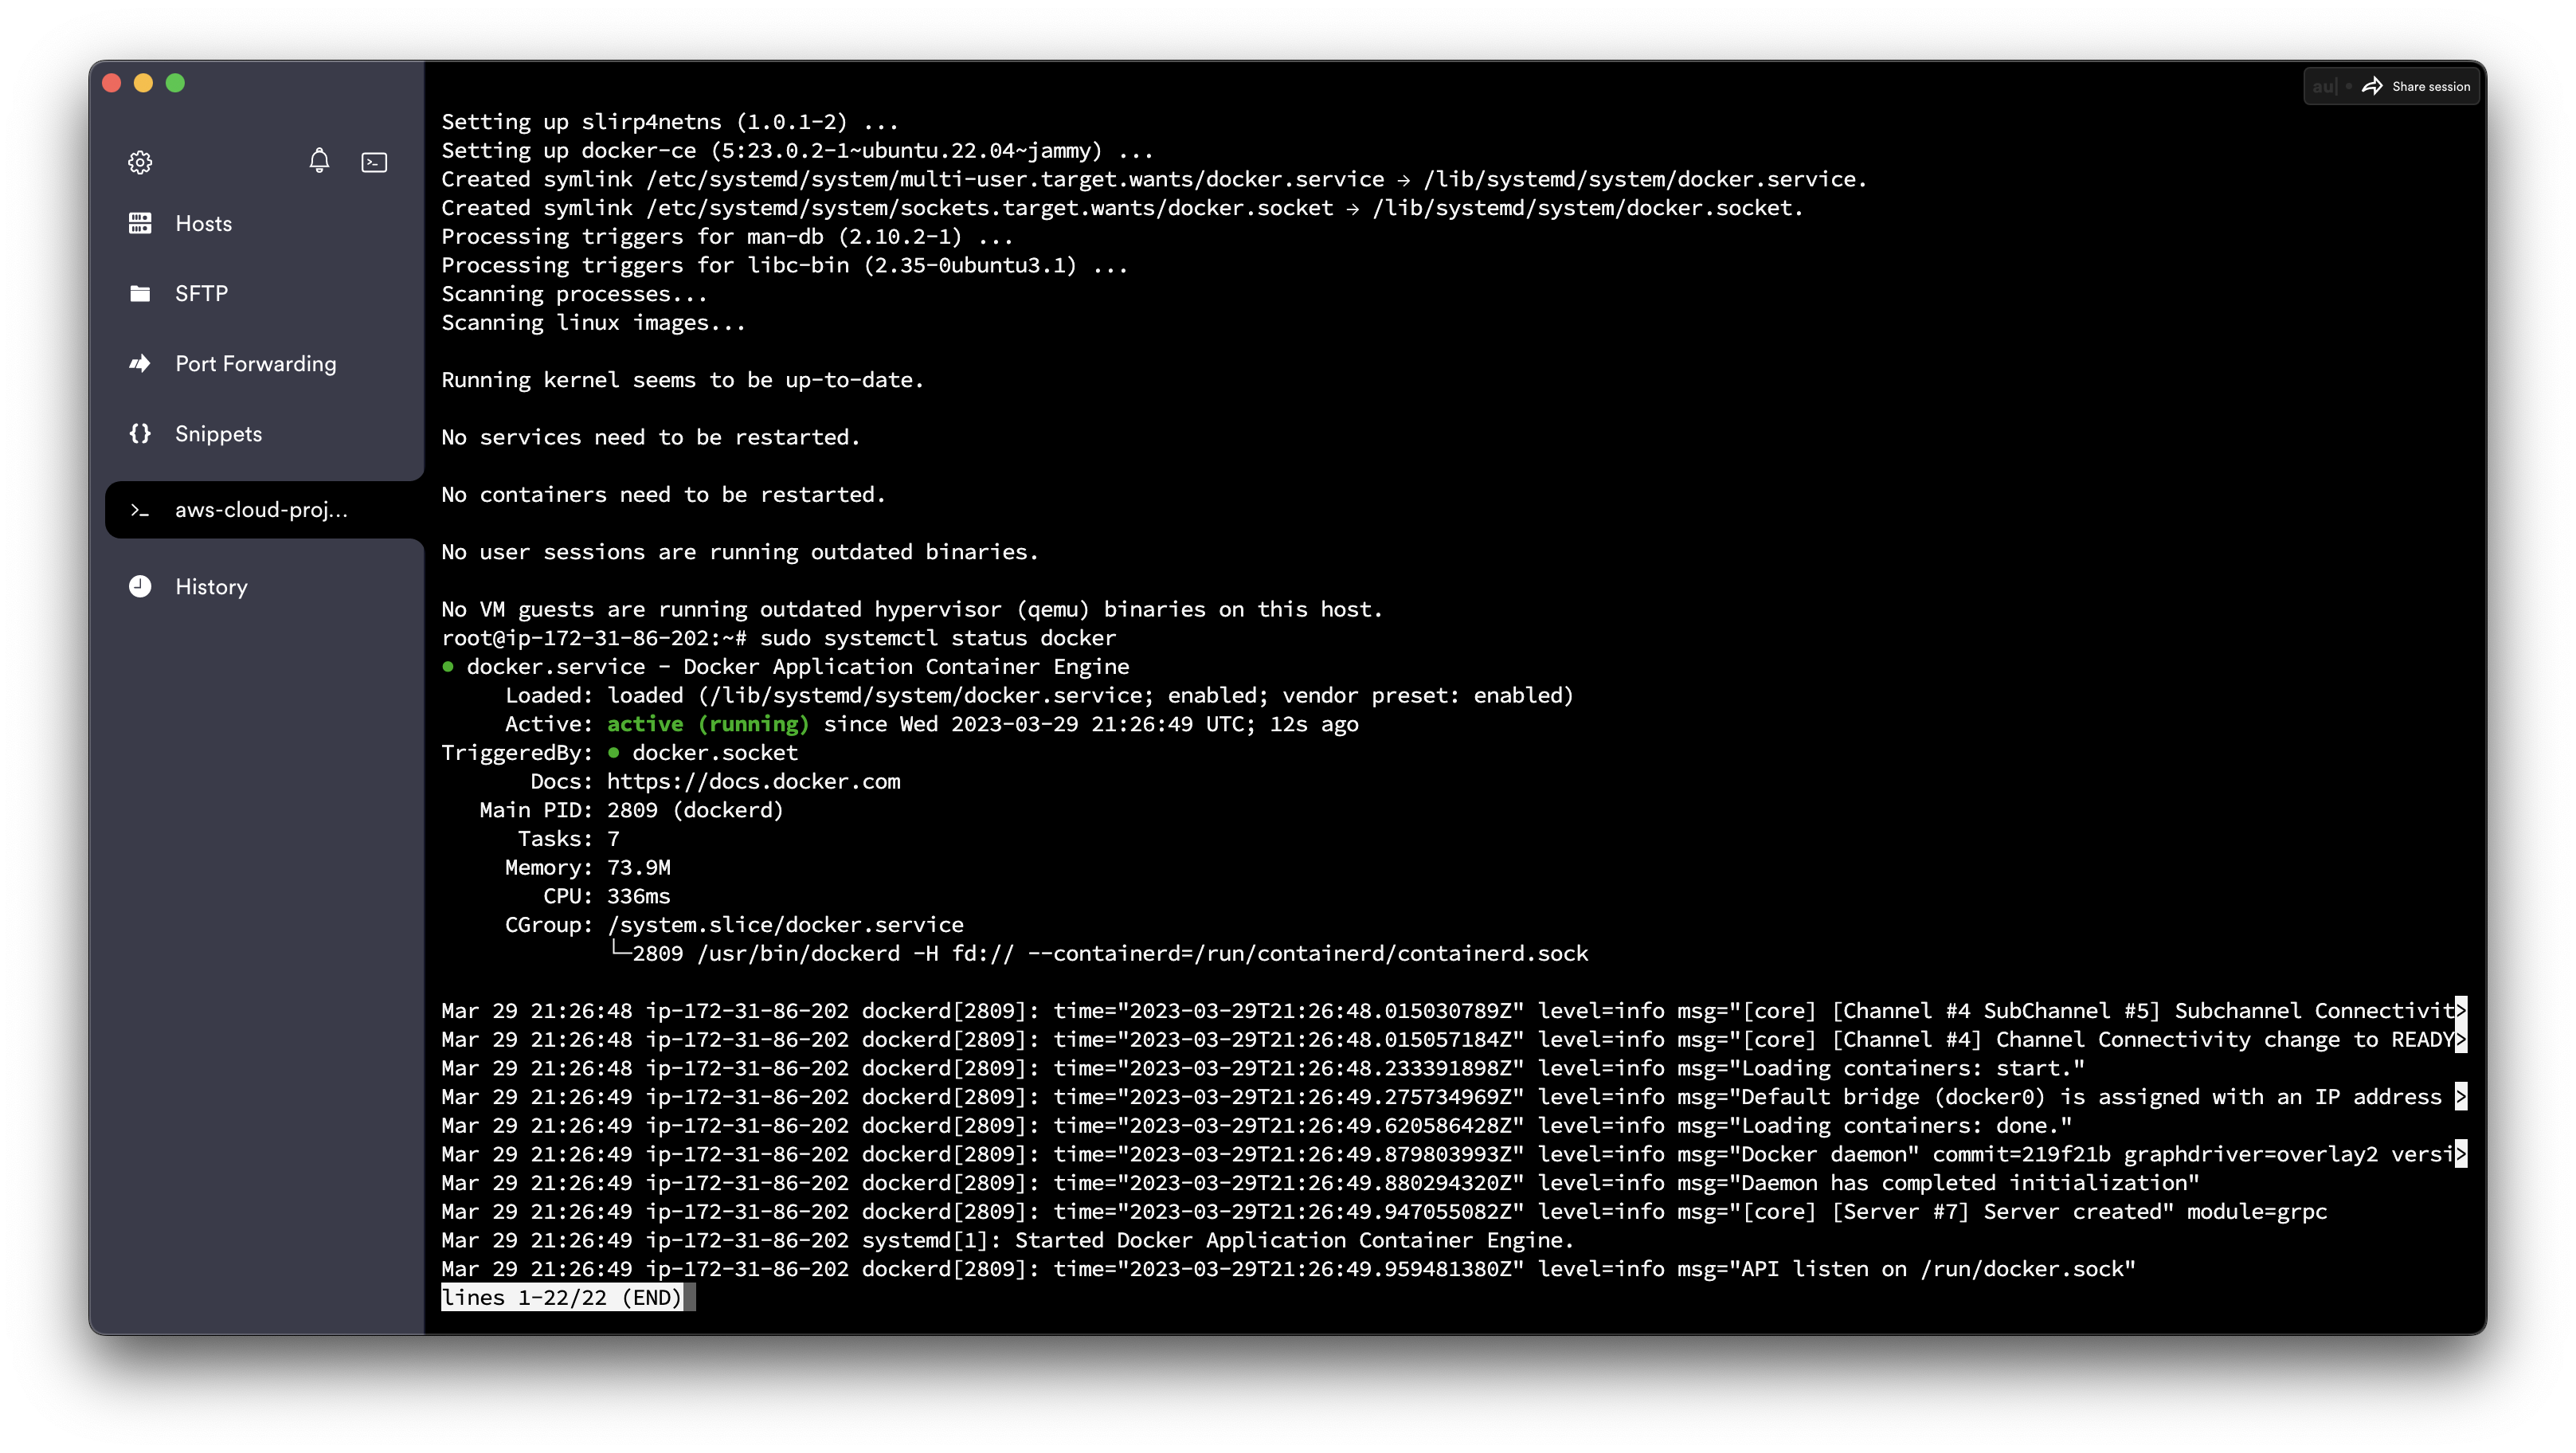
# Check that it’s running
sudo systemctl status docker
Output:
Next step, clone your aws-bootcamp-cruddur-2023 repository in your EC2 instance. Navigate to your cd /home/ubuntu/ directory first and clone your repo.
Create a Bash Script
I created a bash script called ec2.sh that makes my installation on EC2 instances easier.
#!/usr/bin/bash

# Go to /home/ubuntu/ and insall aws cli
cd /home/ubuntu/
CYAN='\033[1;36m'
NO_COLOR='\033[0m'
LABEL="Now in home directory"
printf "${CYAN}== ${LABEL}${NO_COLOR}\n"

# Install aws cli
curl "https://awscli.amazonaws.com/awscli-exe-linux-x86_64.zip" -o "awscliv2.zip"
CYAN='\033[1;36m'
NO_COLOR='\033[0m'
LABEL="Installed aws cli"
printf "${CYAN}== ${LABEL}${NO_COLOR}\n"

# install unzip
apt install unzip -y
CYAN='\033[1;36m'
NO_COLOR='\033[0m'
LABEL="install unzip"
printf "${CYAN}== ${LABEL}${NO_COLOR}\n"

# awscliv2.zip is unzipped
unzip awscliv2.zip
CYAN='\033[1;36m'
NO_COLOR='\033[0m'
LABEL="awscliv2.zip is unzipped"
printf "${CYAN}== ${LABEL}${NO_COLOR}\n"

# awscliv2.zip is unzipped
rm awscliv2.zip
CYAN='\033[1;36m'
NO_COLOR='\033[0m'
LABEL="awscliv2.zip is unzipped"
printf "${CYAN}== ${LABEL}${NO_COLOR}\n"

# Initialize Backend
cd /home/ubuntu/aws-bootcamp-cruddur-2023/backend-flask/
apt install python3-pip -y
pip3 install -r requirements.txt
export FRONTEND_URL="*"
export BACKEND_URL="*"
CYAN='\033[1;36m'
NO_COLOR='\033[0m'
LABEL="Backend initialized"
printf "${CYAN}== ${LABEL}${NO_COLOR}\n"

# Initialize Frontend
cd /home/ubuntu/aws-bootcamp-cruddur-2023/frontend-react-js/
export REACT_APP_BACKEND_URL="http://$(curl -s ifconfig.me):4567"
apt update
apt install npm -y
npm install
CYAN='\033[1;36m'
NO_COLOR='\033[0m'
LABEL="installed npm so frontend is initialized"
printf "${CYAN}== ${LABEL}${NO_COLOR}\n"

# install docker
cd /home/ubuntu/aws-bootcamp-cruddur-2023/
CYAN='\033[1;36m'
NO_COLOR='\033[0m'
LABEL="Installing docker"
printf "${CYAN}== ${LABEL}${NO_COLOR}\n"
apt install docker.io

# install docker-compose
CYAN='\033[1;36m'
NO_COLOR='\033[0m'
LABEL="installing docker-compose"
printf "${CYAN}== ${LABEL}${NO_COLOR}\n"
curl -L "https://github.com/docker/compose/releases/download/1.23.2/docker-compose-$(uname -s)-$(uname -m)" -o /usr/local/bin/docker-compose
chmod +x /usr/local/bin/docker-compose
ln -s /usr/local/bin/docker-compose /usr/bin/docker-compose
Make your bash script executable with the following command: chmod u+x ec2.sh Run it.
Build Images from Dockerfile
Now that our environment is ideal. We can build images from our Dockerfile.
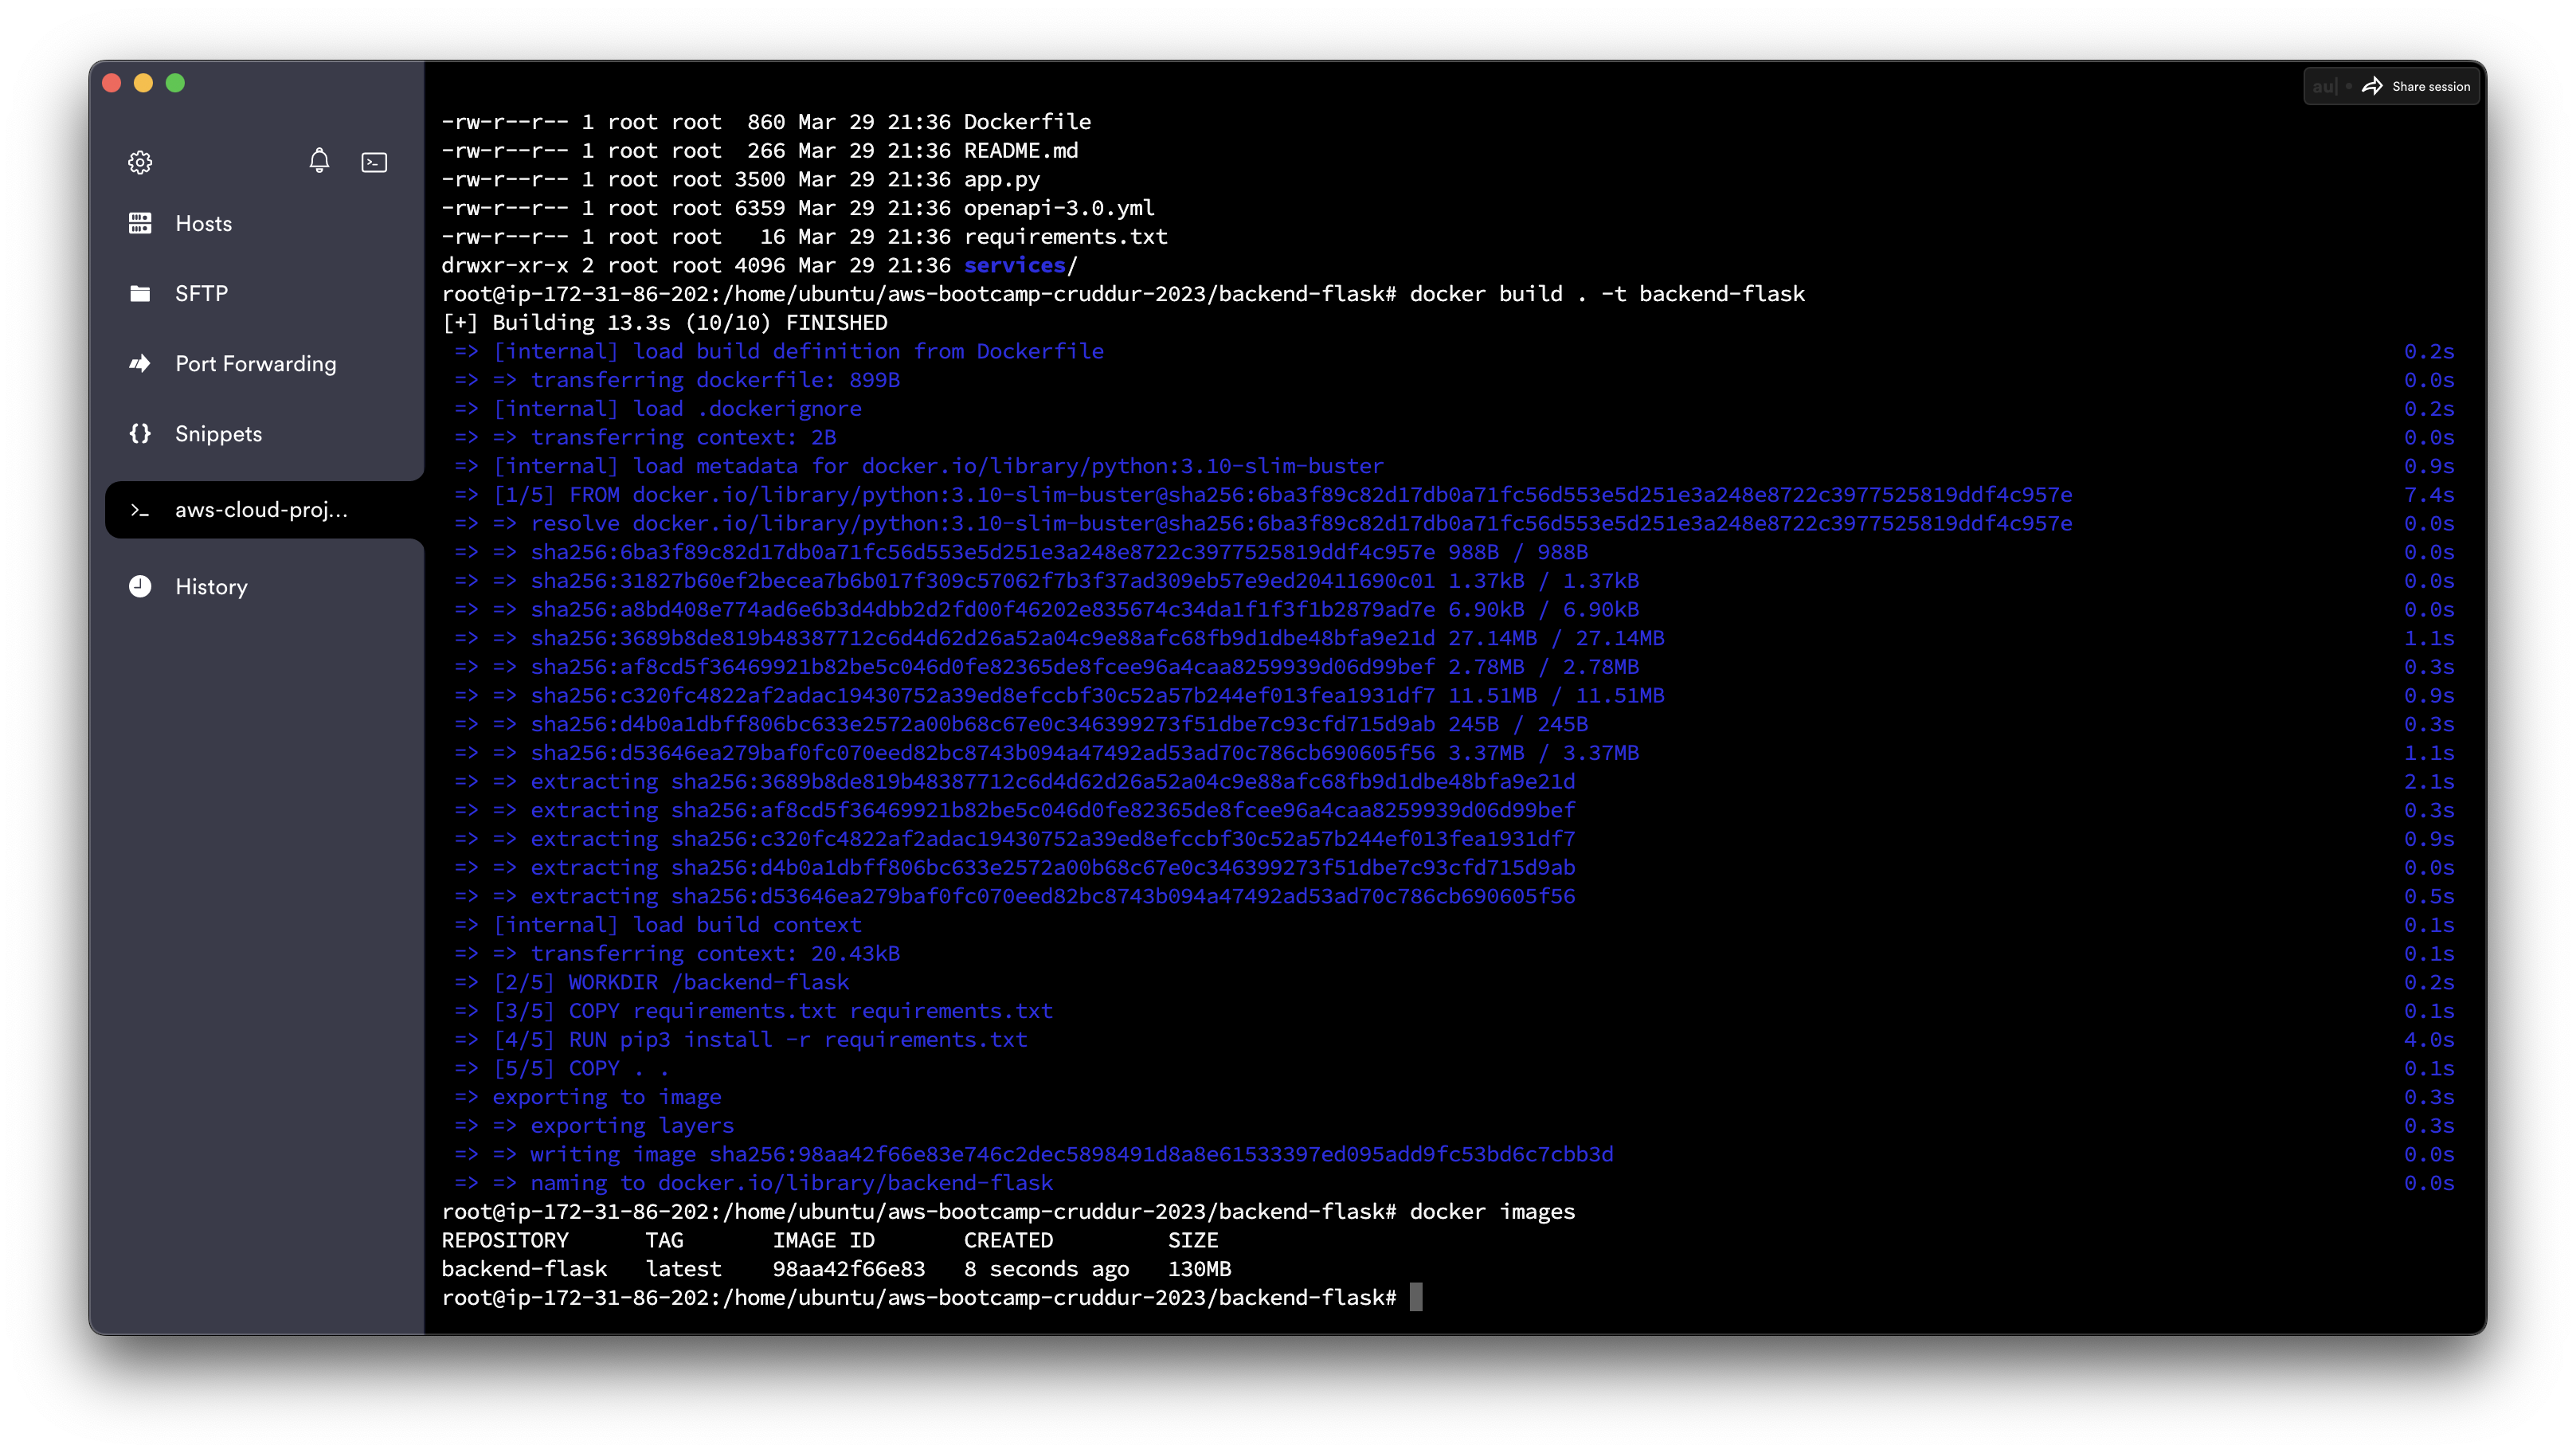
# cd into /backend-flask/
cd /home/ubuntu/aws-bootcamp-cruddur-2023/backend-flask/

# run docker build
docker build . –t backend-flask
Docker build output:
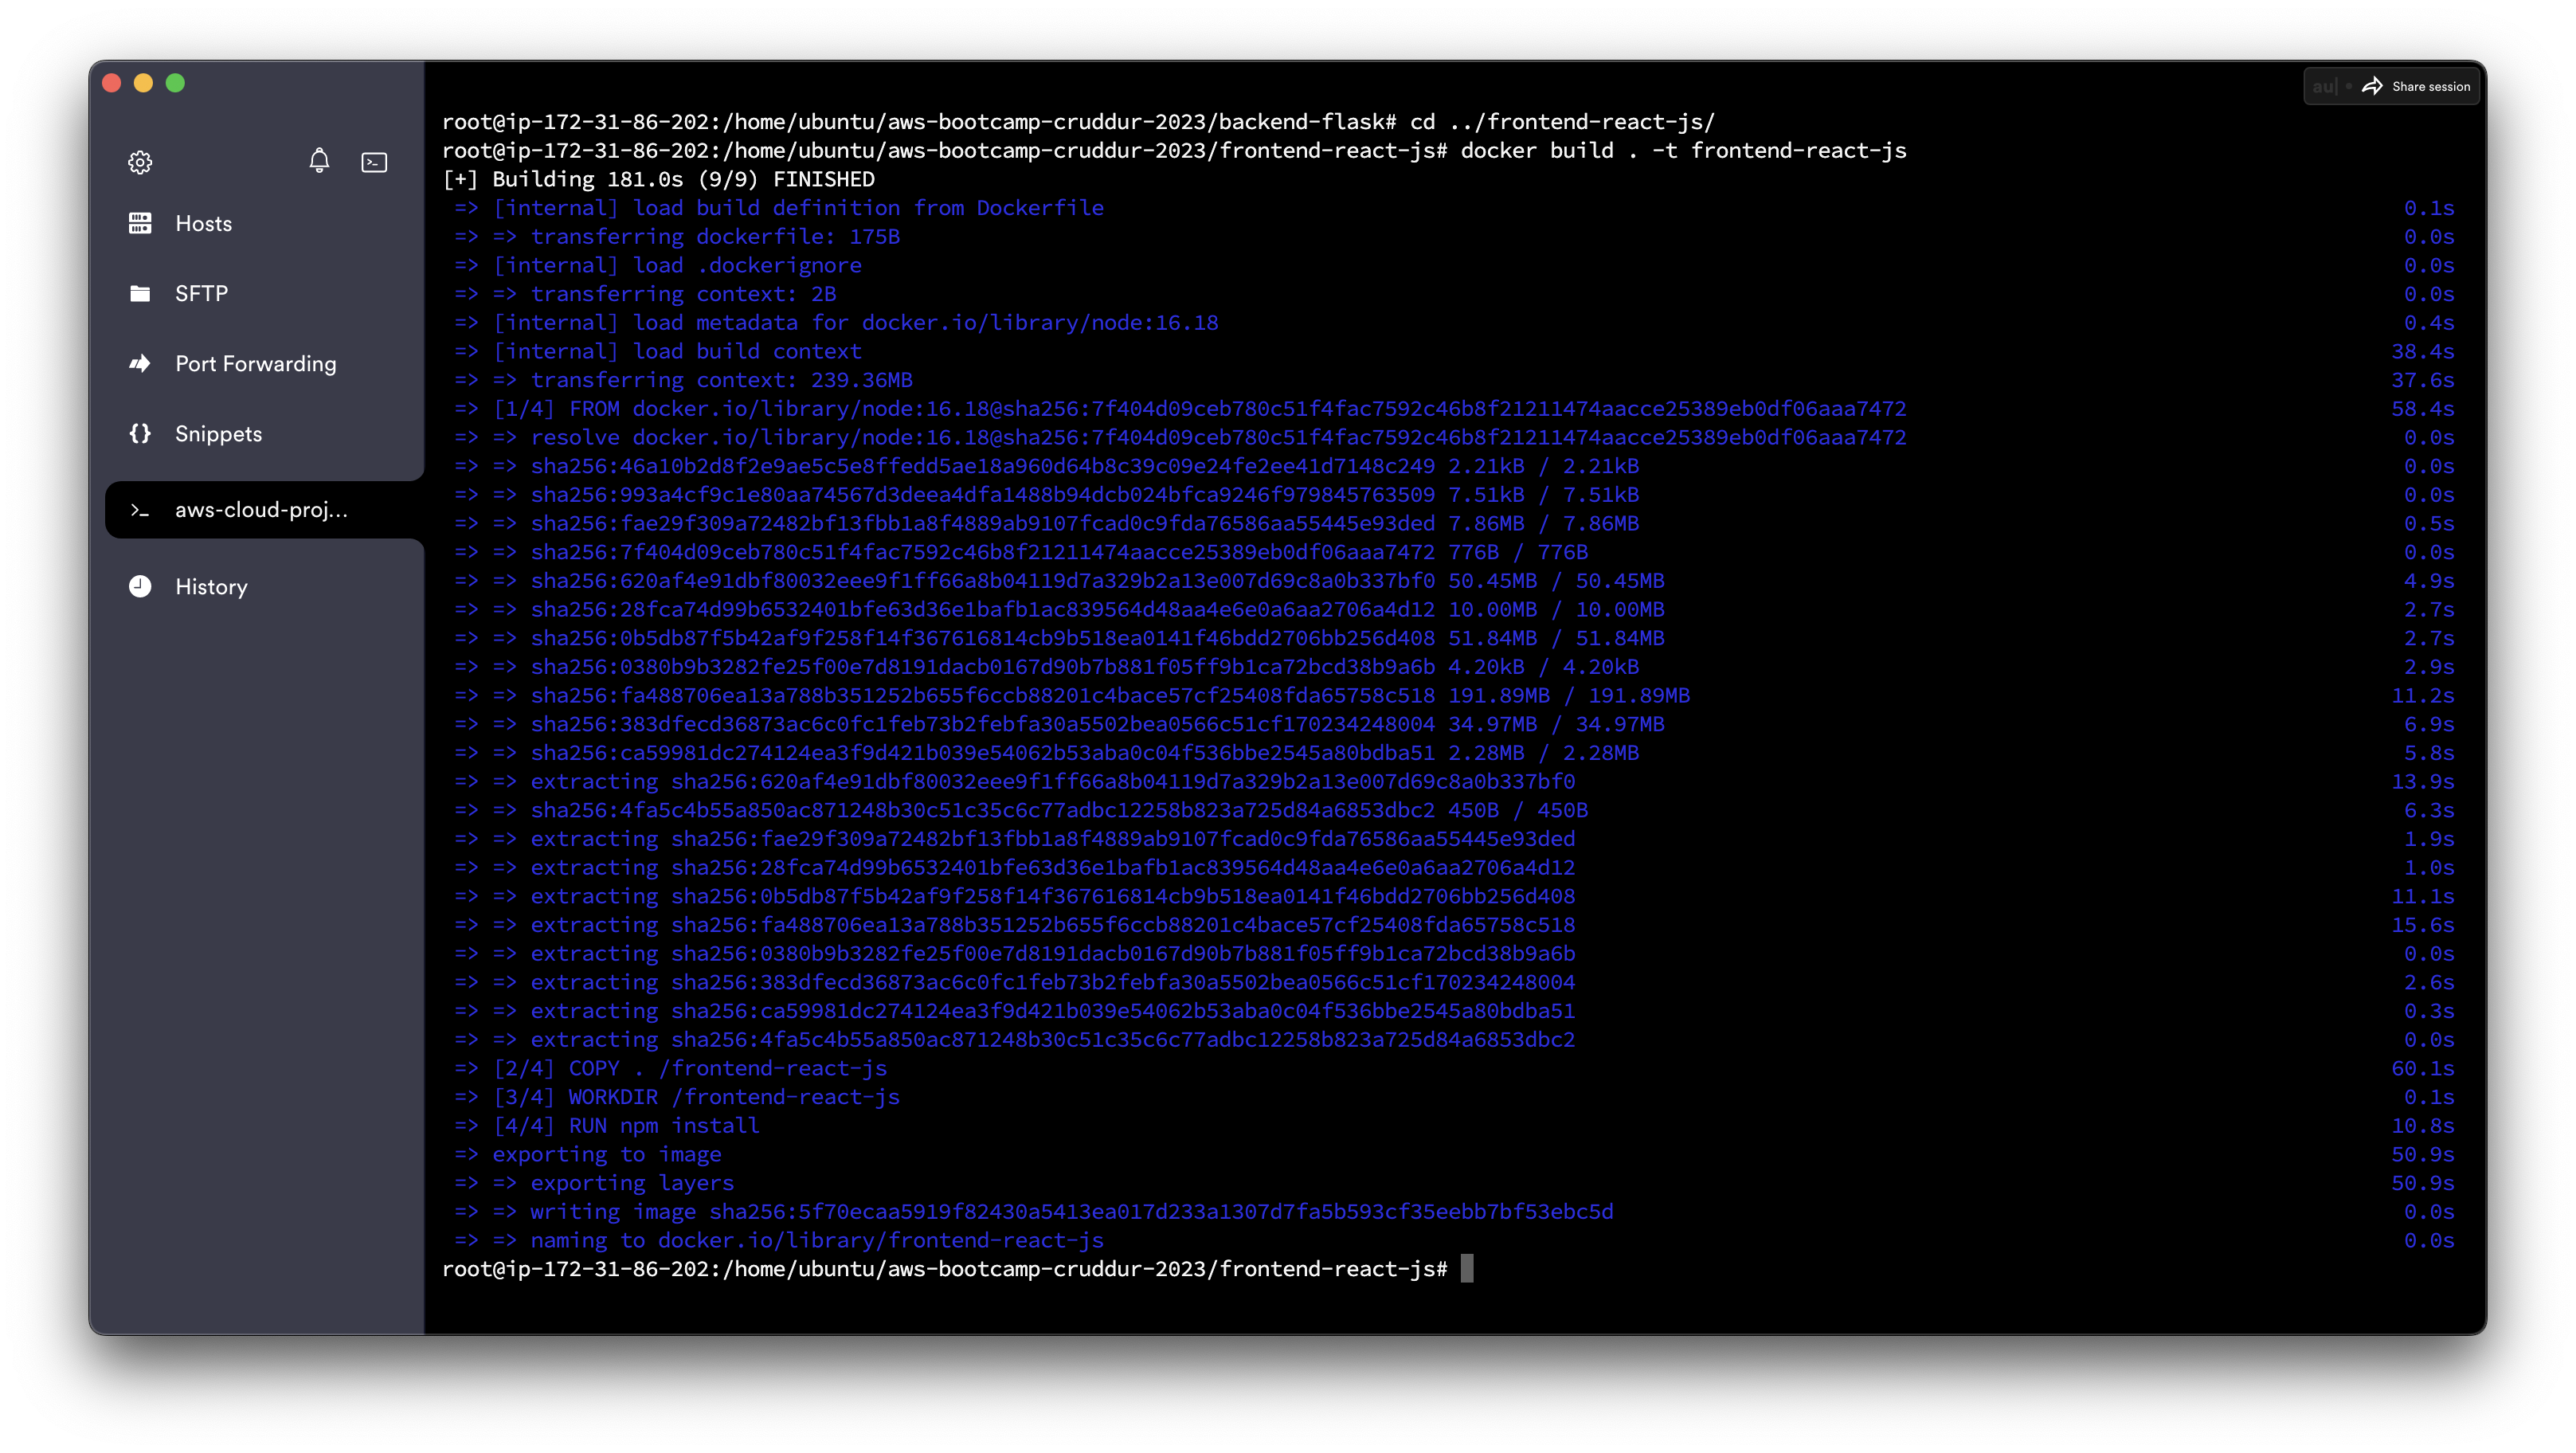
# cd into /backend-flask/
cd /home/ubuntu/aws-bootcamp-cruddur-2023/frontend-react-js/

# run docker build
docker build . –t frontend-react-js
Docker build output:
Run Backend and Frontend Containers
cd /home/ubuntu/aws-bootcamp-cruddur-2023/

# view images
docker images -a

# run backend container
docker run -d -p 4567:4567 -it backend-flask

# run frontend container
docker run -d -p 3000:3000 -it frontend-react-js
Docker run output:

Web browser output:

NB: Ensure you have this env variable configured on your CLI:
export REACT_APP_BACKEND_URL="http://$(curl -s ifconfig.me):4567"
Run docker-compose.yml
We need to stop the 2 running containers because they are using port 3000 and 4567
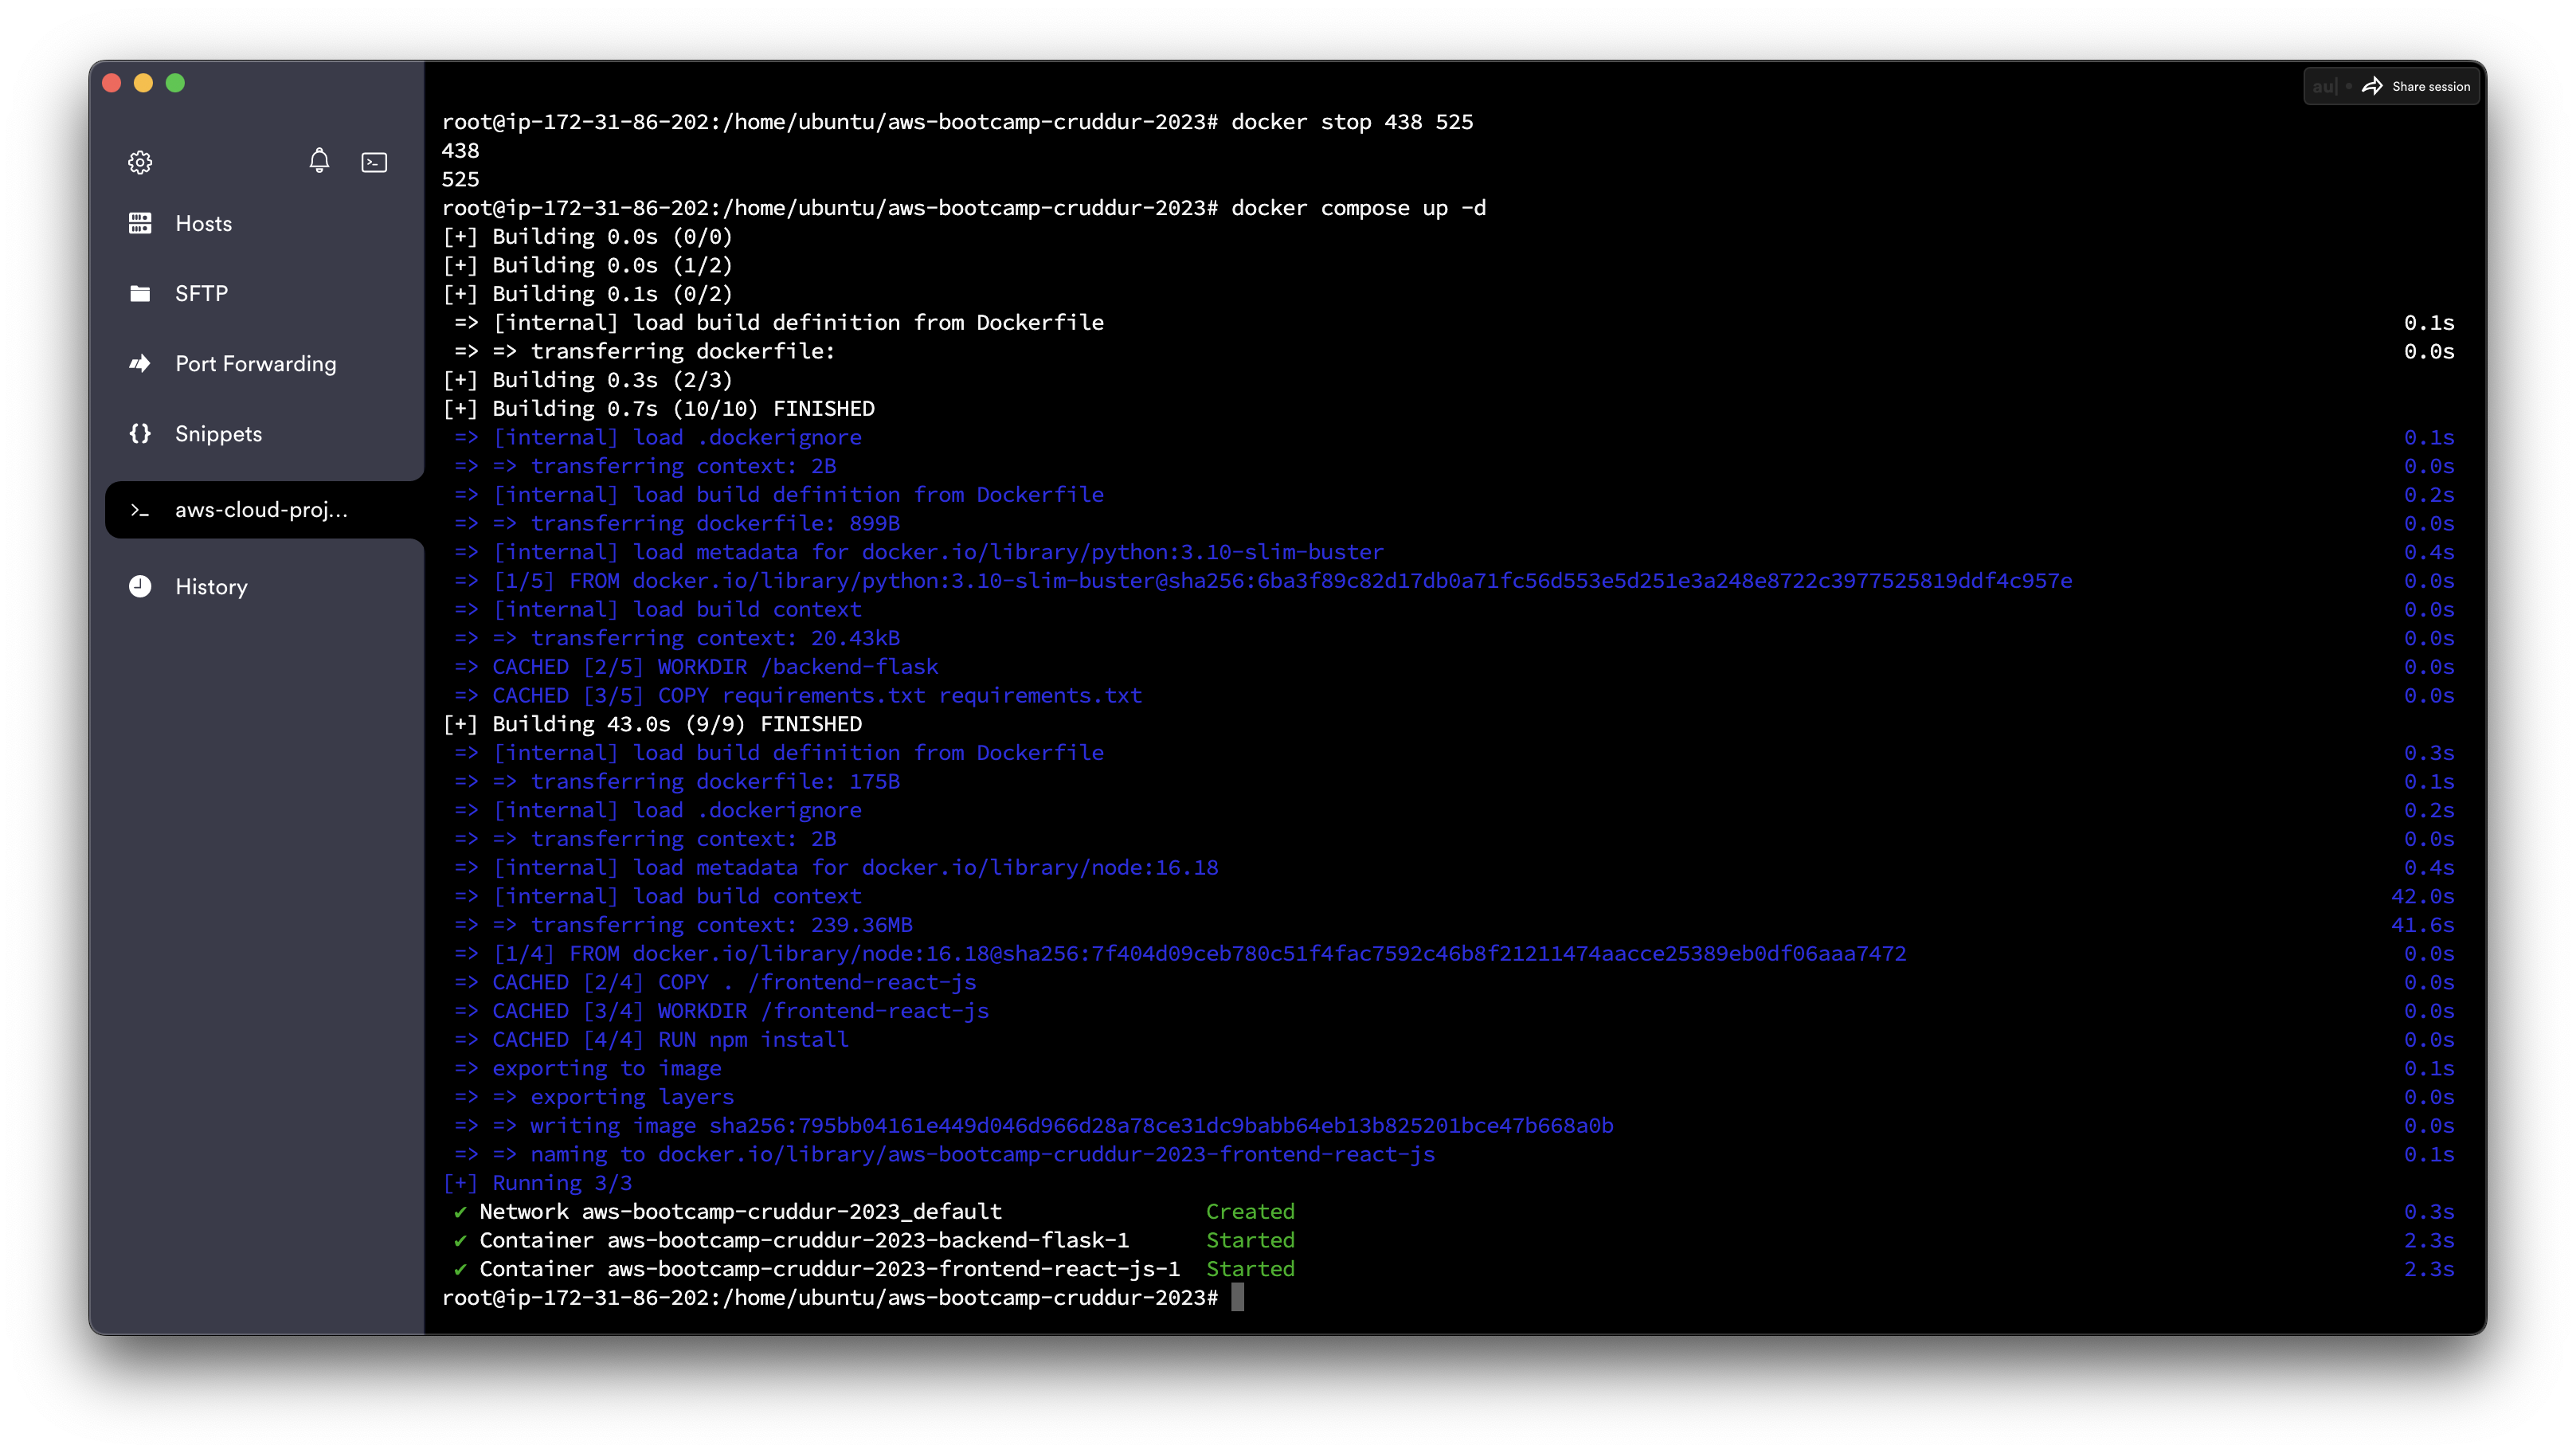
# stop both containers
docker stop 438 525

# cd to working dir
cd /home/ubuntu/aws-bootcamp-cruddur-2023/

# run docker compose
docker compose up -d
Docker compose up output:
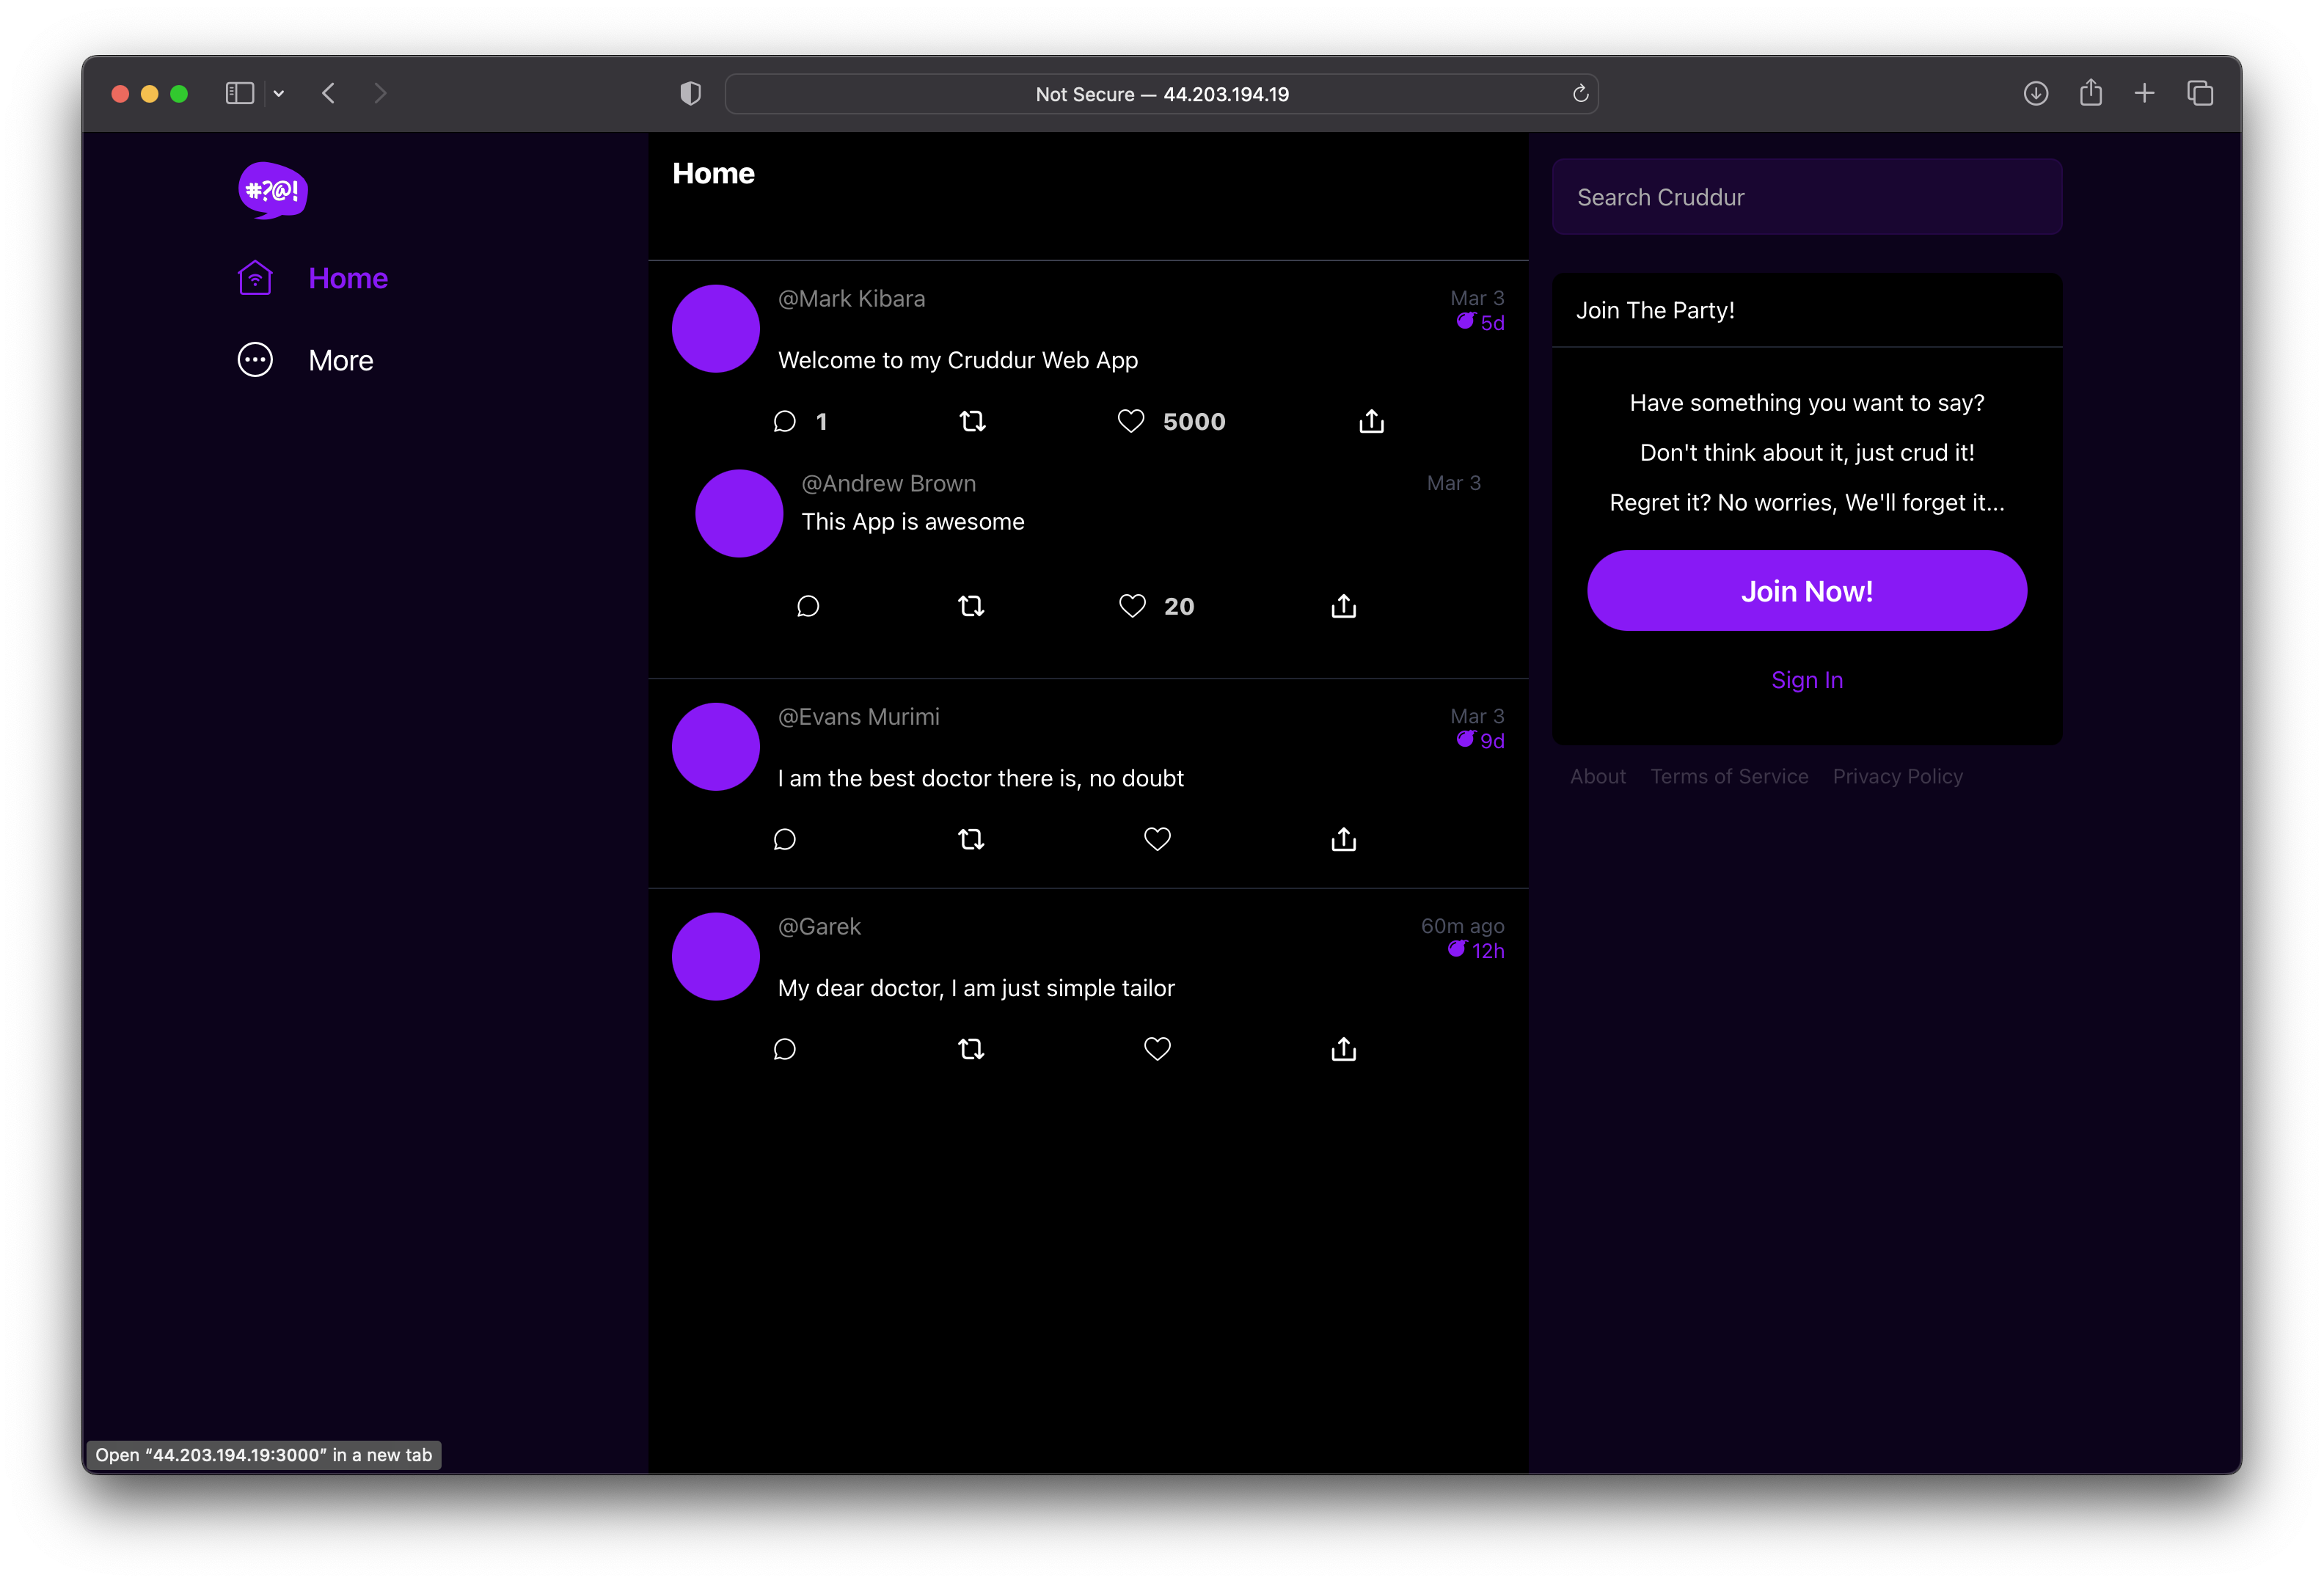
Browser output on http://44.203.194.19:3000(frontend):
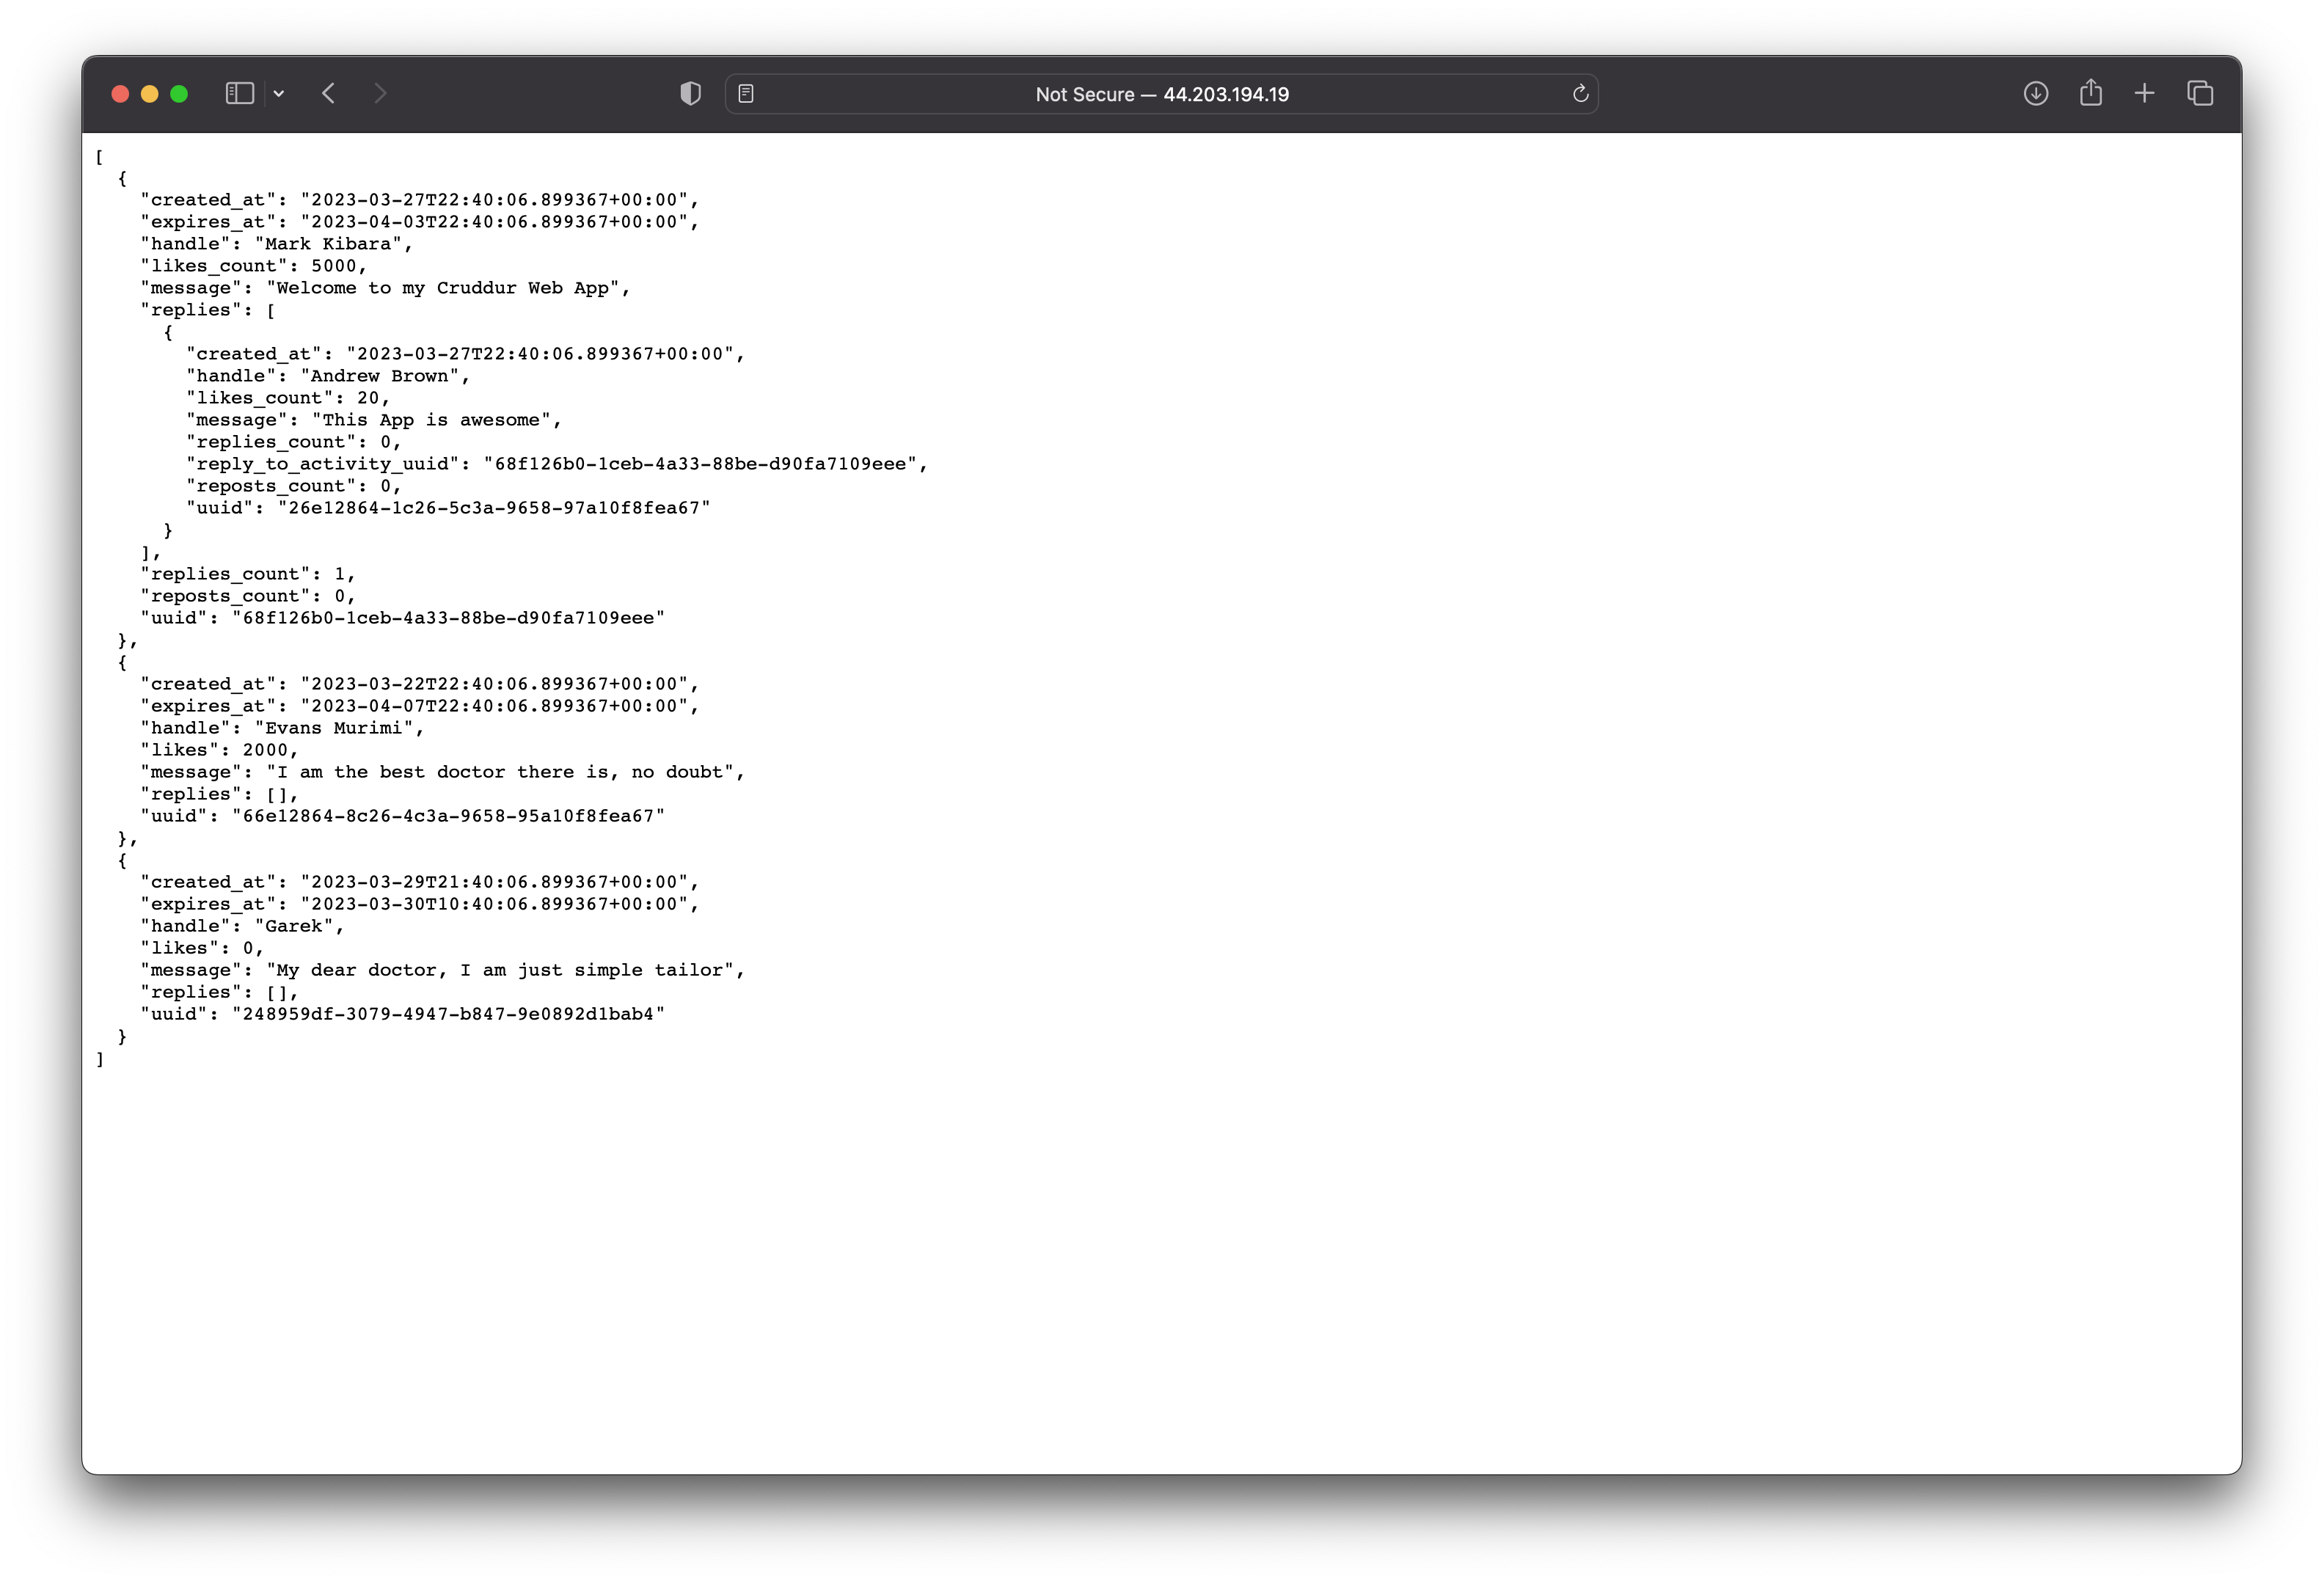
Browser output on http://44.203.194.19:4567/api/activities/home(backend):

And that, my friends, is how you deploy docker containers on an EC2 instance.
Some might find it easier to pull the docker images from dockerhub. Don't worry, I got you:
AWS-Cloud-Project-Bootcamp-Viewing-Material
As promised, here are some quick links to the videos for Week 1:
YouTube – Week 1 – Live Streamed Video
YouTube – Before You Ask For Help Watch This
YouTube – Grading Homework Summary
YouTube – Week 1 – Create the Notification Feature (Backend and Front)
YouTube – Week 1 – Commit Your Code
YouTube – Week 1 – DynamoDB and Postgres vs Docker
YouTube – Week 1 – Docker Security Best Practices
YouTube – Week 1 – App Containerization Pricing Considerations
YouTube – Free AWS Cloud Project Bootcamp – Update 2023-02-23


